
Annotation
Introduction
Annotation on Studio allows your team to annotate intents and entities on user utterances. The Lead Annotators in your team can then review and approve these annotations, which are stored in the Annotation History to be used as your assistant’s training data or exported.
Annotation Dashboard
On the navigation bar on the left, find and click on Annotation Dashboard under Bot Tuner.

As a Lead Annotator, you can view the following data in the Annotation Dashboard:
- Total utterances These are all the messages users have sent to the assistant.
- Total conversations These are all the sessions that users have created by talking to the assistant.

Assign annotation to team members
In order to assign annotation to one or more annotators in the team, as a Lead Annotator, you need to create a batch by clicking on the Assign annotation button on the Annotation Dashboard.
On this screen, you can:
Select annotators
These annotators will be working on the utterances on the batch.
You must select at least one annotator from the list of available annotators. This list also includes yourself.
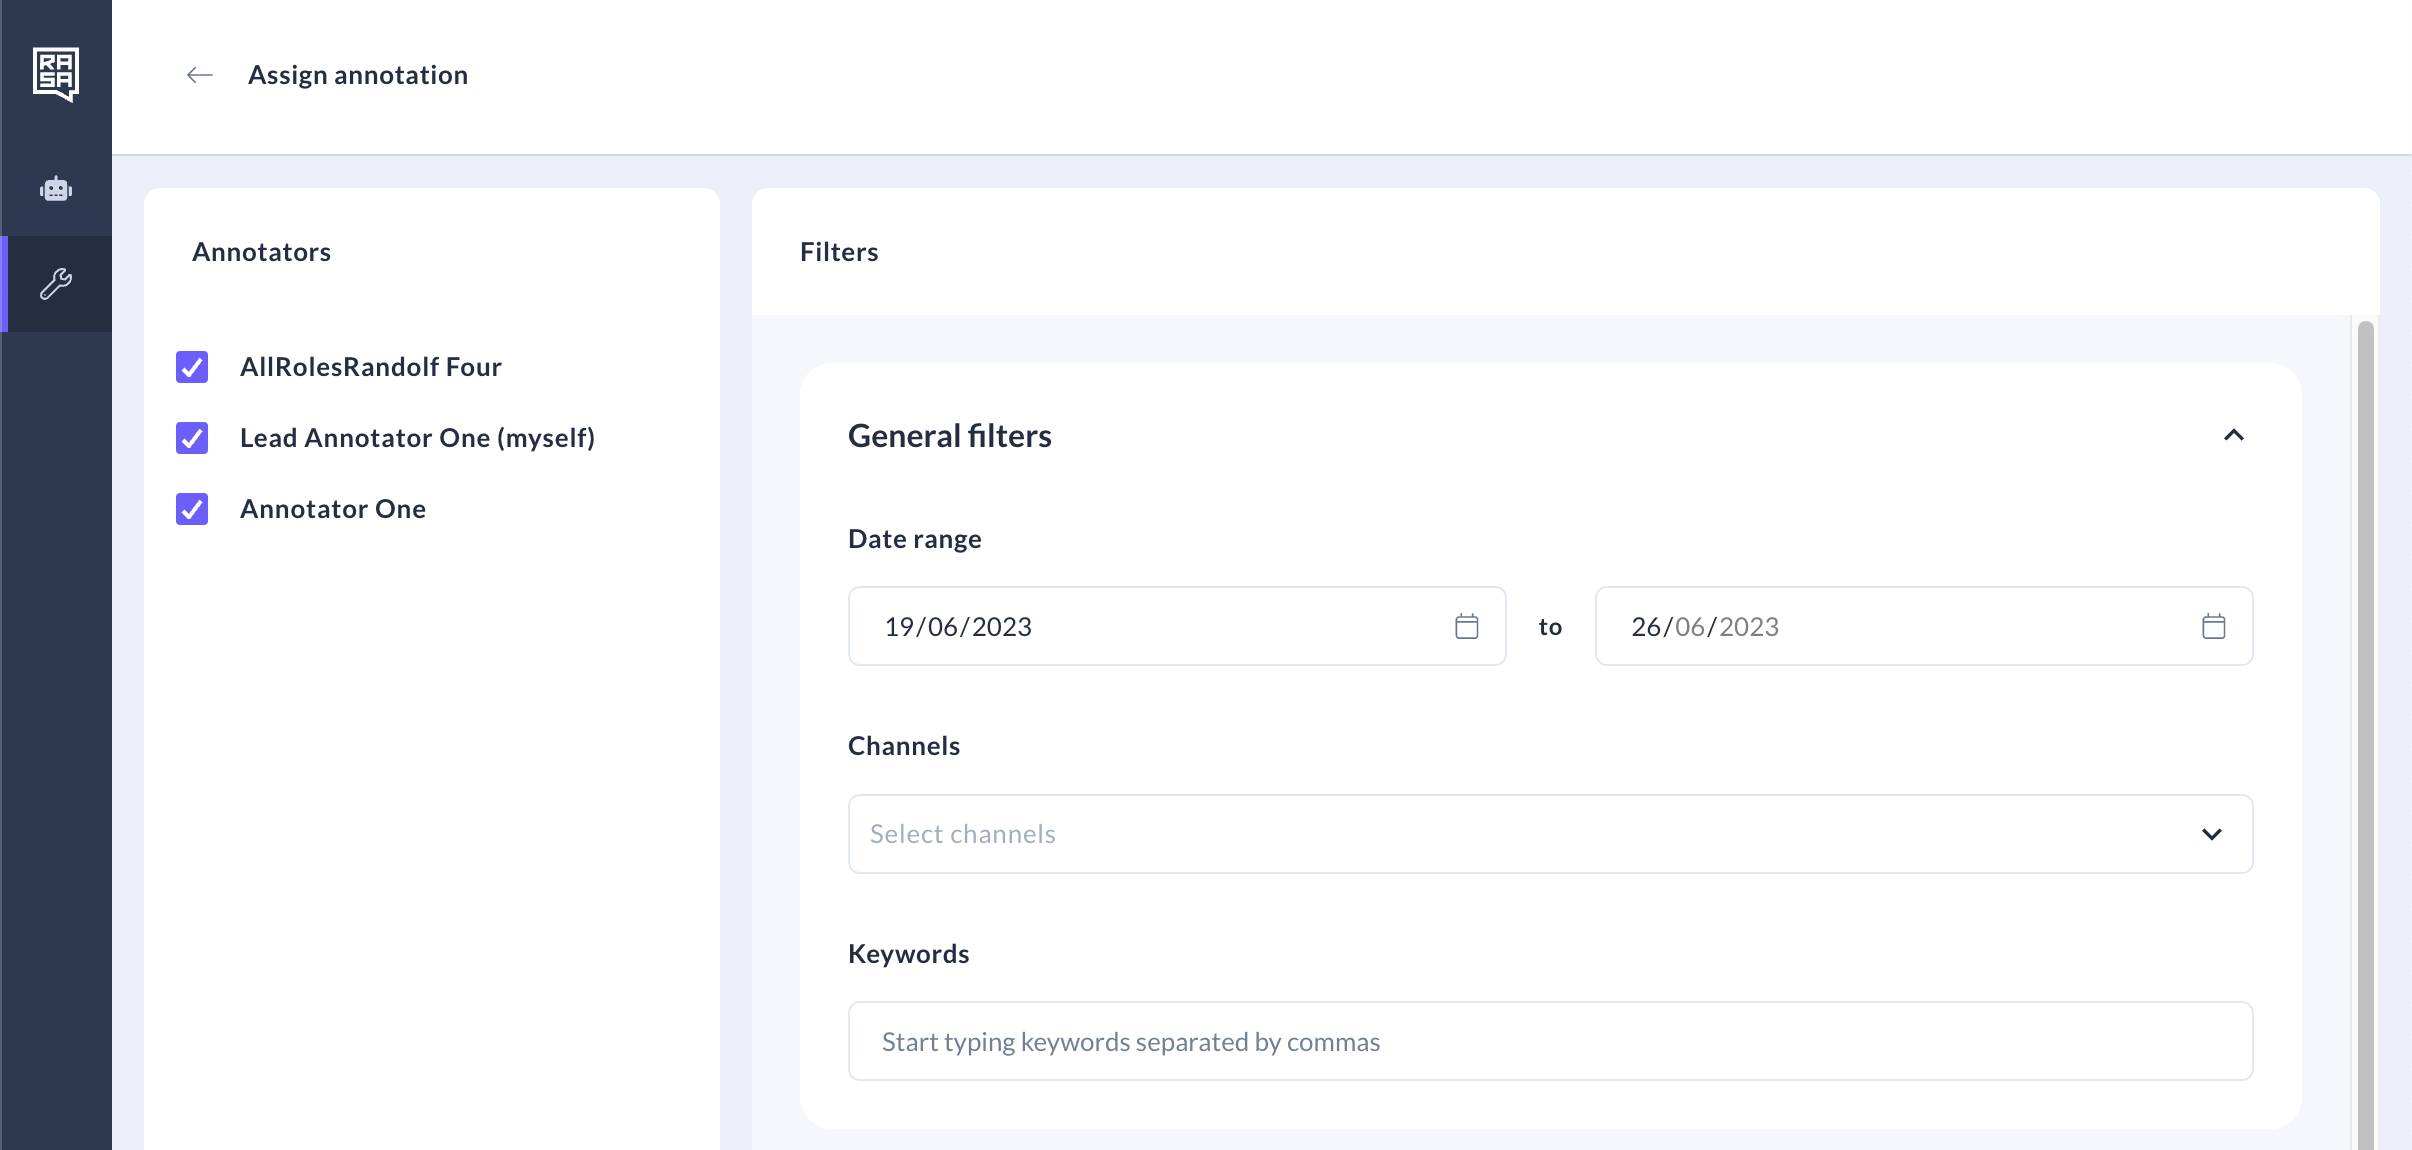
Filter utterances
Use these filters to narrow down the number of utterances on the batch.
- Date Range
Specify a date range that includes the period in which the utterances were made. - Channels
Select the channels used to send the utterances. - Keywords
Define the keywords that the text of the utterance must include. Add them by typing and separating them by commas. - Predicted Intent
Choose the intents that the utterance must have been predicted with.- Additionally, you can toggle the ‘Match also second prediction’ checkbox to include utterances where the chosen intent had the second-highest confidence score.
- Confidence
Use the slider to set a maximum and minimum range and filter the utterances by confidence score. - Sample
Use the sample size to manage the number of filtered utterances on the batch.
In order to know how many utterances match the filters applied, click the refresh icon at the bottom left to update the number.
When you have finished setting the filters, click the Assign Annotation button to create the batch. You will see a confirmation screen with the names of the annotators in the batch and the utterances that will be evenly divided between them.
Annotation
In order to start annotating utterances as an Annotator, on the navigation bar on the left, find and click on Annotation inbox under Bot Tuner. You can see all the batches assigned to you, along with their filters, listed in the Annotation inbox.
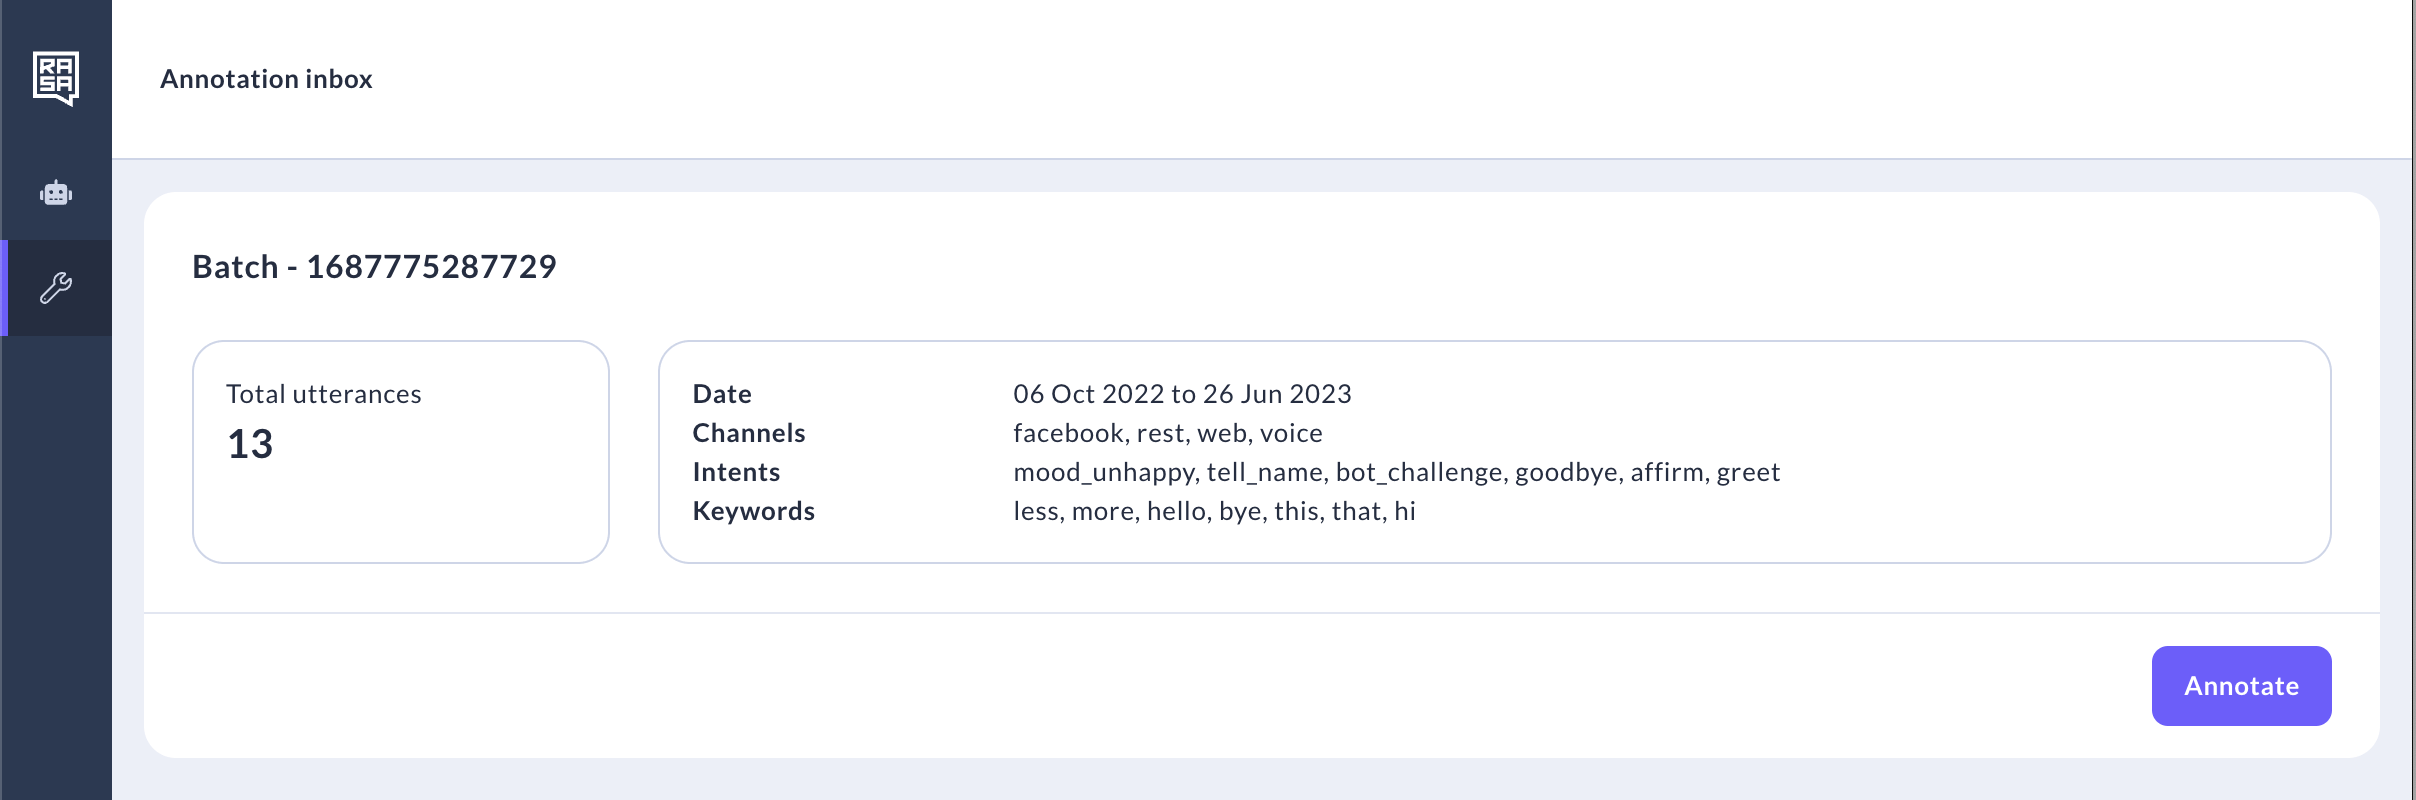
Click on Annotate on any of the batches to start annotating utterances.
There are two modes of annotation: either you annotate the utterances in bulk, or you annotate the utterances one at a time. By default, you will start on bulk annotation, but you can switch to single annotation at any given time.
Bulk annotation
The bulk annotation mode allows you to view the full list of utterances in the batch, filter them, annotate or discard several at a time or one by one.
In the bulk annotation mode, you will be presented with a list of utterances along with their predicted intent and confidence score for that prediction. There are three tabs on this mode:
- Inbox Utterances that haven’t been annotated or discarded yet.
- Saved Utterances that have been annotated and saved along with their intents and comments.
- Discarded Utterances that have been discarded.
You can filter the results on this list by:
- Predicted intent or confidence score by clicking the filter icon at the top right.
- Utterance text by searching for specific words or sentences using the search bar at the top.
Intent Annotation
- You can annotate utterances one at a time by clicking on the annotation dropdown for the utterance under the Annotation column and choosing the intent from the provided list of existing intents. If none of the existing intents are suitable, you also have the option to create a new intent. See the steps to create a new intent further down in this document.
- You can annotate multiple utterances in bulk by following these steps:
- Select the utterances you want to annotate from the list by clicking the checkboxes.
- Choose an intent from the provided list of existing intents. If none of the existing intents are suitable, you also have the option to create a new intent.
- Click "Annotate" to save the changes. These utterances will now be in the "Saved" tab.
- If you find utterances that you don’t consider valuable and wish to exclude them permanently from being predicted in the future, you can discard them. These will be archived.
Entity Annotation
You can annotate single or multiple words on the utterance text as entities and also confirm entity predictions if the model has already predicted entities in the utterance, which will be highlighted.
- Click the Entity annotation icon or click directly on the words on the utterance.
- There will be a panel displayed below the utterance row where to choose Entity type, Role and Synonym. If an entity was predicted, it will also be displayed in this panel for your information.
- If an entity was predicted and the entity exists in your assistant’s NLU, the ‘Entity type’ dropdown will be filled with the matching entity.
- If an entity was predicted, but it doesn’t exist in your assistant’s NLU anymore, the ‘Entity type’ dropdown will be empty, and you will have to choose an entity in case you want to keep the prediction. You can discard the prediction by clicking the delete icon .
- You can discard an annotation or prediction by clicking the delete icon .
- If an entity was predicted and you leave the ‘Entity type’ dropdown empty, it will discard the prediction upon submitting annotations.
- When you are finished annotating entities, click the exit icon to get out of the entity annotation mode.
Single annotation
The single annotation mode allows you to view each utterance in the context of the conversation to annotate utterances one at a time.
Intent Annotation
- You can access the Single annotation mode by clicking the Single annotation button at the top right on the Bulk annotation screen.
- On the left, you can review the entire conversation for the session. The highlighted utterance is the one you are annotating.
- On the right, you can see the utterance you are annotating, the predicted entities (if any), the top three predicted intents and their corresponding confidence scores.
- You can annotate the intent for the utterance by clicking the dropdown and choosing the intent from the provided list of existing intents. If none of the existing intents are suitable, you also have the option to create a new intent. 💡 Remember, the highest score doesn't guarantee it's the correct intent.
Entity Annotation
You can annotate single or multiple words on the utterance text as entities and also confirm entity predictions if the model has already predicted entities in the utterance, which will be highlighted.
- Click the Entity annotation icon or click directly on the words on the utterance.
- There will be a panel displayed below the utterance row where to choose Entity type, Role and Synonym. If an entity was predicted, it will also be displayed in this panel for your information.
- If an entity was predicted and the entity exists in your assistant’s NLU, the ‘Entity type’ dropdown will be filled with the matching entity.
- If an entity was predicted, but it doesn’t exist in your assistant’s NLU anymore, the ‘Entity type’ dropdown will be empty, and you will have to choose an entity in case you want to keep the prediction. You can discard the prediction by clicking the delete icon .
- You can discard an annotation or prediction by clicking the delete icon .
- If an entity was predicted and you leave the ‘Entity type’ dropdown empty, it will discard the prediction upon submitting annotations.
- When you are finished annotating entities, click the exit icon to get out of the entity annotation mode.
- You can write a comment to provide additional context for the annotation. The Lead Annotators (reviewers) can read these comments.
Complete
- Click the Annotate button to save the annotation(s) and move on to the next utterance on the batch. In single annotation mode, you go through each utterance individually and cannot skip or leave any utterance unannotated. However, you can always leave this screen; all annotations will be automatically saved.
- If you annotate all utterances on the batch, you can return to the bulk annotation mode and submit your annotations. 💡 You don’t need to annotate all utterances in a batch in order to submit your annotations.
Annotation review
As a Lead annotator (or an Annotator with review permissions), you can review the annotations made by annotators.
Intent annotation review
- Start by navigating to the "Review inbox" page in the menu.
- In the Review inbox, you can see all the batches you can review.
- If you are reviewing your own batch or if the team consists solely of you, you have the option to click on "Approve all" to bypass the review process and move all annotated utterances directly to the Annotation History (refer to the guide on Annotation History).
- Click on "Review" to enter the review mode, where you can bulk assess the utterances, predictions, annotations, and any comments provided.
- You can apply filters to streamline your review process. These filters allow you to:
- Reduce the number of utterances you need to check.
- Focus specifically on utterances where the predicted intents align with the annotations.
- View the work of a specific annotator.
- As you review, make necessary changes to the annotated intent where required or discard any utterances deemed as not valuable.
Entity annotation review
- Click the Entity annotation icon or click directly on the words on the utterance.
- There will be a panel displayed below the utterance row where to choose Entity type, Role and Synonym. If an entity was predicted, it will also be displayed in this panel for your information.
- As a reviewer, you can:
- Change Entity type, Role and Synonym by changing the values on the respective dropdowns
- Delete an annotation by clicking the delete icon
- If an entity was predicted and you leave the ‘Entity type’ dropdown empty, it will discard the prediction upon submitting annotations.
- When you are finished annotating entities, click the exit icon to get out of the entity annotation mode.
Mark as reviewed
- Once you have completed the review, click on "Mark batch as reviewed"
- Once you confirm your review, all annotated utterances will be added to the Annotation History, discarded utterances will be archived, and unannotated utterances will remain in the assistant’s dataset.
Annotation history
As a Lead annotator, you can access the Annotation history, where you can view the full list of annotated and approved utterances, filter, export or add them as training data for your assistant.
You can filter the results on this list by:
- Confidence score range
- Predicted intent
- Annotated intent
- Training data status
- Show all utterances, including the ones used as training data
- Hide utterances used as training data
- Only show utterances used as training data
You can also search in the utterance text by searching for specific words or sentences using the search bar at the top.
Export from Annotation history
To export all utterances on the Annotation history, click the Export all to CSV button on the top right of the screen.
You can export specific utterances by clicking on each utterance checkbox and then clicking the Export selection to CSV at the bottom right of the screen.
Use utterances from the Annotation history as training data
To use the utterances from the Annotation history as training data, select them by clicking each utterance checkbox and then click the Add to training data button. They will now be available as training data on the NLU screen.
💡 Remember to train your model, so your assistant can use the newly added training data
Linked blocks
Create new intent during annotation
As an Annotator or Lead Annotator, you can create a new intent while annotating without leaving the screen in either Bulk or Single annotation modes:
- Click on the intent dropdown to open it, then click Create new intent.
- In the "Create intent" screen, type in the intent name. It must not contain spaces or special characters and must not match an existing intent name.
- Click Save to create the intent.
This intent can be used on any utterances on your annotation batch.