Flow Builder — Create flow
Create flows
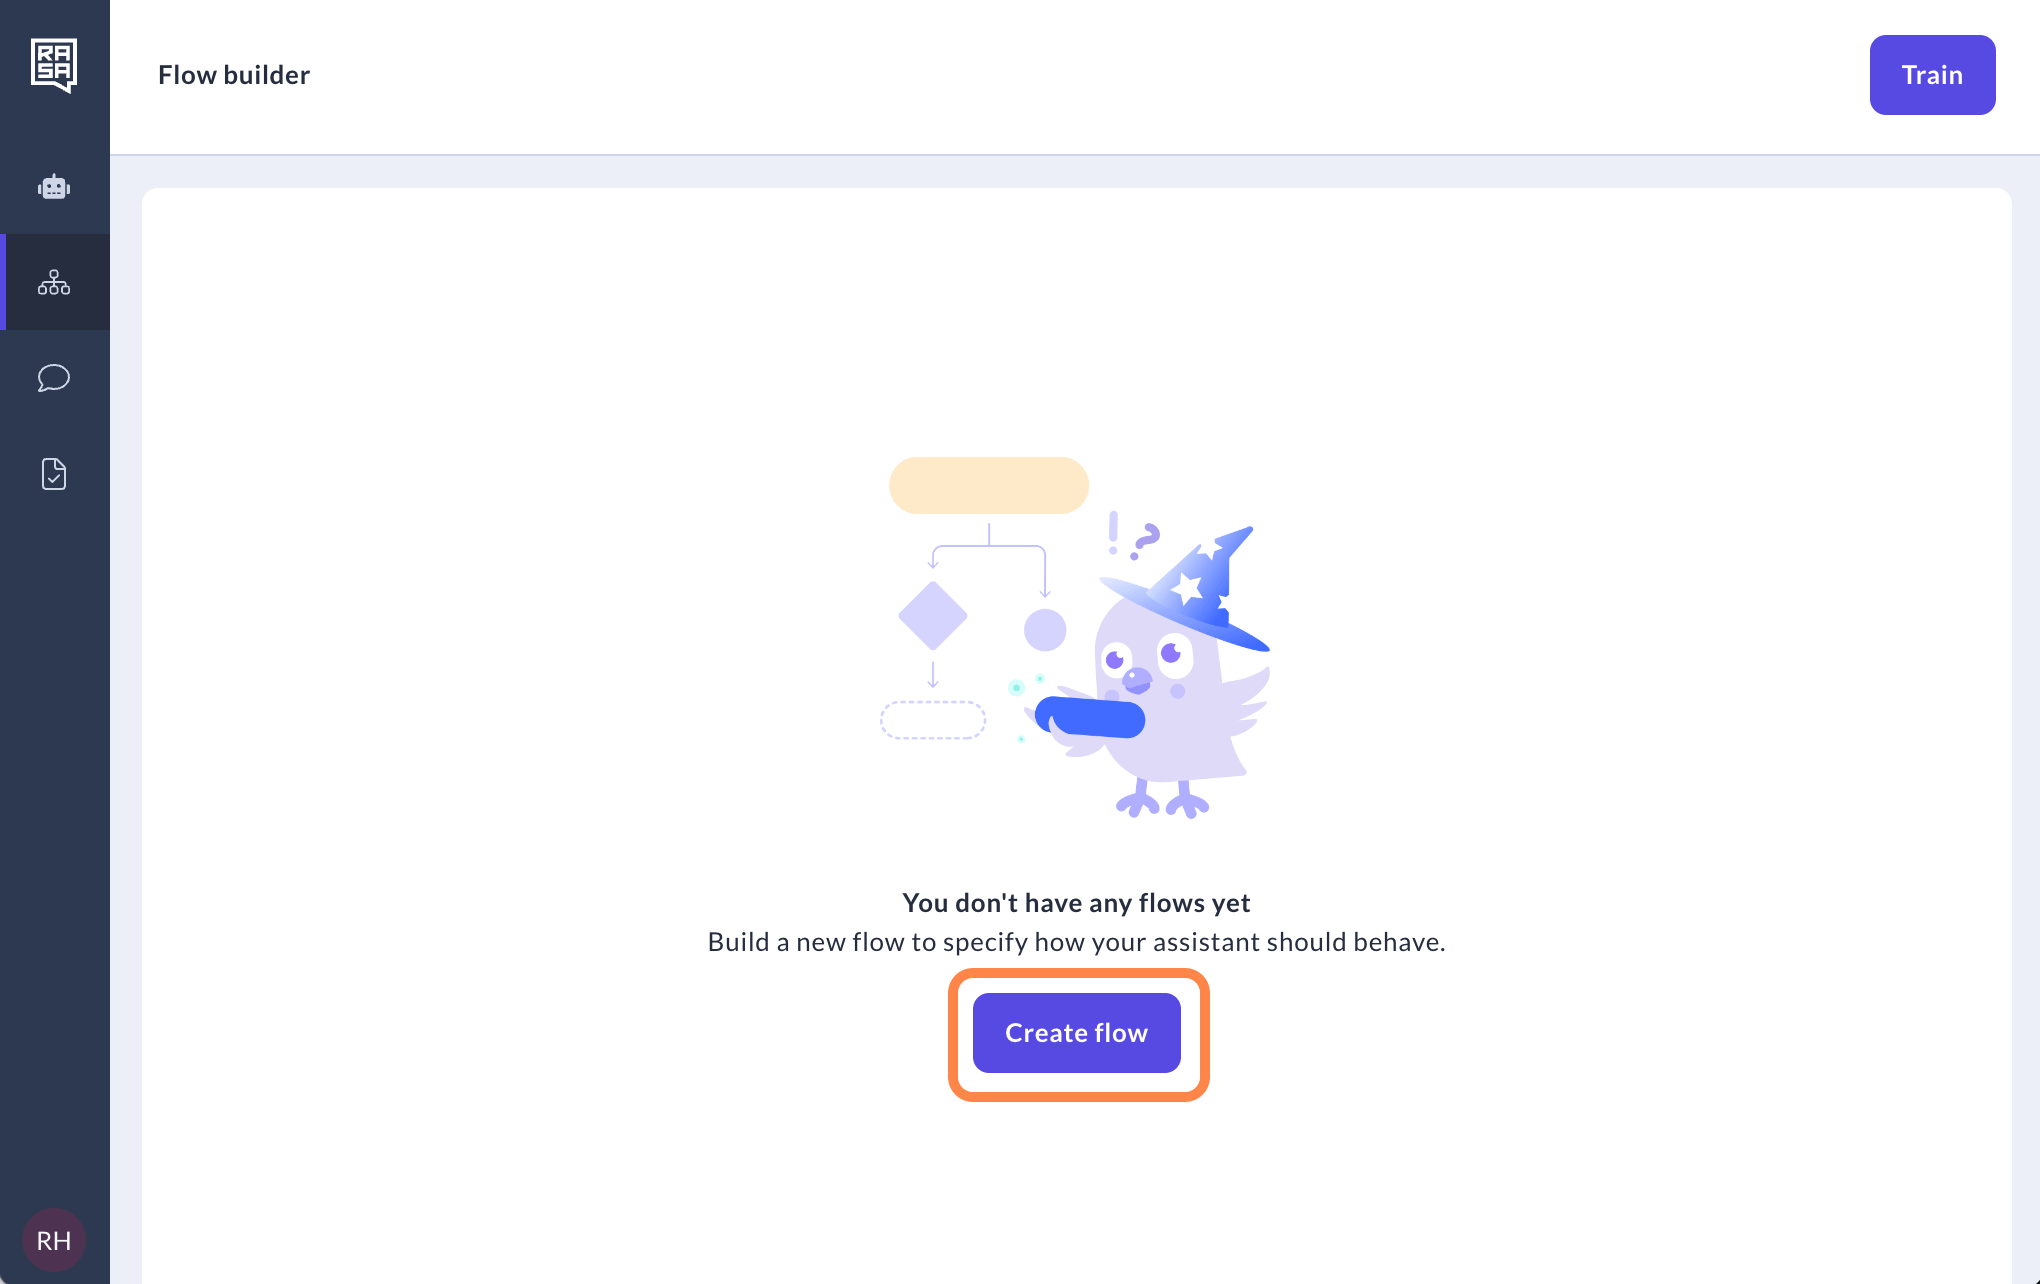
Go to Flow builder
To kickstart your first flow, hit the "Create flow" button.
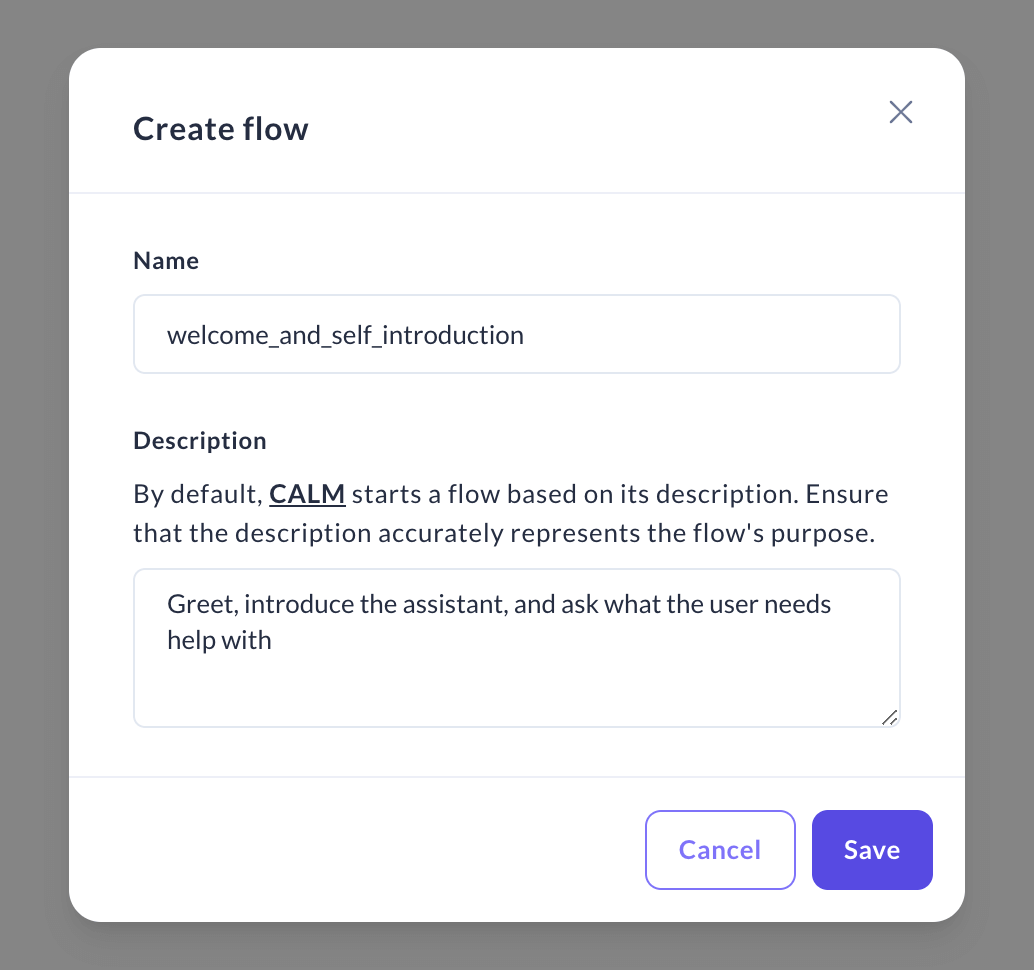
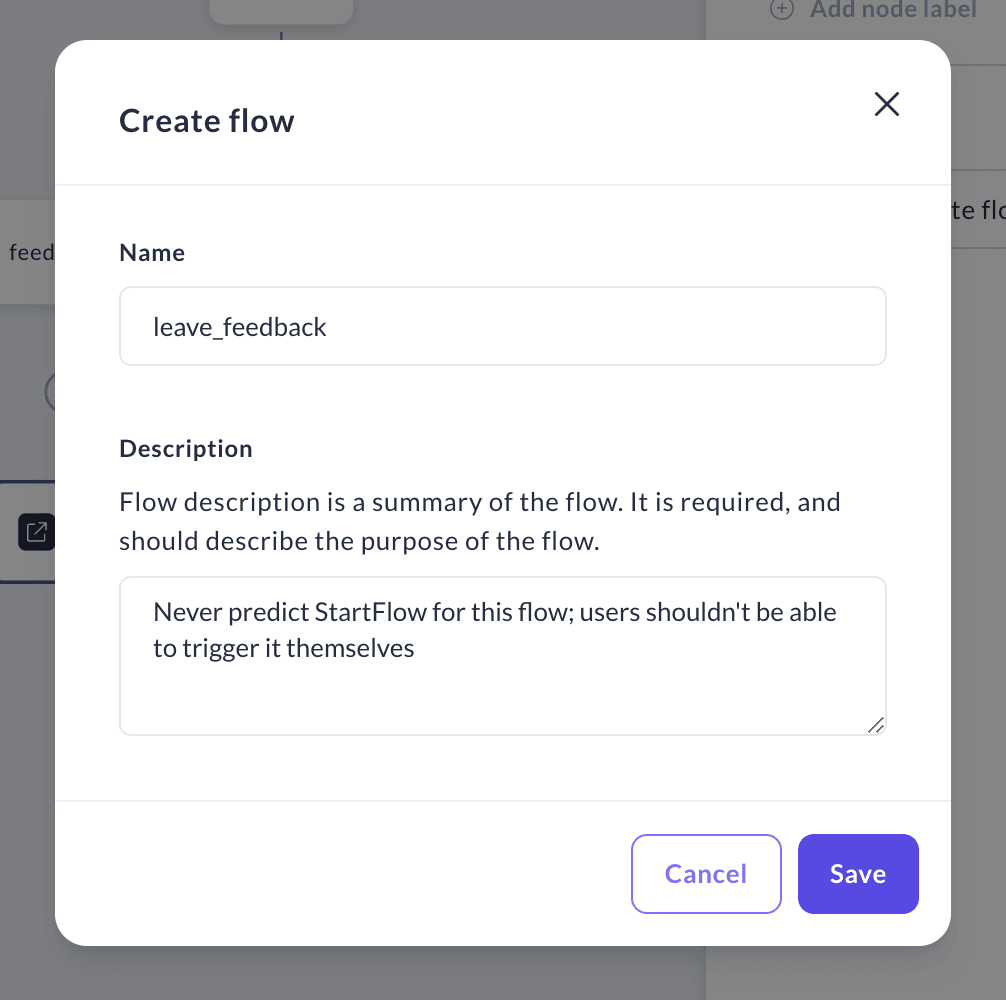
For your flow's name, avoid spaces, +, / or ! symbols. In the "Description" field, provide a detailed summary of the flow's purpose. This description is what will be used by LLM to decide when your flow should be triggered. Once you're set, click "Save".
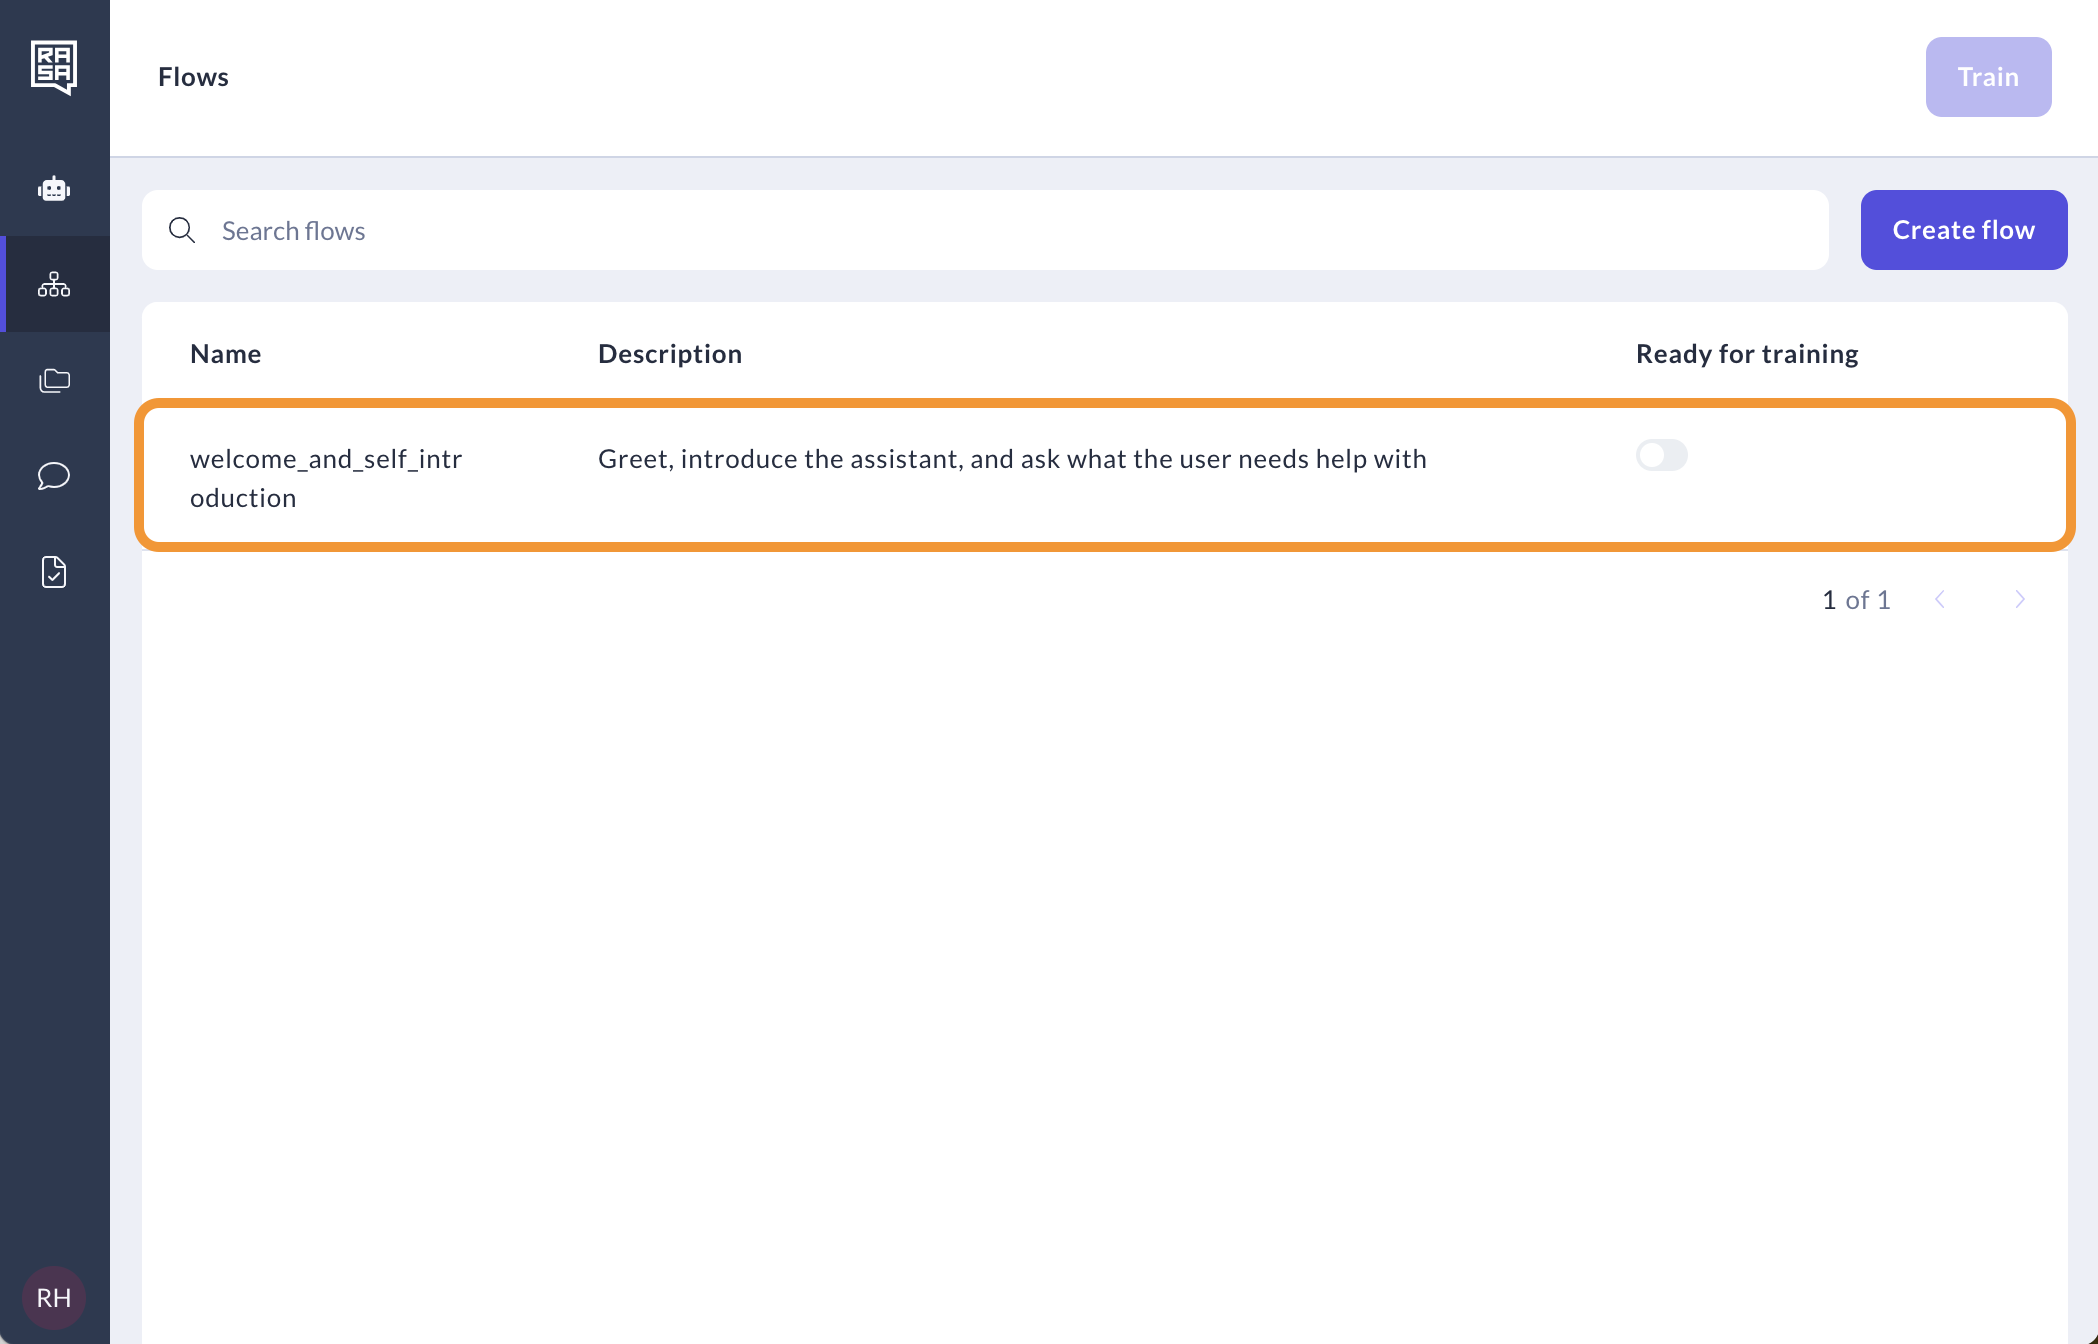
Your flow is created. Click on its name to start building.
Click the "+" icon to select your first step.
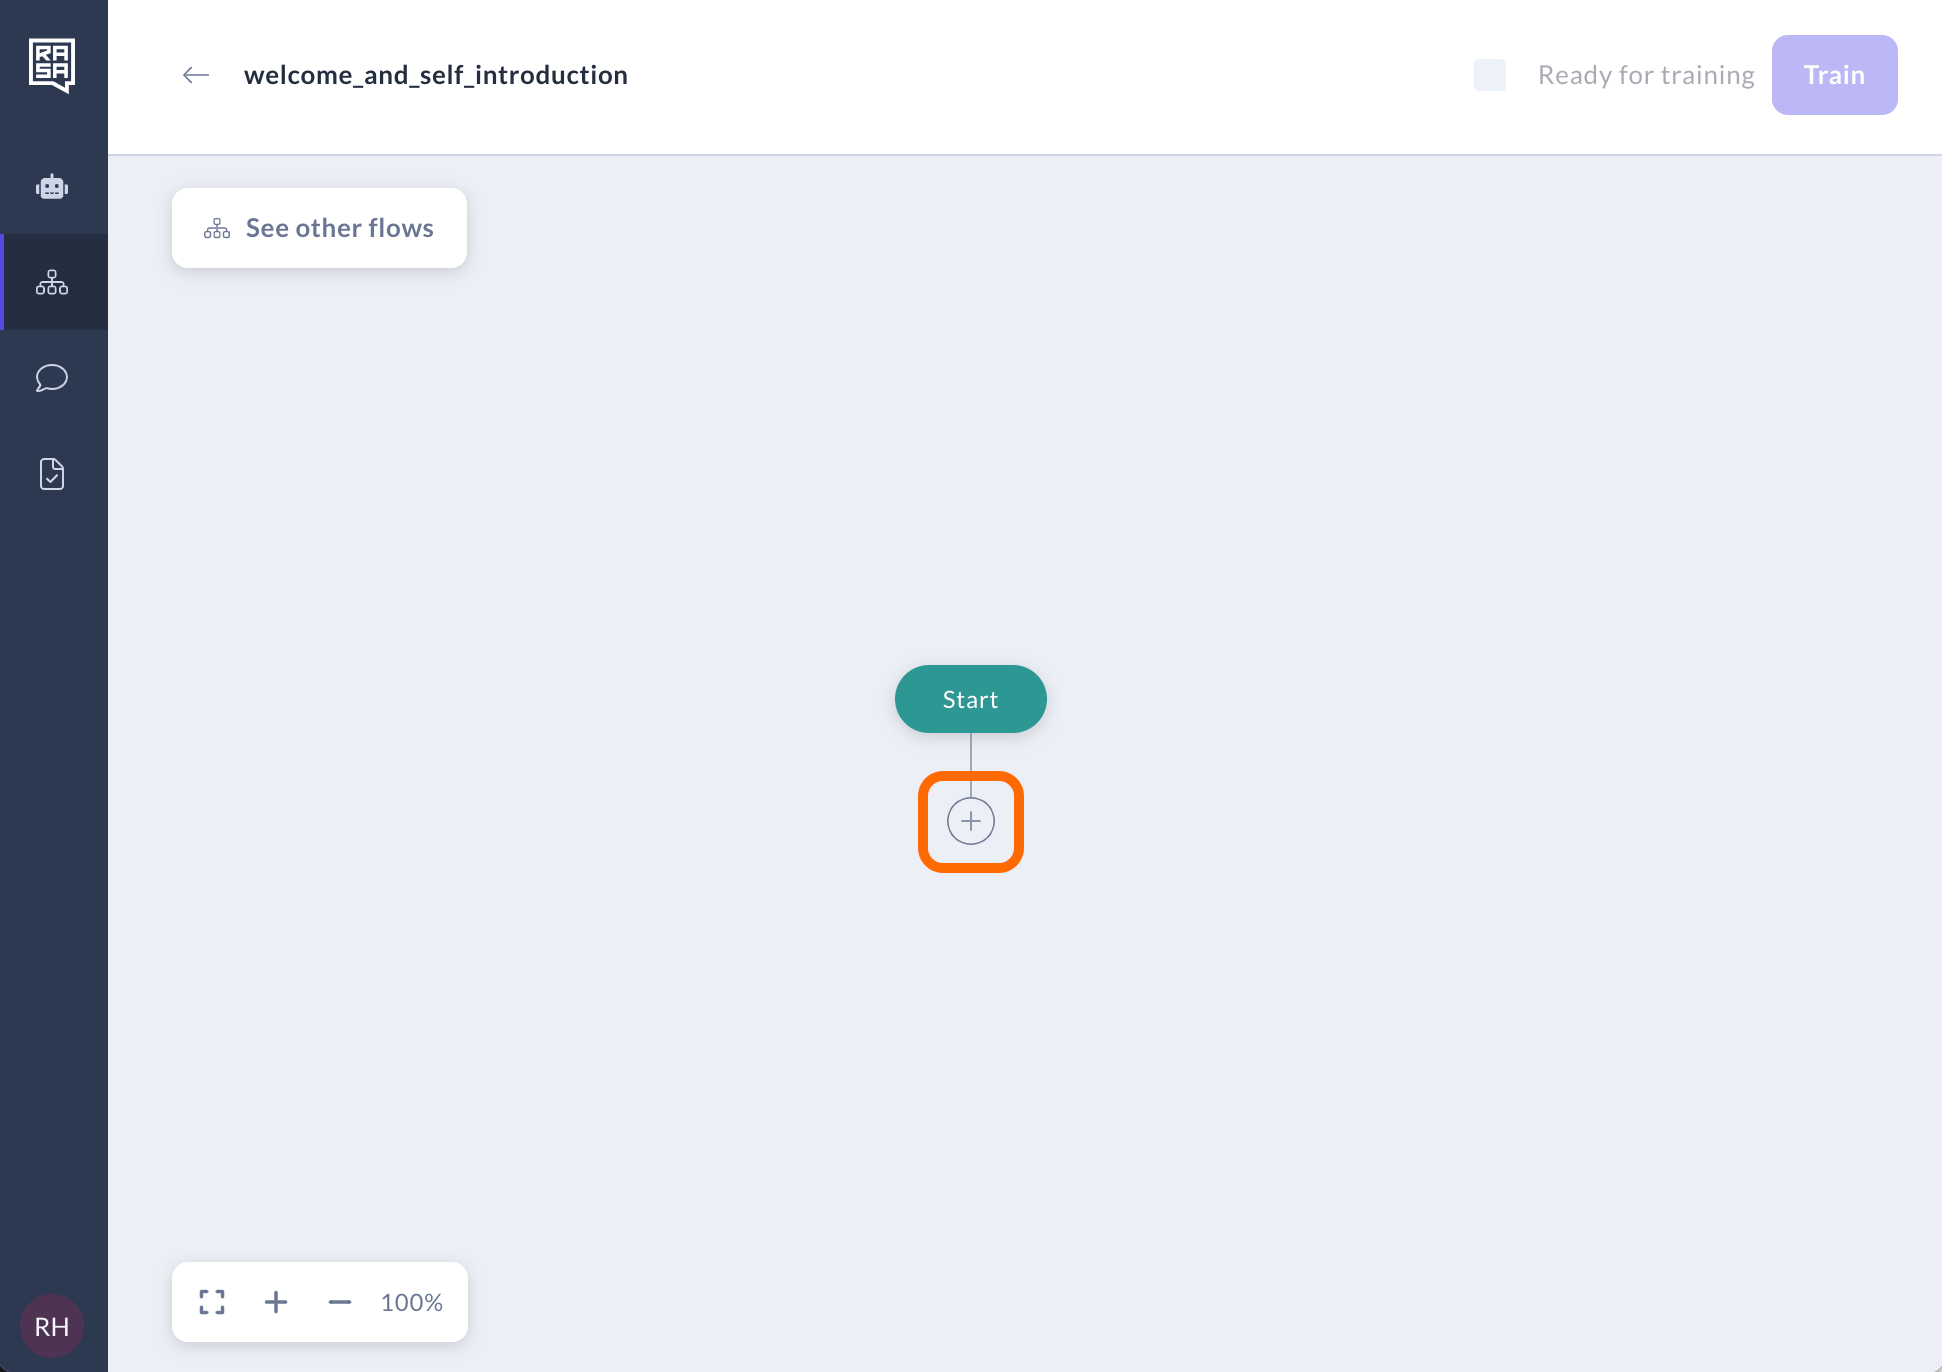
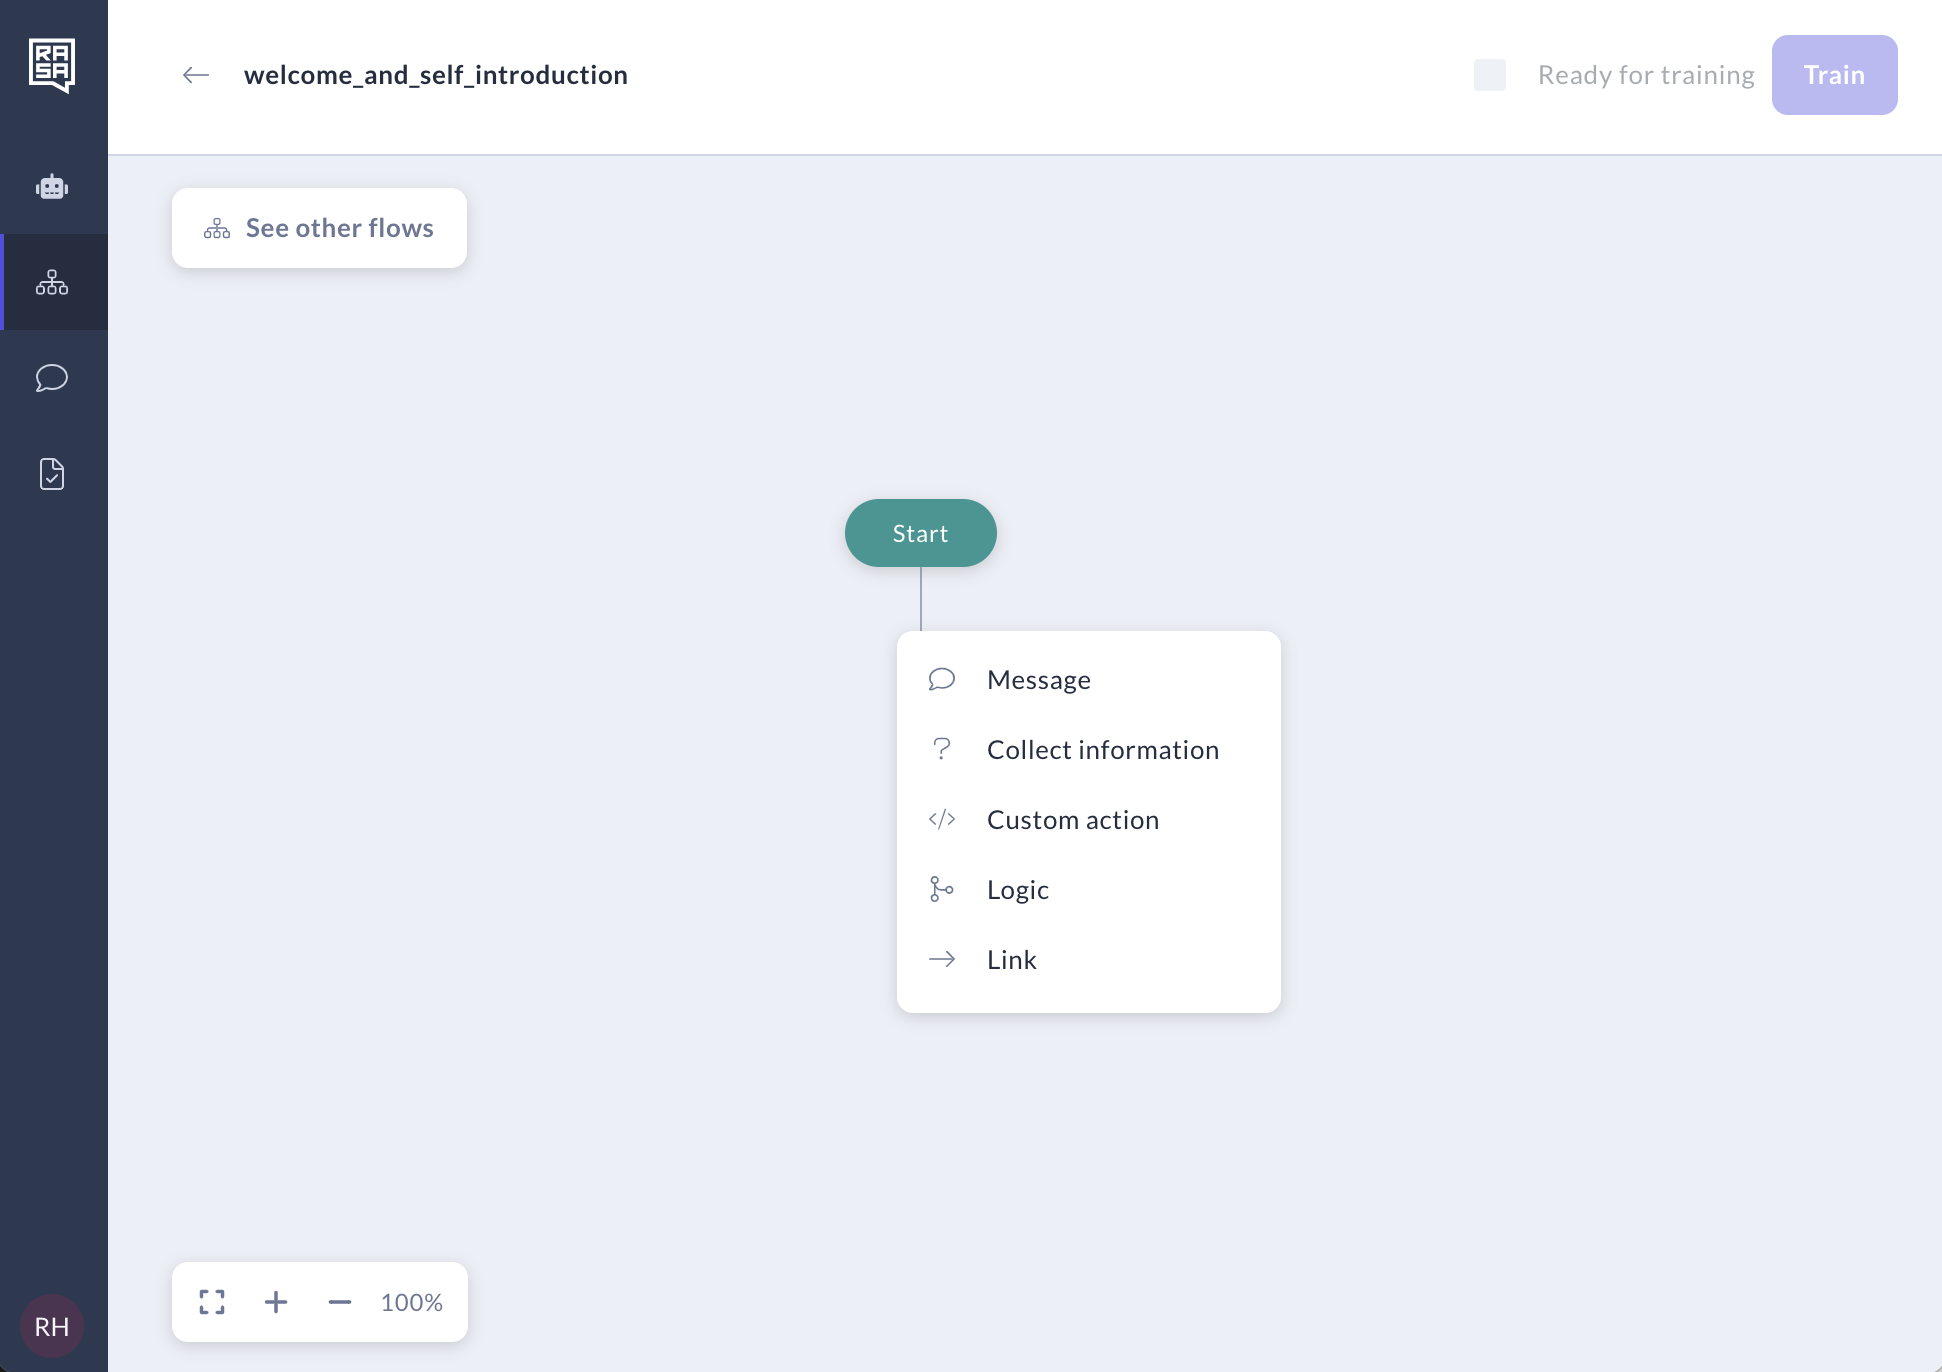
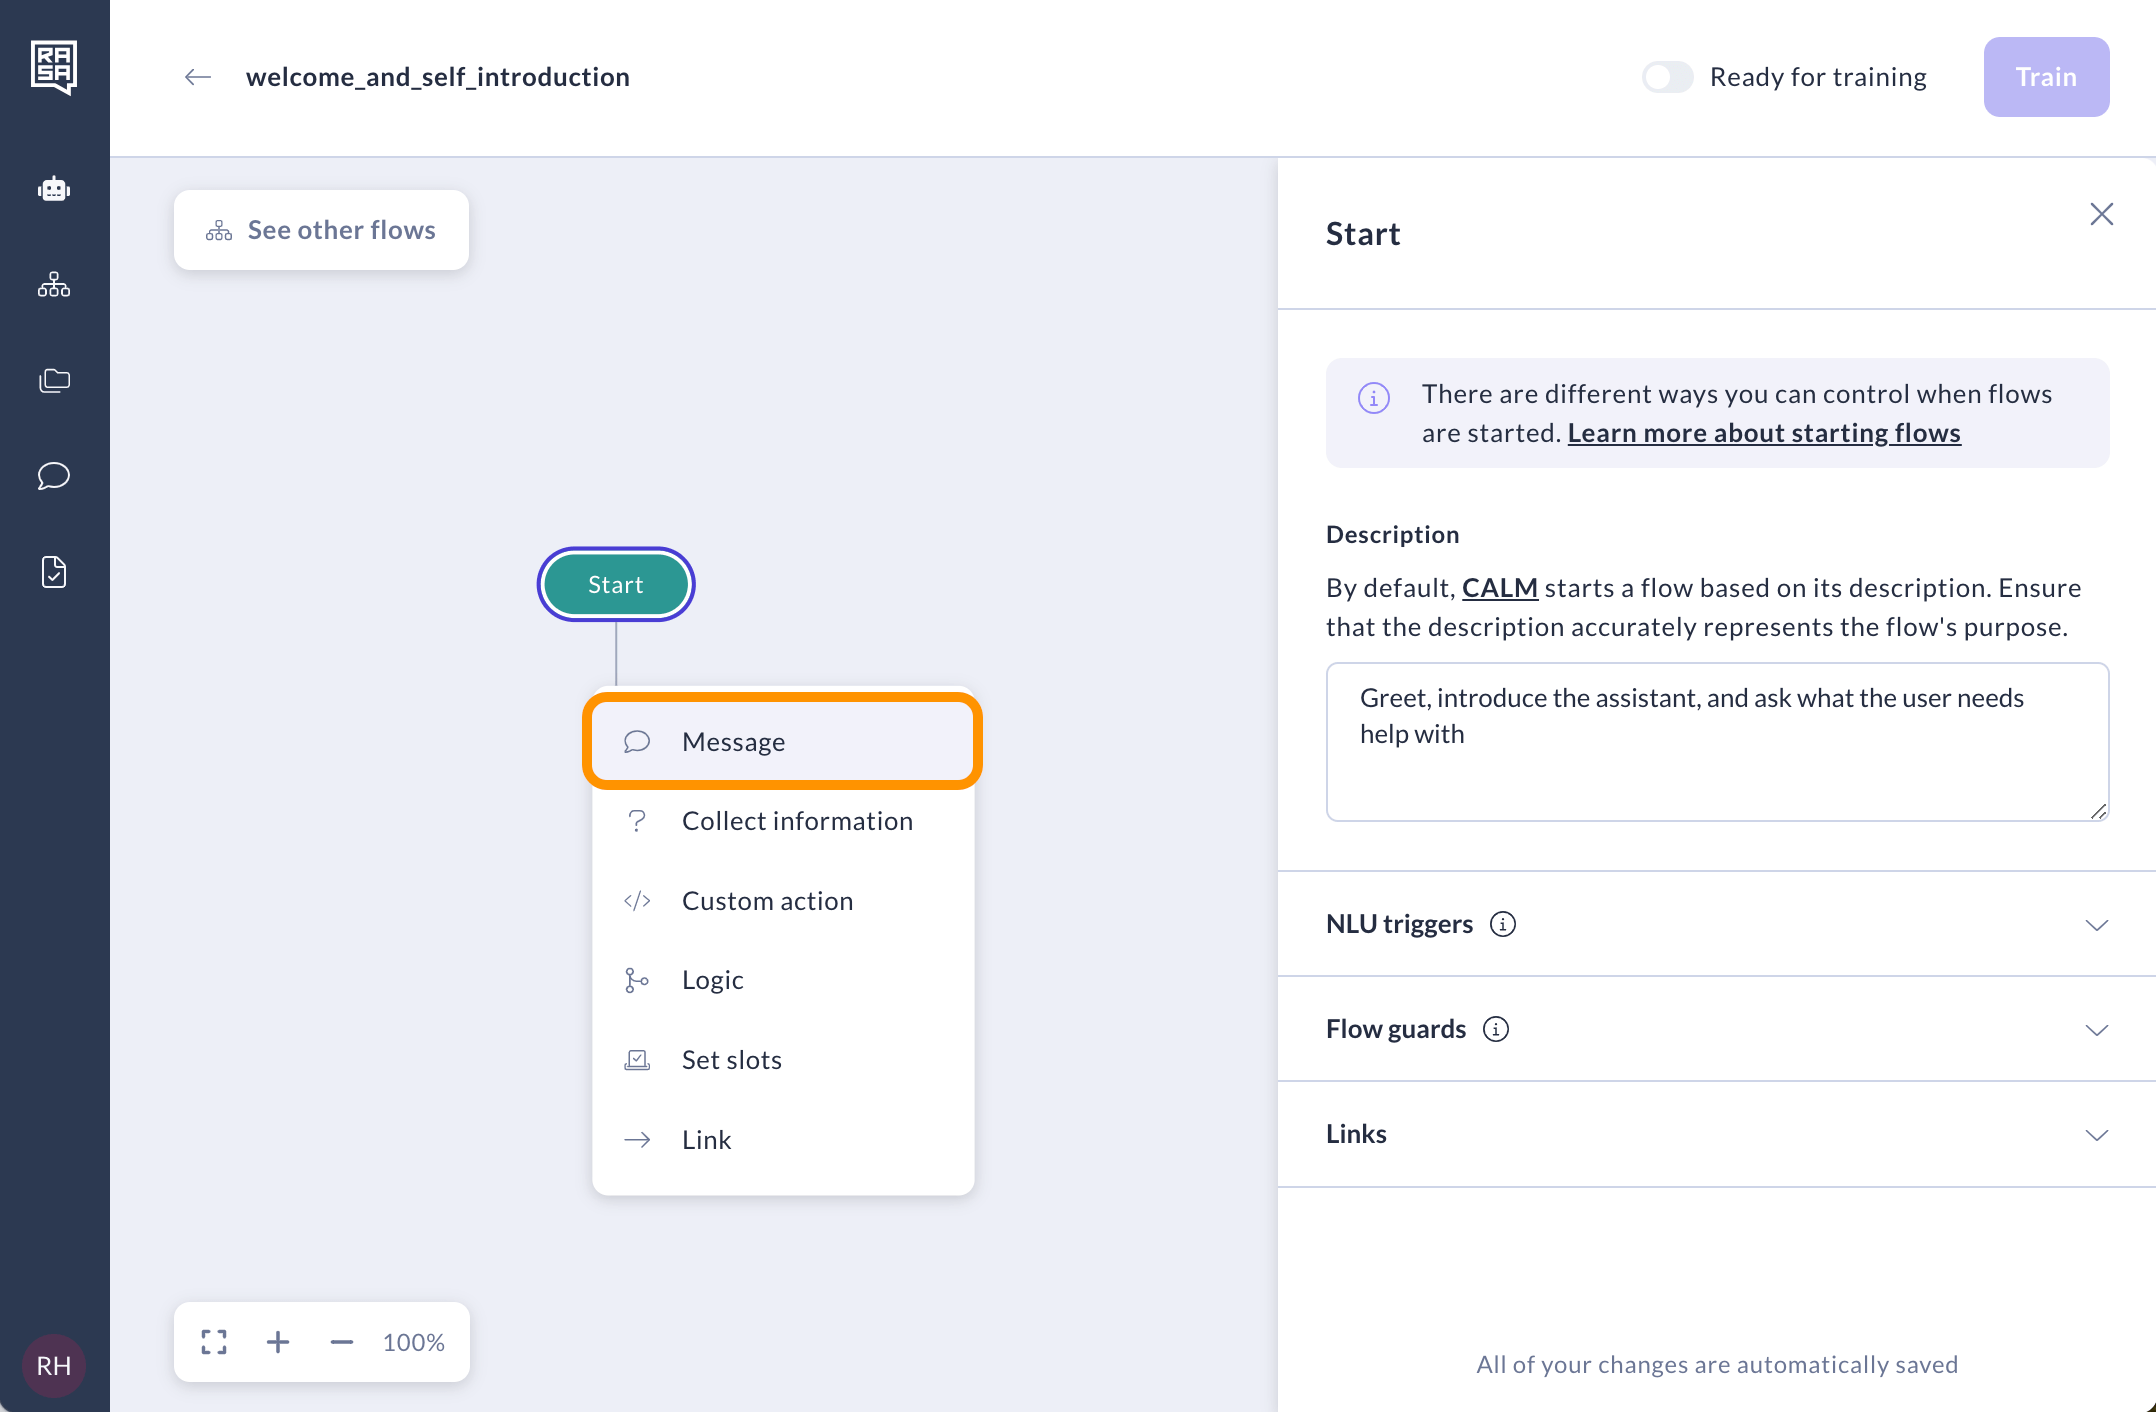
The primary building block of a Flow is a Step, equivalent to a node in the graph. Various step types are available in the menu for building and branching your flows, including Message, Collect information, Custom action, Logic, and Link. Let's break down each type.
Start
Start step is where you can manage how your flow gets triggered. There are three primary methods for initiating the flow: through descriptions, NLU triggers, and links.
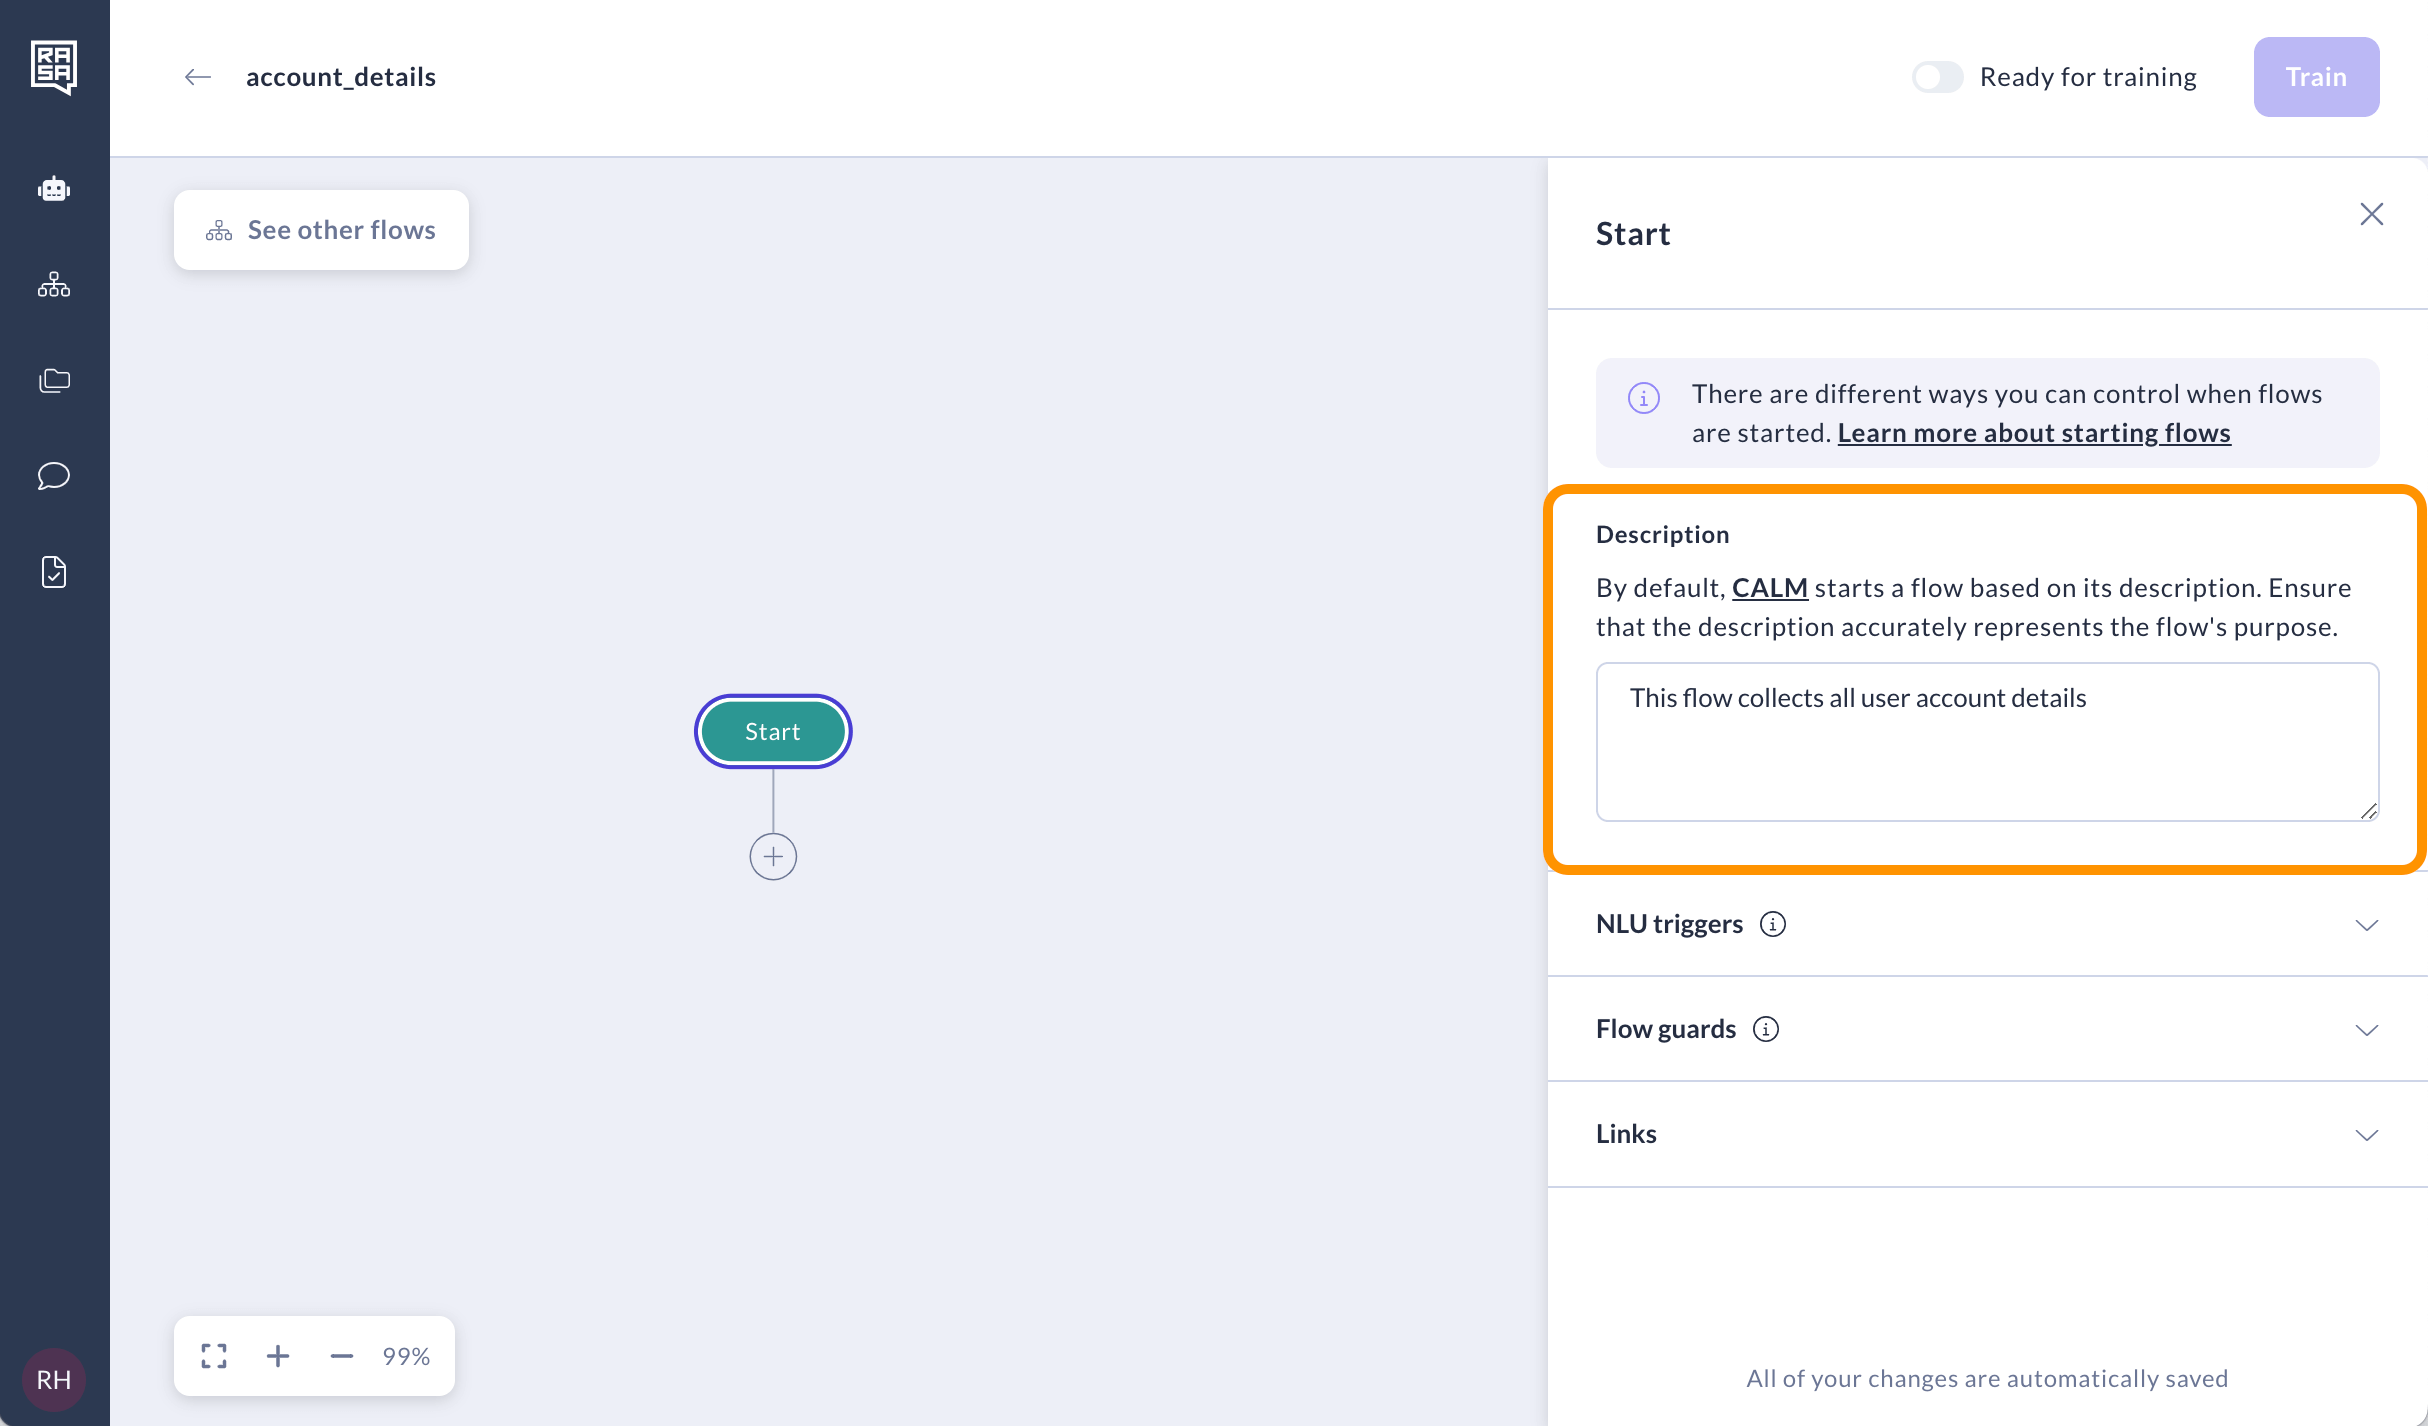
Flow description
The flow description serves as the default trigger mechanism. The system utilizes the flow description, ongoing conversation, and contextual cues to determine when to activate a flow. As you can only control the flow descriptions, it's crucial to craft clear and distinct descriptions for each flow. For guidelines on how to write concise and clear descriptions see the section provided here.
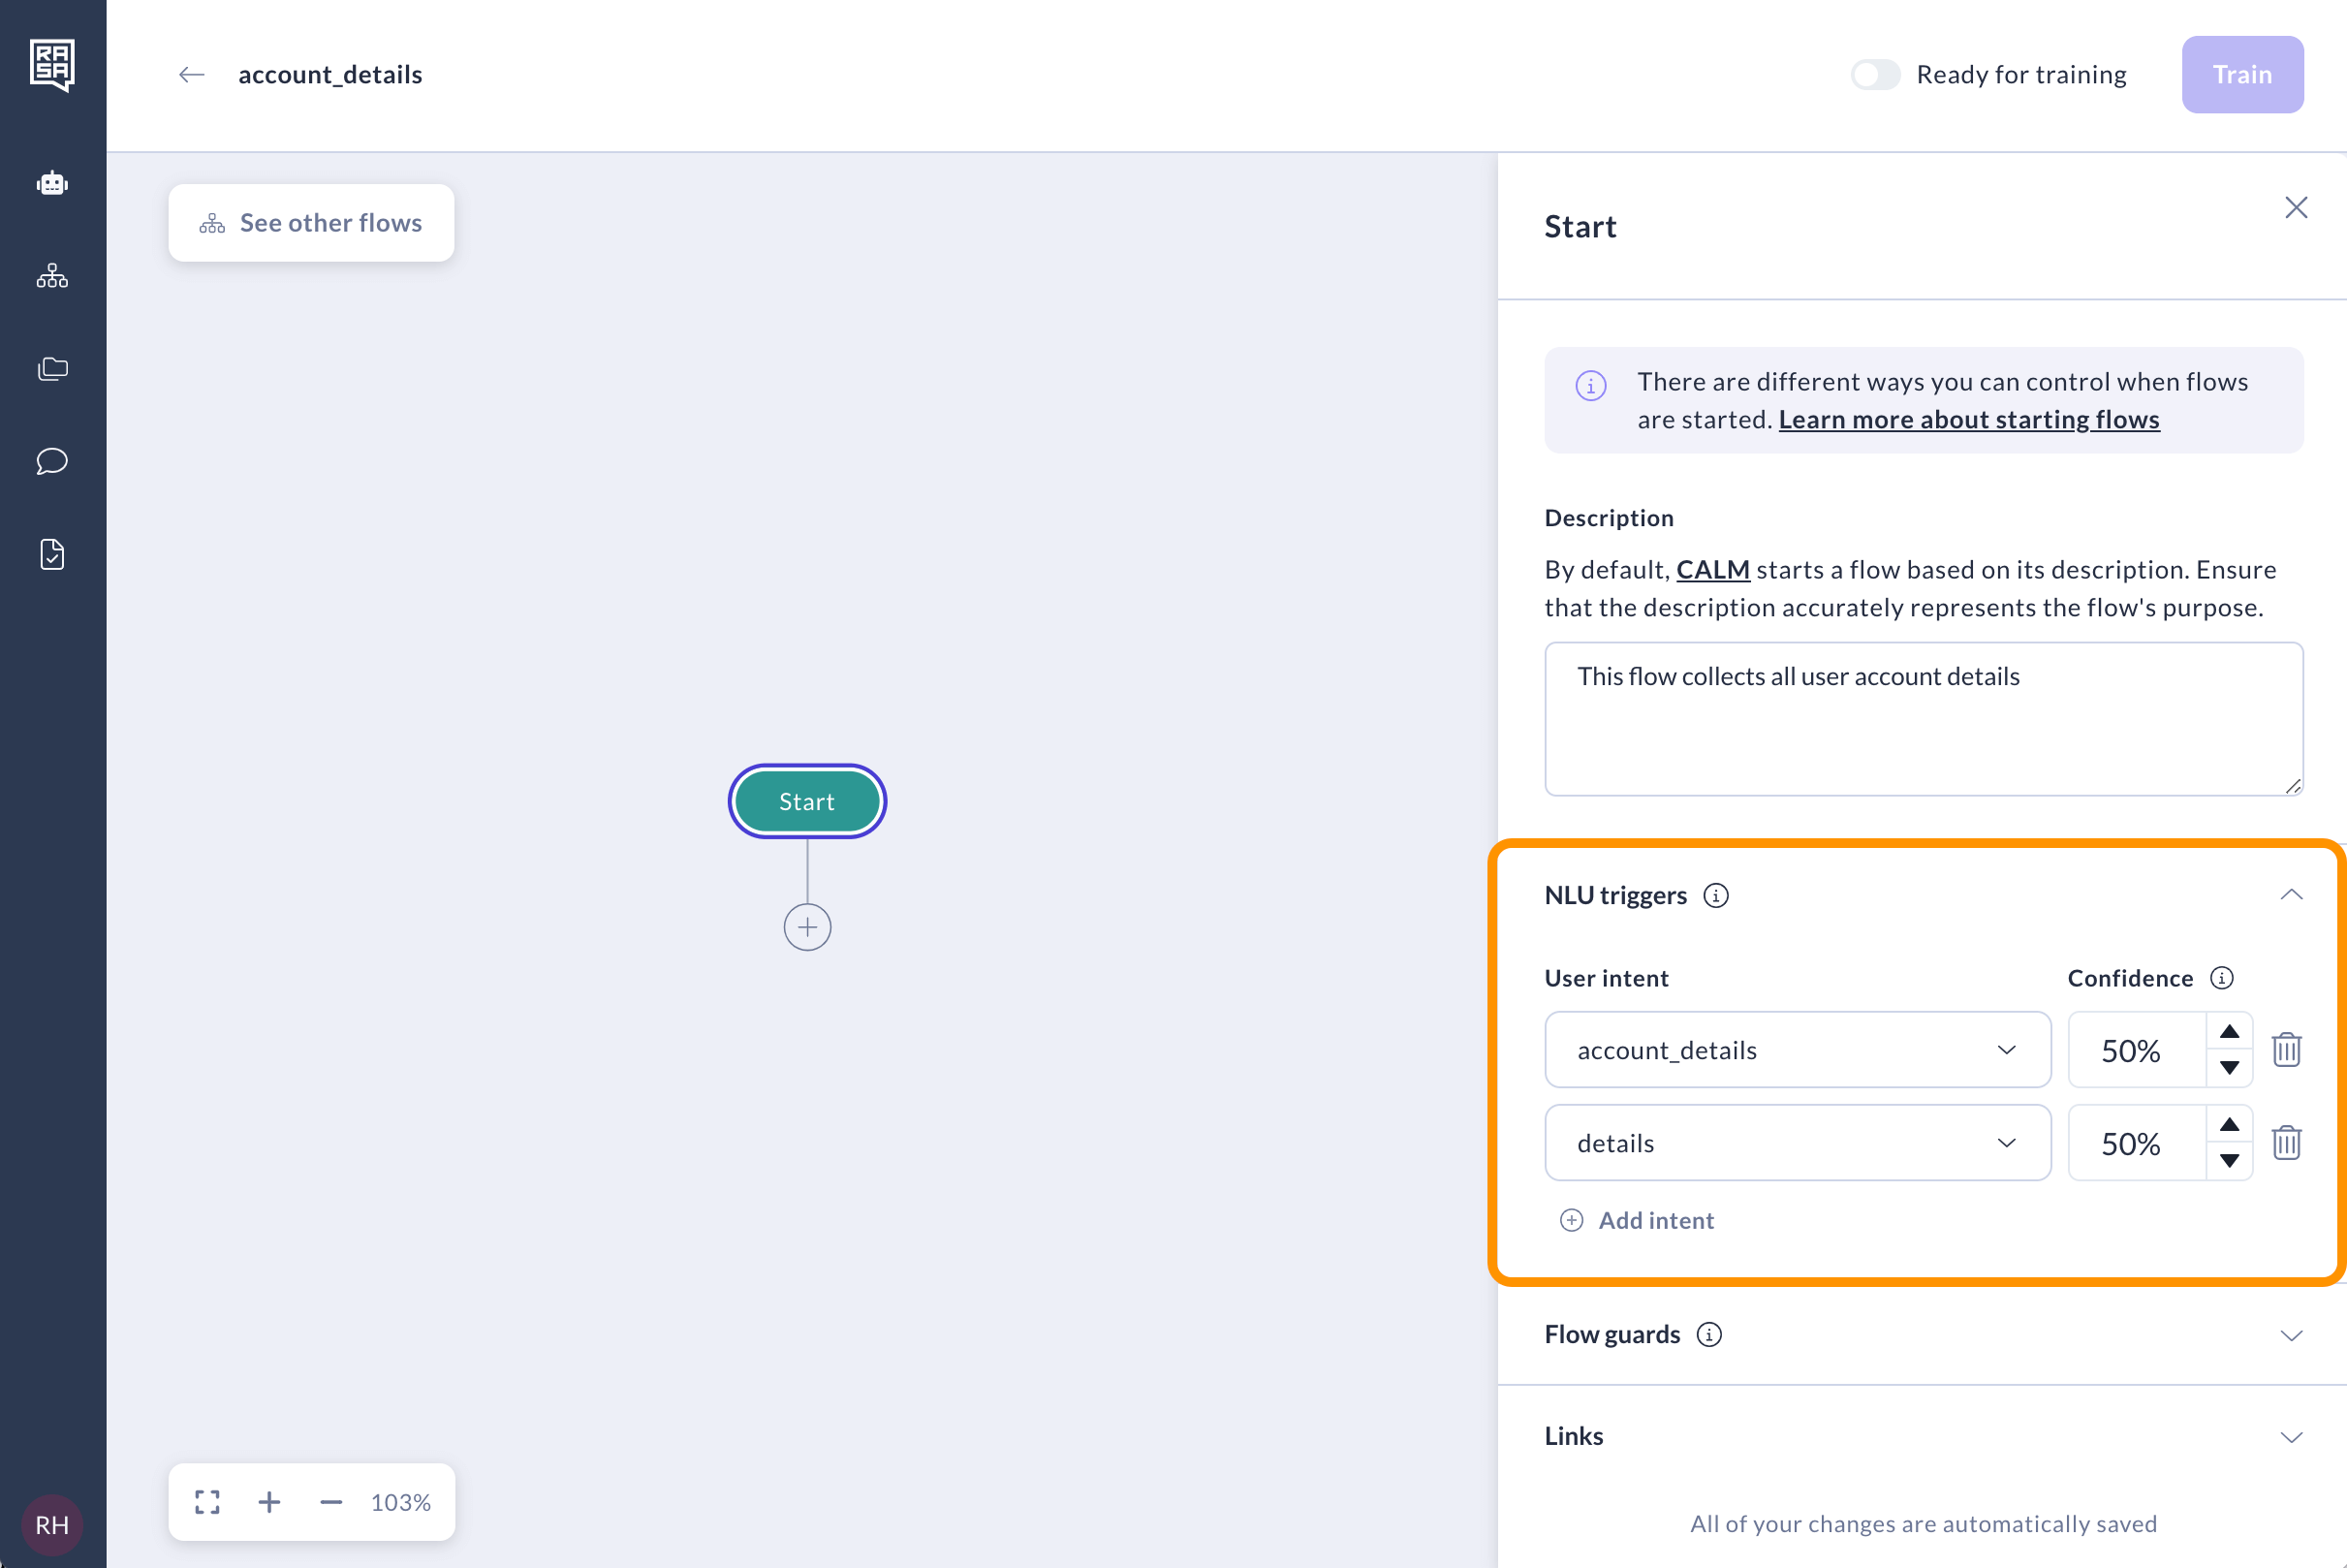
NLU triggers
For a more deterministic approach, you can use NLU triggers. With NLU triggers, you can select multiple user intents that are able to start this flow and the confidence threshold for each intent. We recommend using a confidence threshold calculated by dividing 1 by the total number of intents in the model. However, it's essential to experiment with different confidence thresholds to find the optimal setting for your scenario.
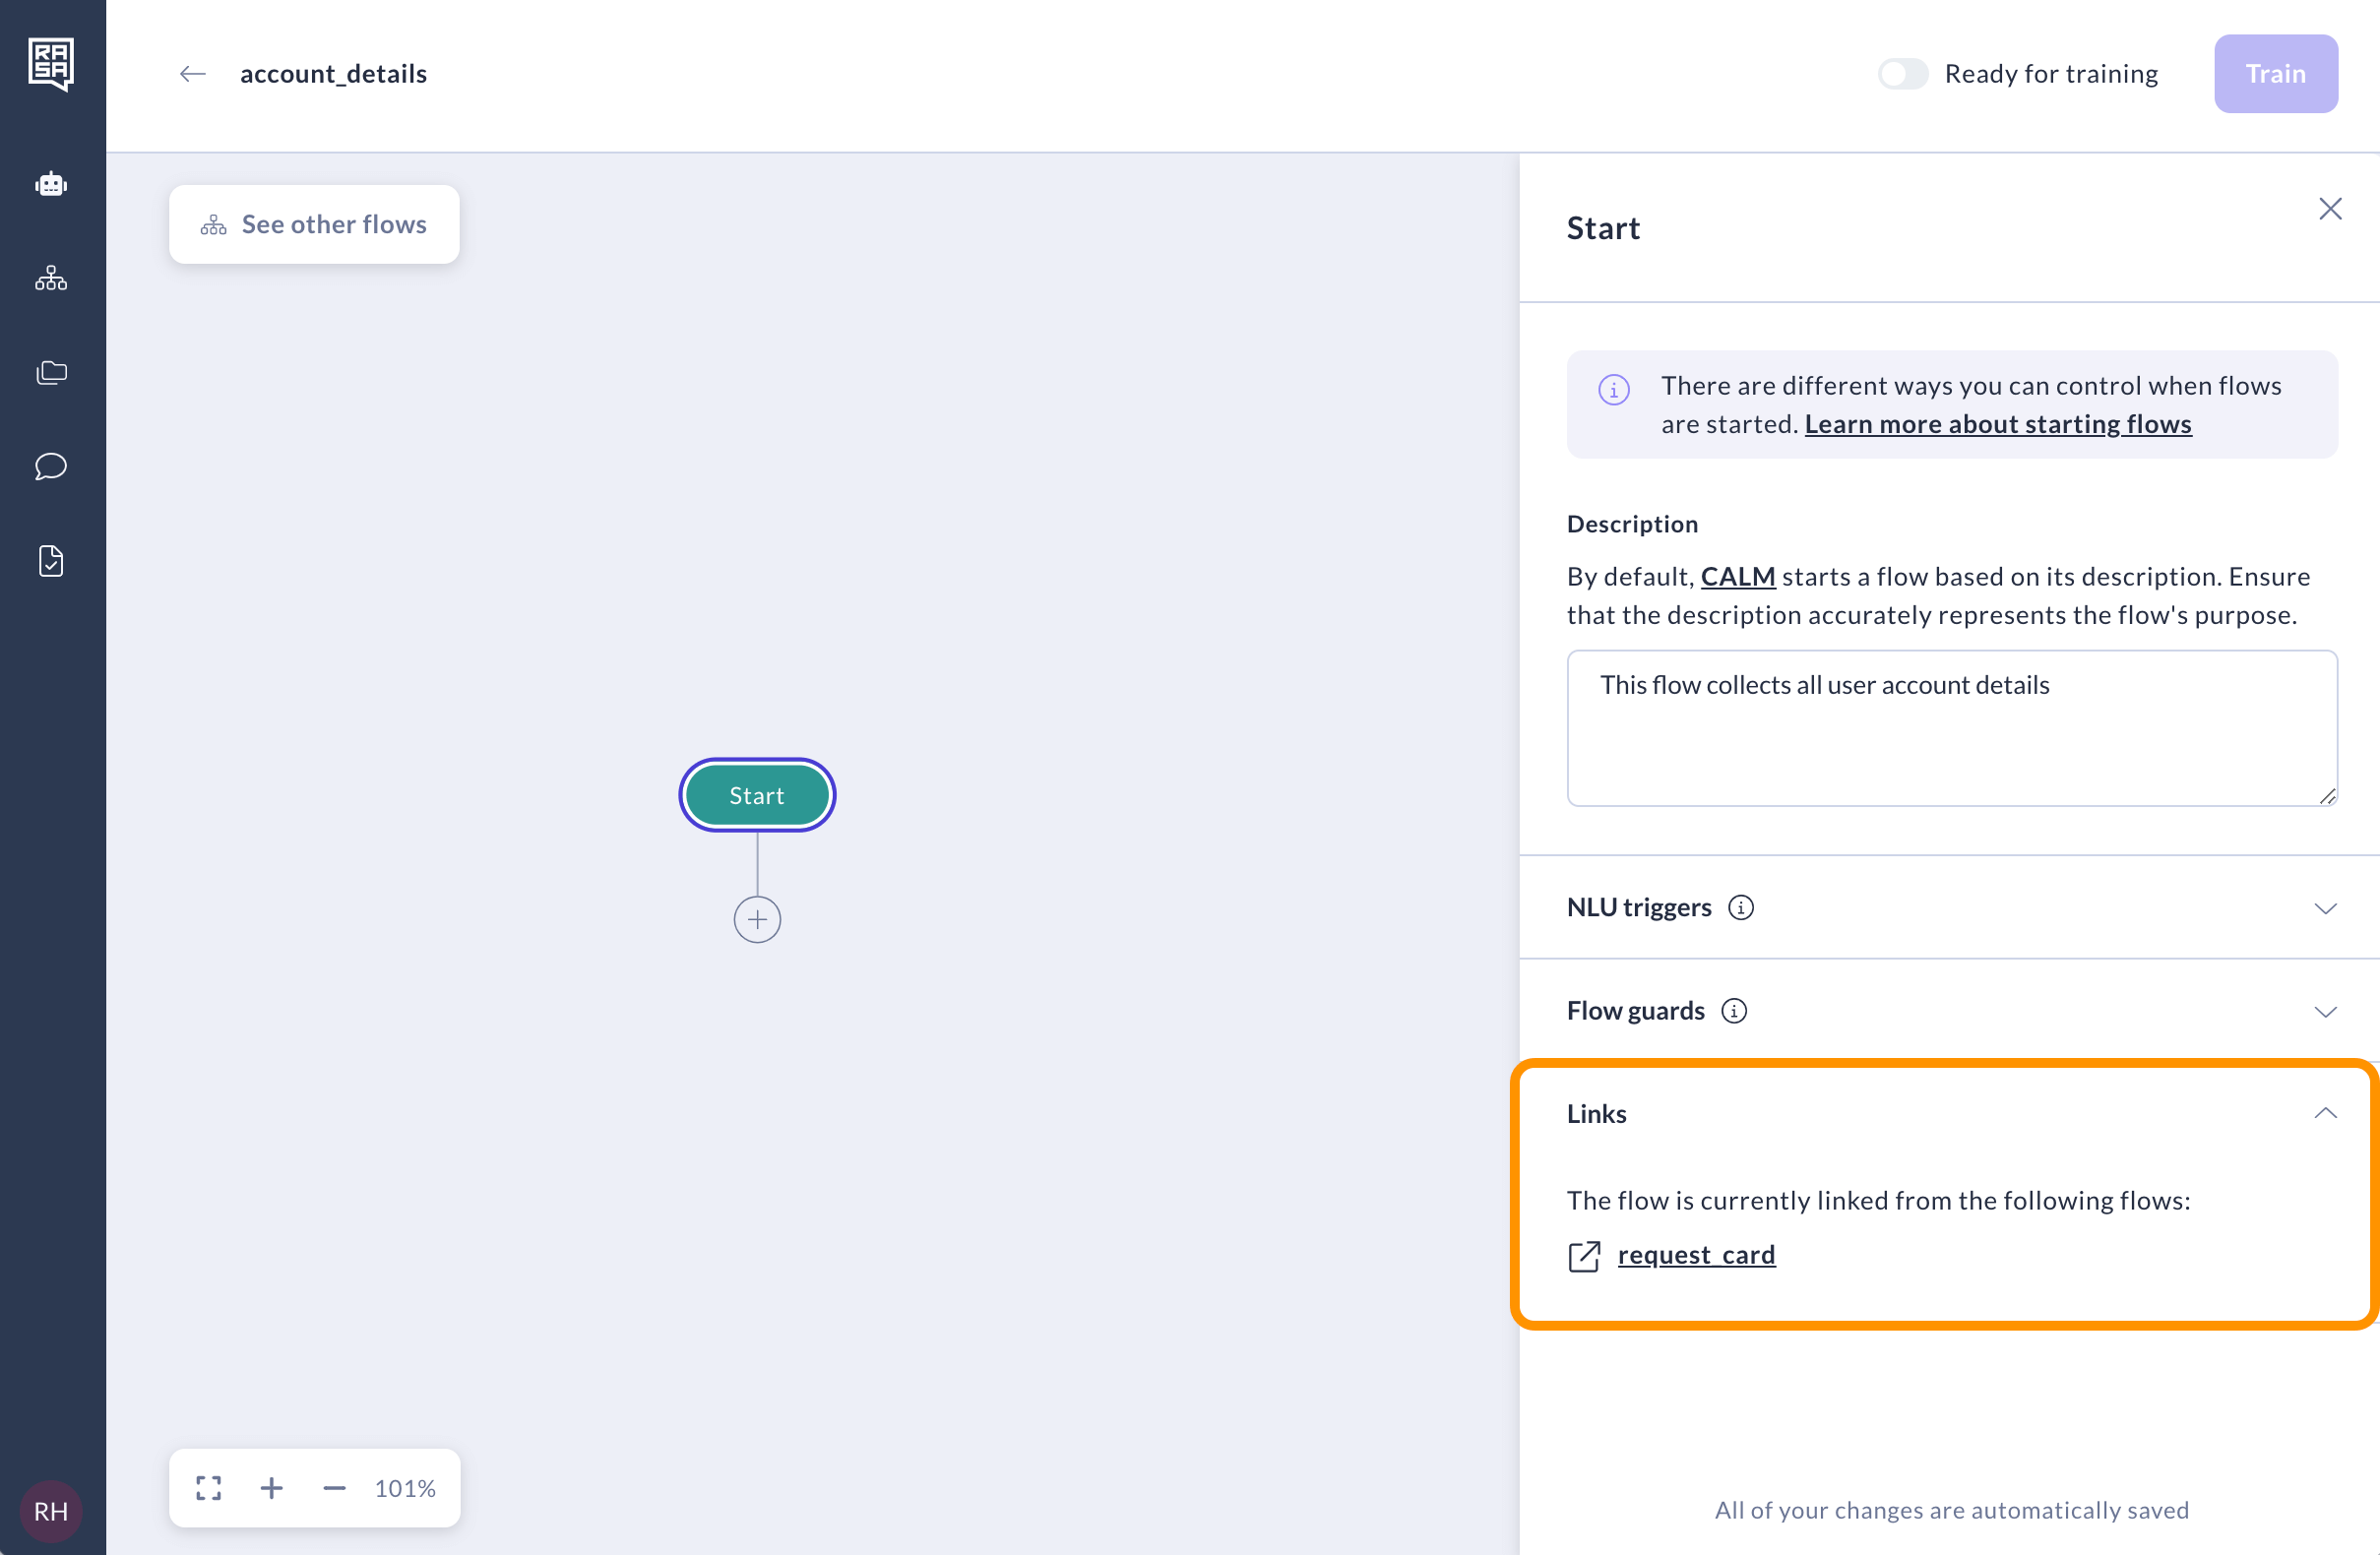
Links
If there are other flows that lead to the current flow, you can view them here. Additionally, you have the option to remove links to the current flow from within these parent flows.
Message
The Message step is responsible for the message that your assistant sends to the user. It usually consists of text but can also include buttons.
For example, let's start by sending a simple "Hello!" message to the user. To do this, create the Message step from the menu.
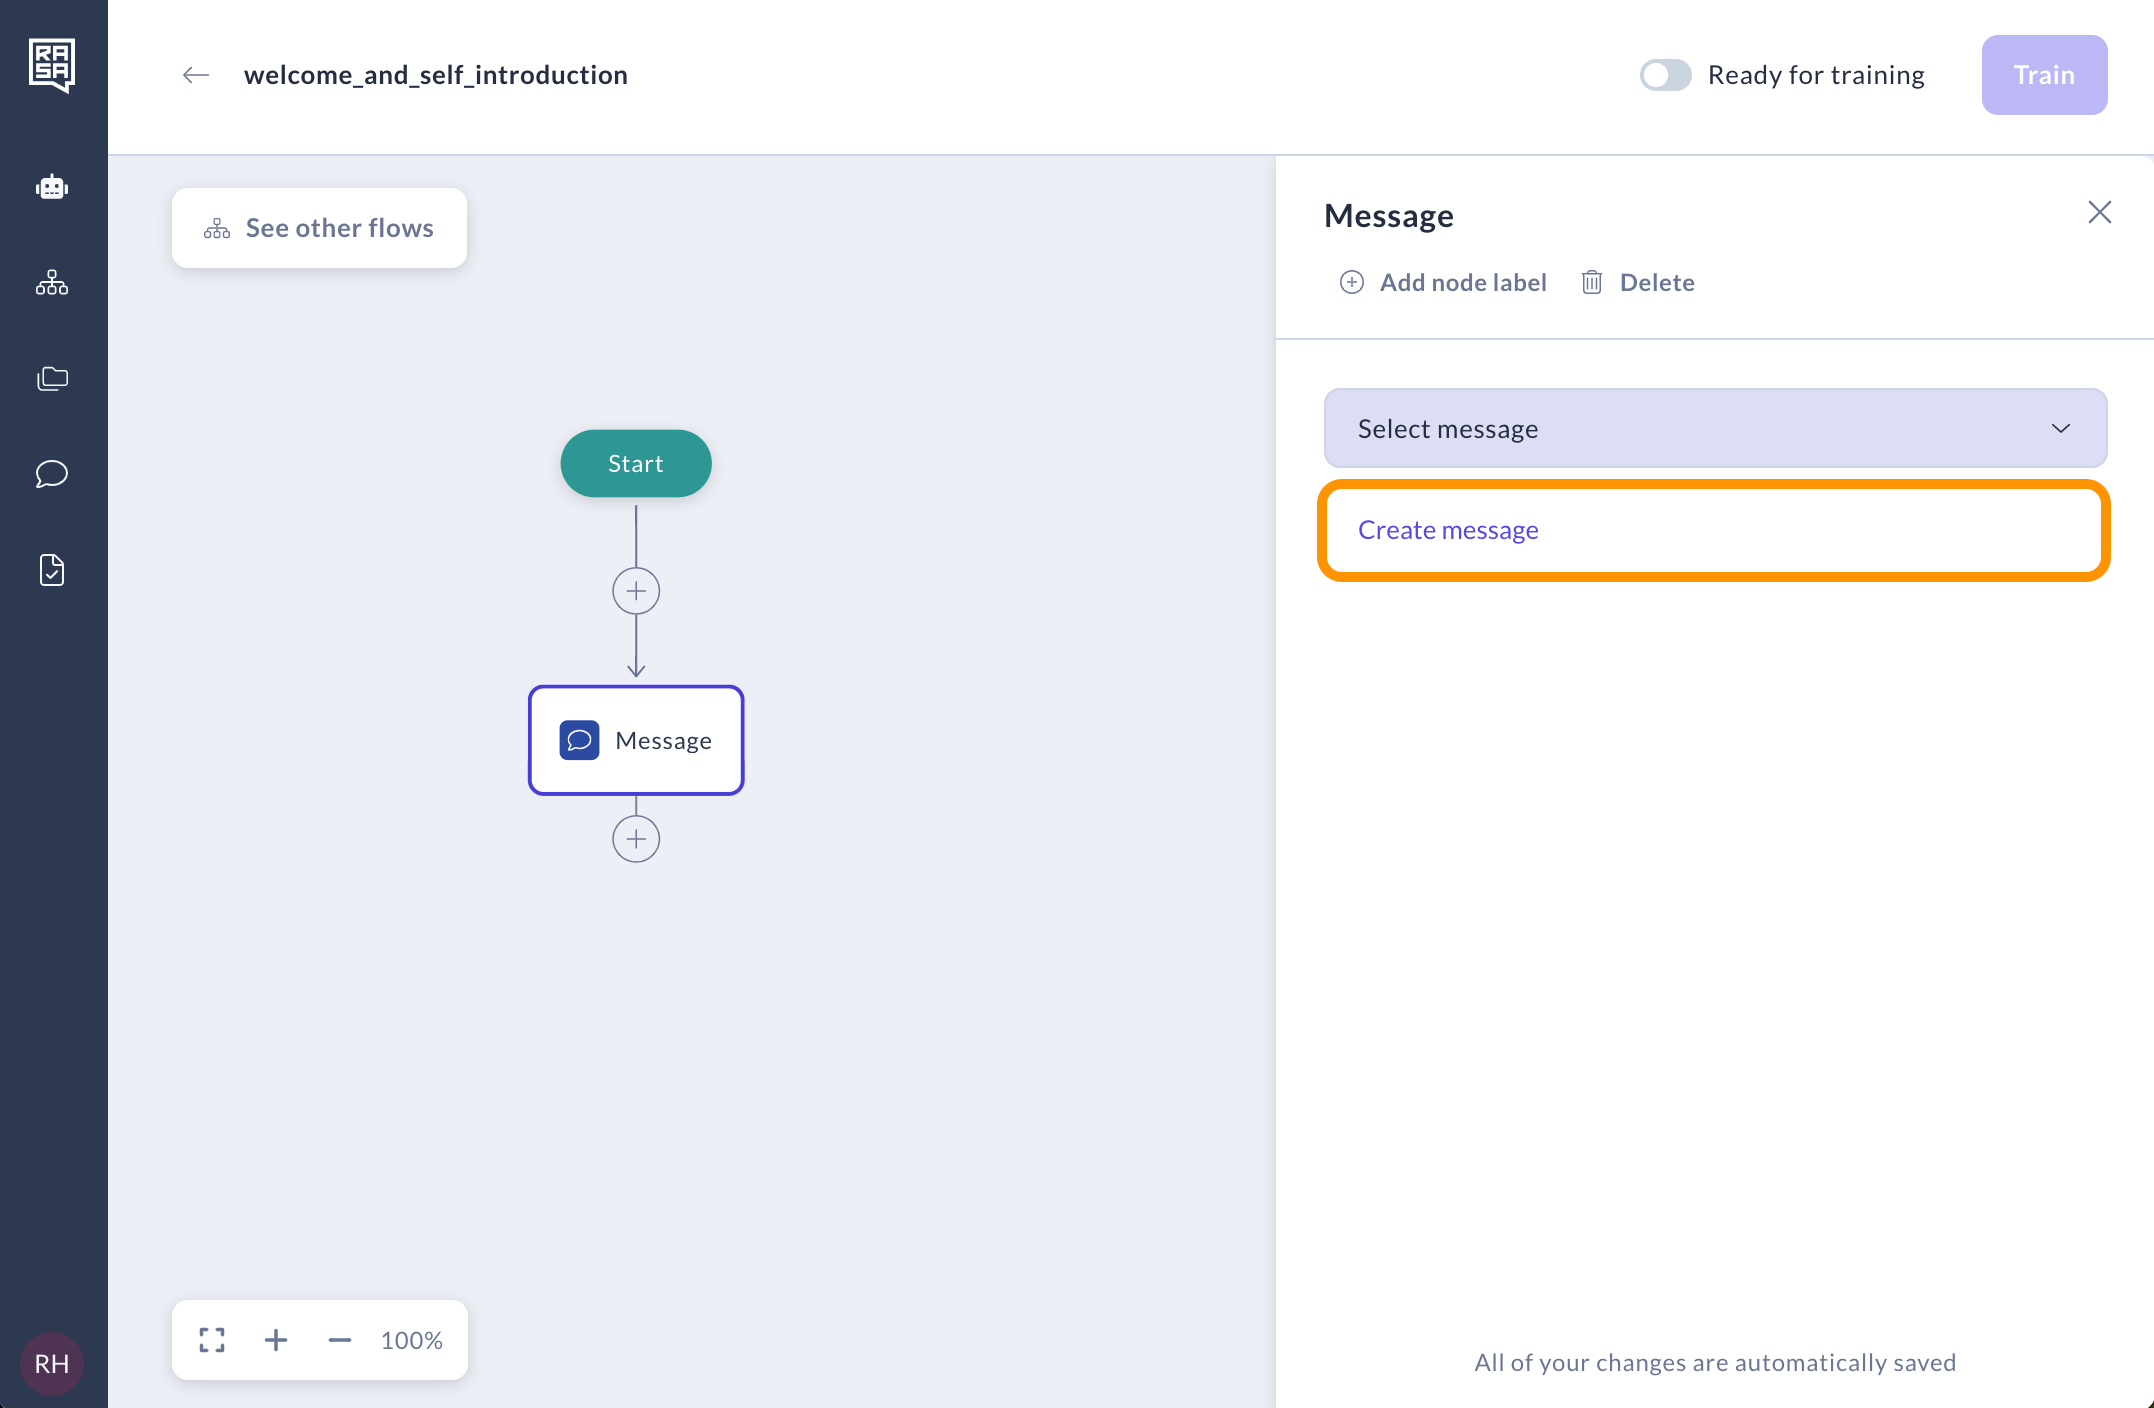
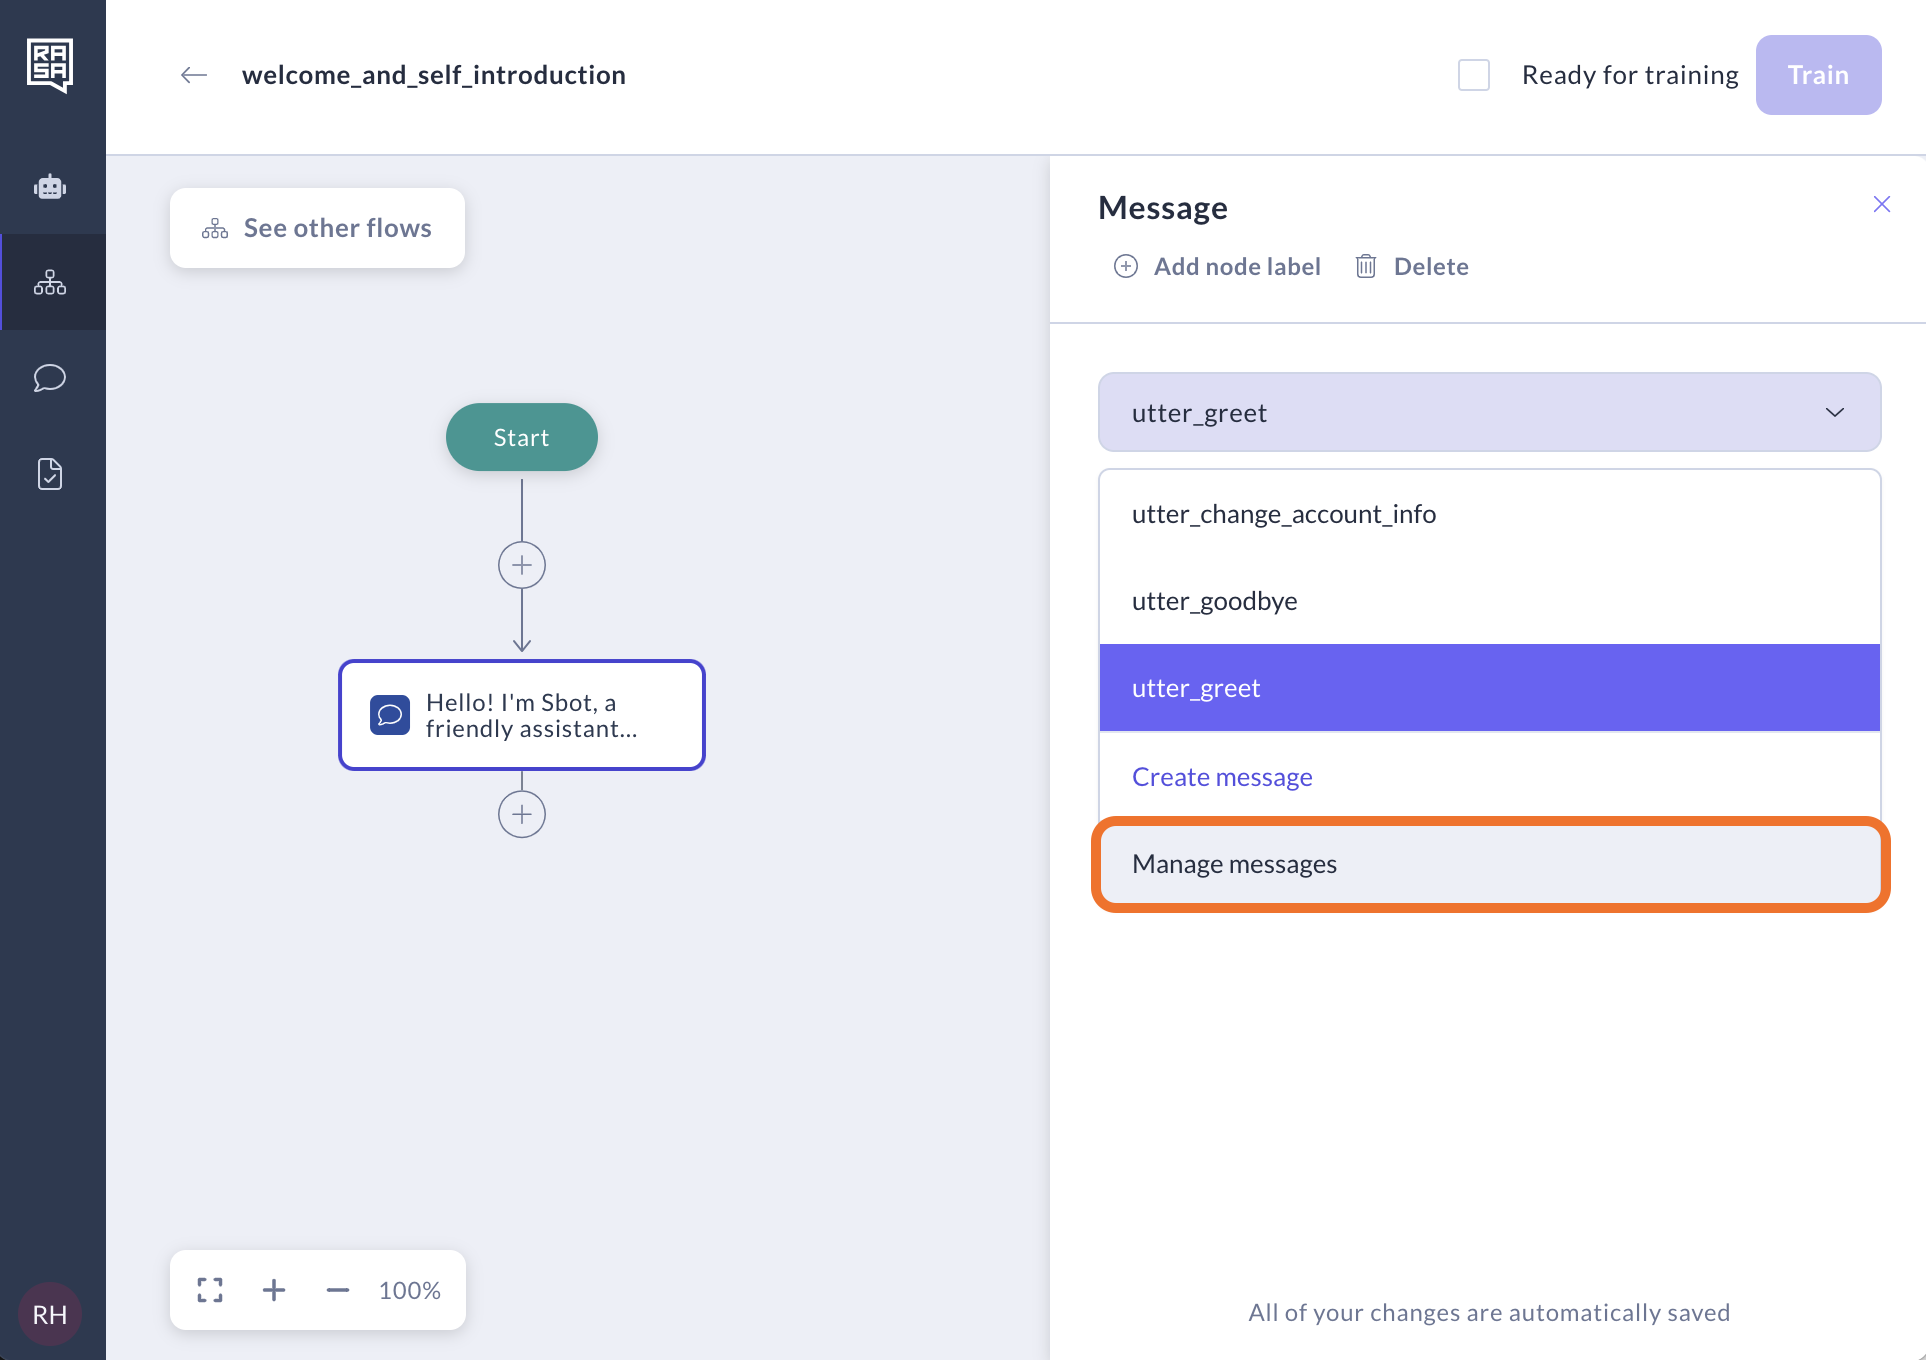
Click "Select message" and choose "Create message" from the list.
In the modal, enter the message name starting with "utter_" and add the message text in free form.
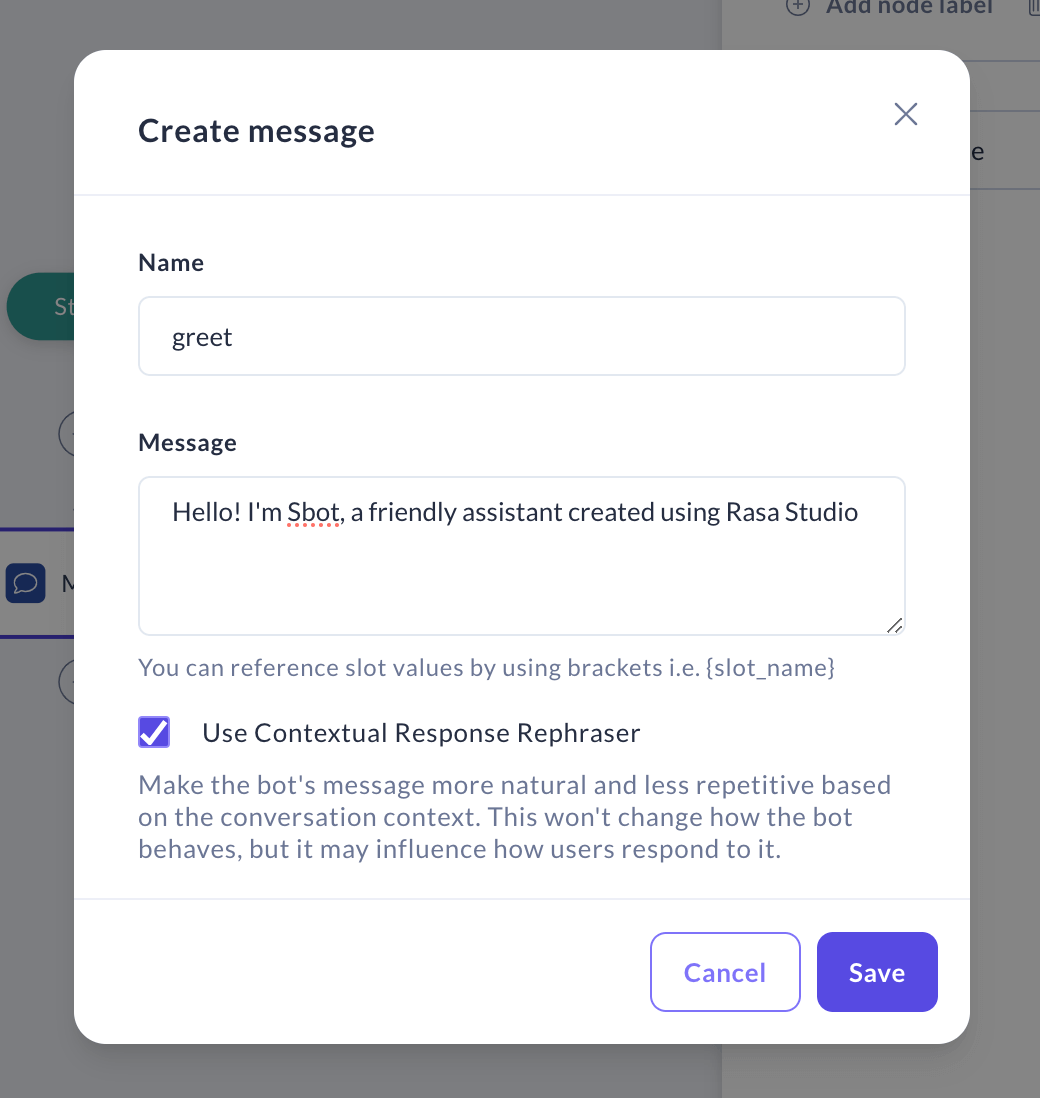
The "Use Contextual Response Rephraser" option is enabled by default. This feature enables the assistant to rephrase its responses by prompting an LLM, based on the conversation's context. It helps make the assistant's responses feel more organic and conversational.

If you prefer full control over responses, you can manually add message variations. Simply uncheck the checkbox and hit the "Add variation" button.
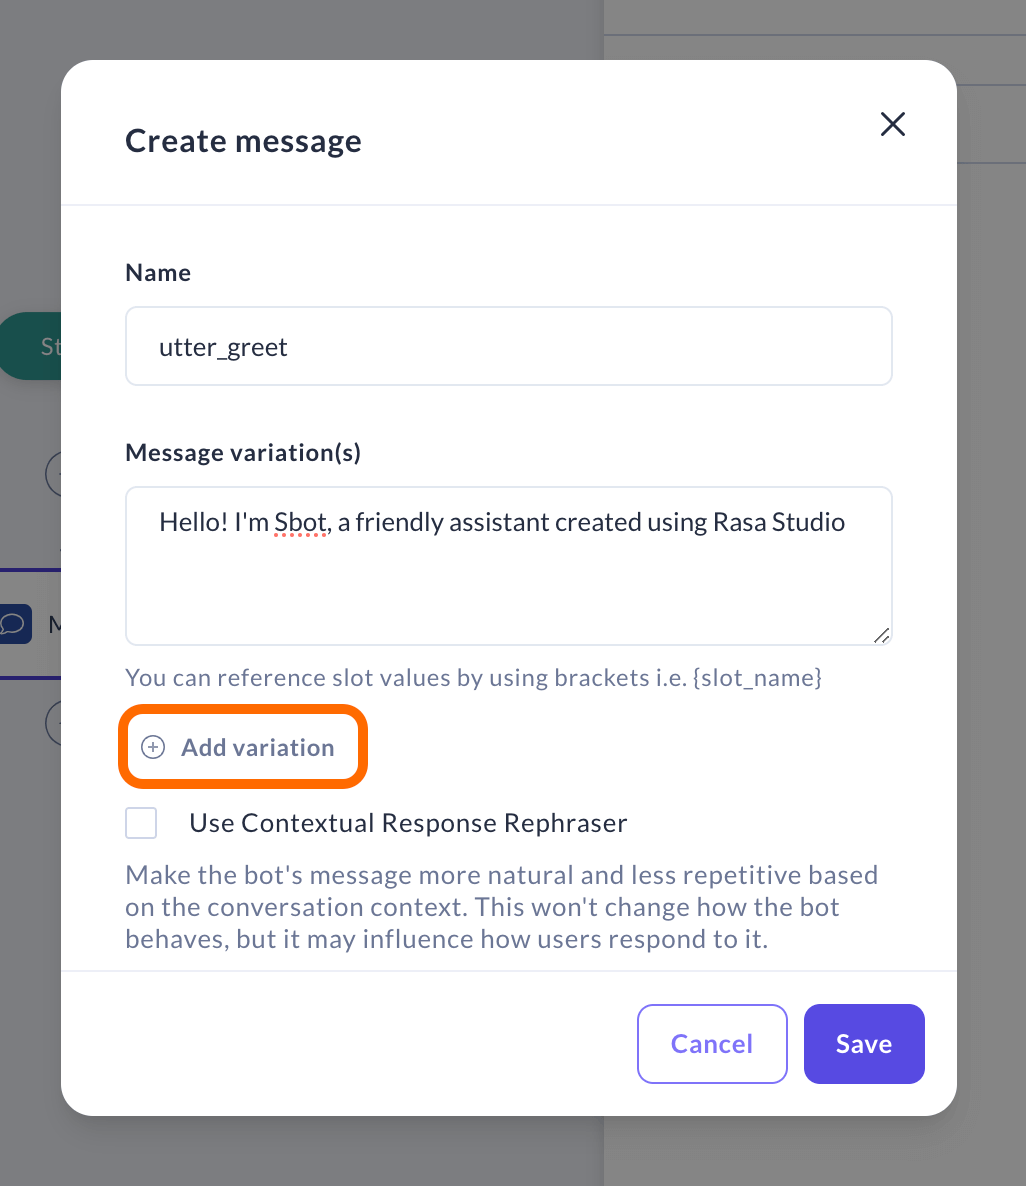
Add as many variations as you'd like, then click "Save".

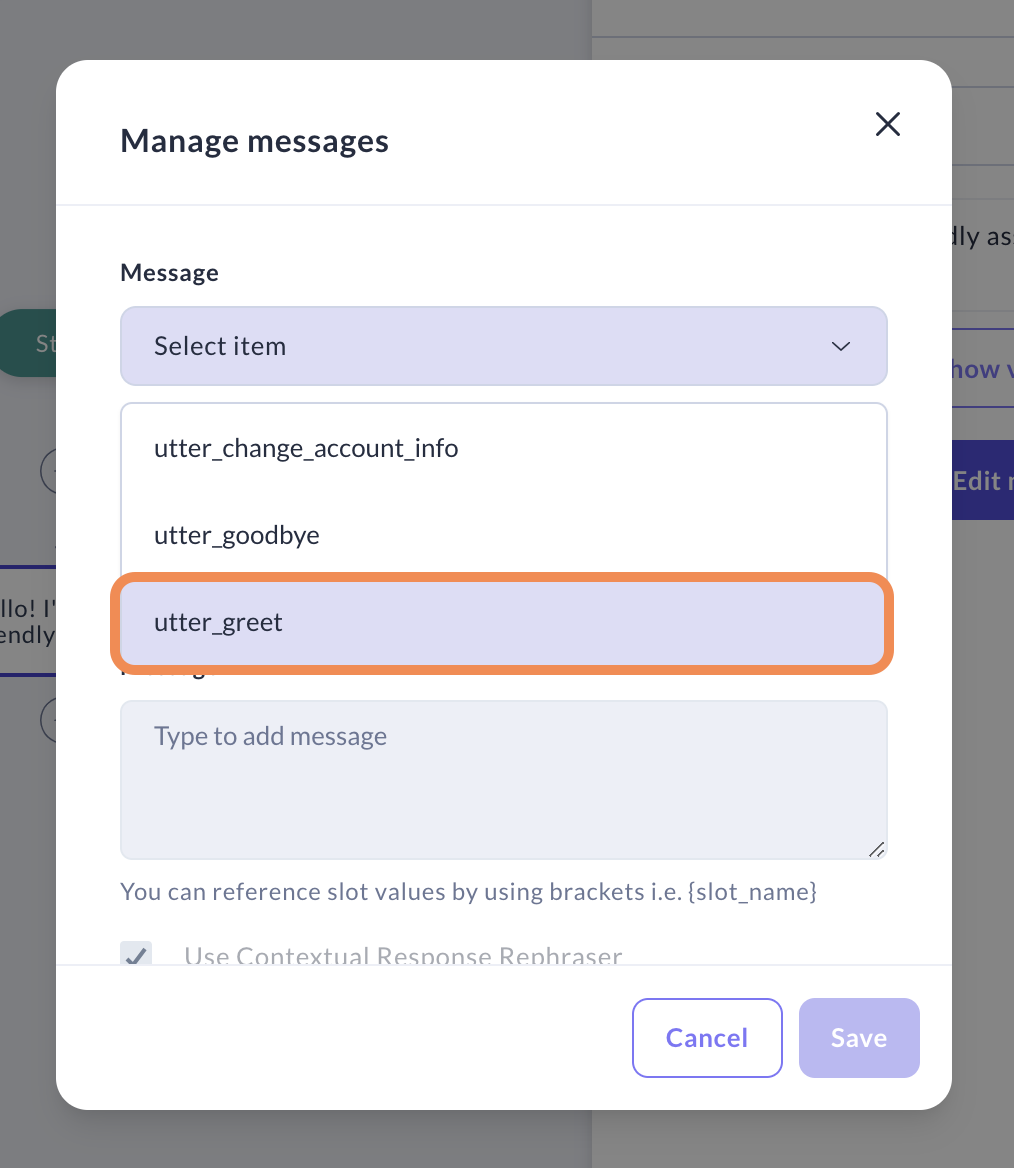
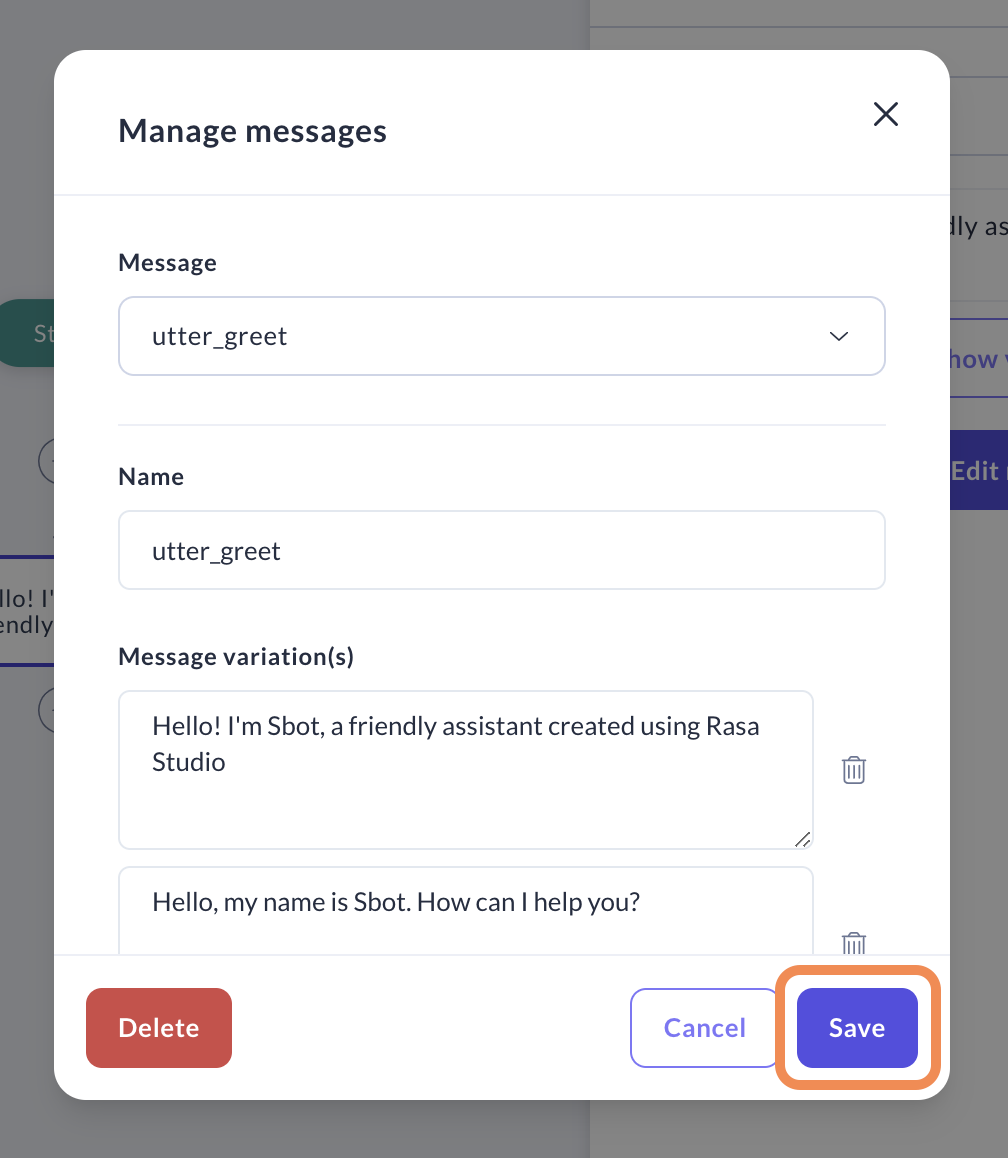
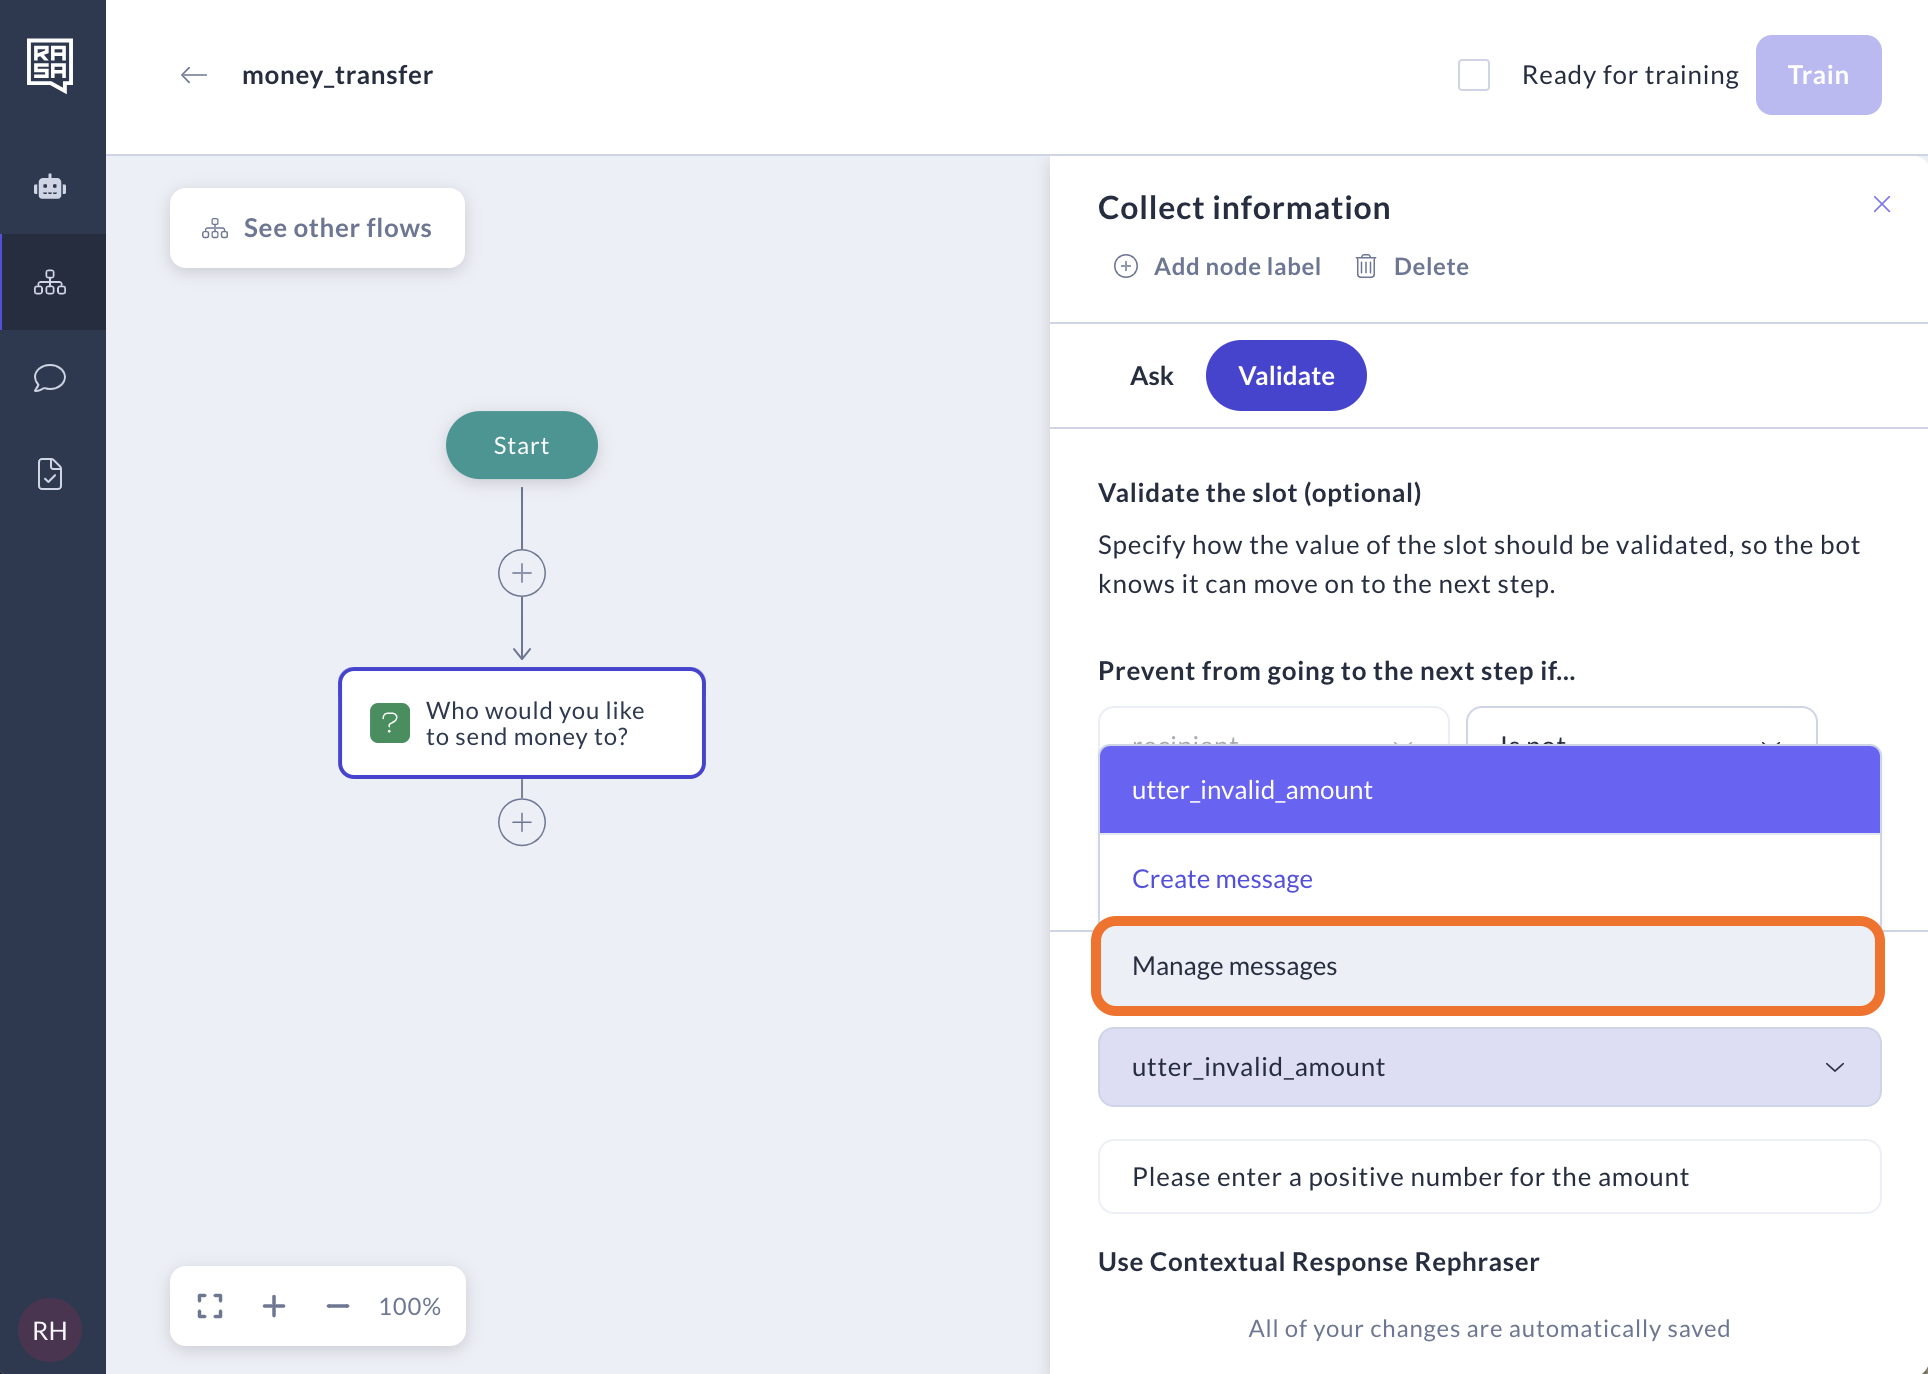
You can edit or delete previously created messages by clicking on the drop-down menu and choosing the "Manage messages" option.
Referencing slot values in a reply message
This feature allows you to leverage the information you have about the user (such as their name or age), or to confirm the input provided by the user, by incorporating a slot value in your message.
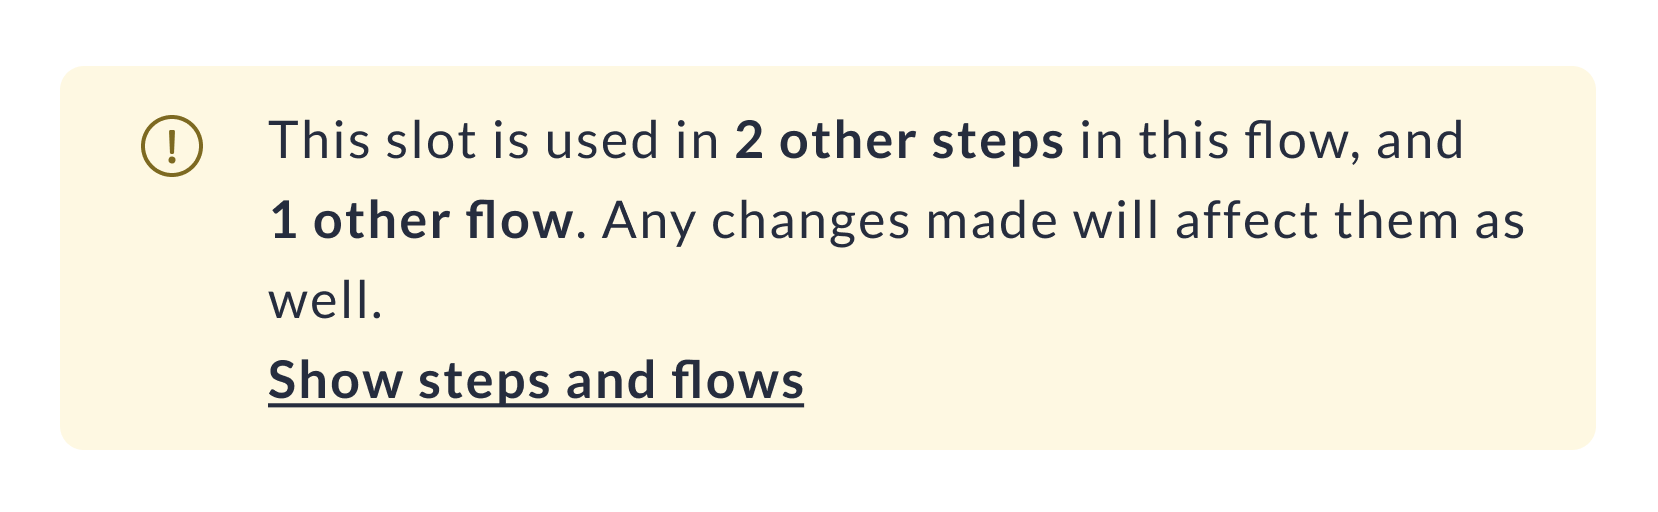
Identify the slot: First, pinpoint the specific slot you wish to reference. Understand the flows in which this slot is used and what factors can influence its values. If a slot is utilized in multiple flows, you will see this alert:
Insert the slot: In your message, enclose the slot name within curly brackets
{}at the position where you want the slot value to appear. For instance, if you have a slot named "user_name" and you wish to greet the user by their name, your message might look as follows:Hello, {user_name}! How can I assist you today?Test and improve: After executing the training, navigate to Try Your Assistant page to evaluate the assistant's message. In the assistant’s response, the slot value should dynamically substitute the placeholder with the actual value stored in the "user_name" slot. For example, if the user's name is "John," the message would appear as "Hello, John! How can I assist you today?
Collect Information
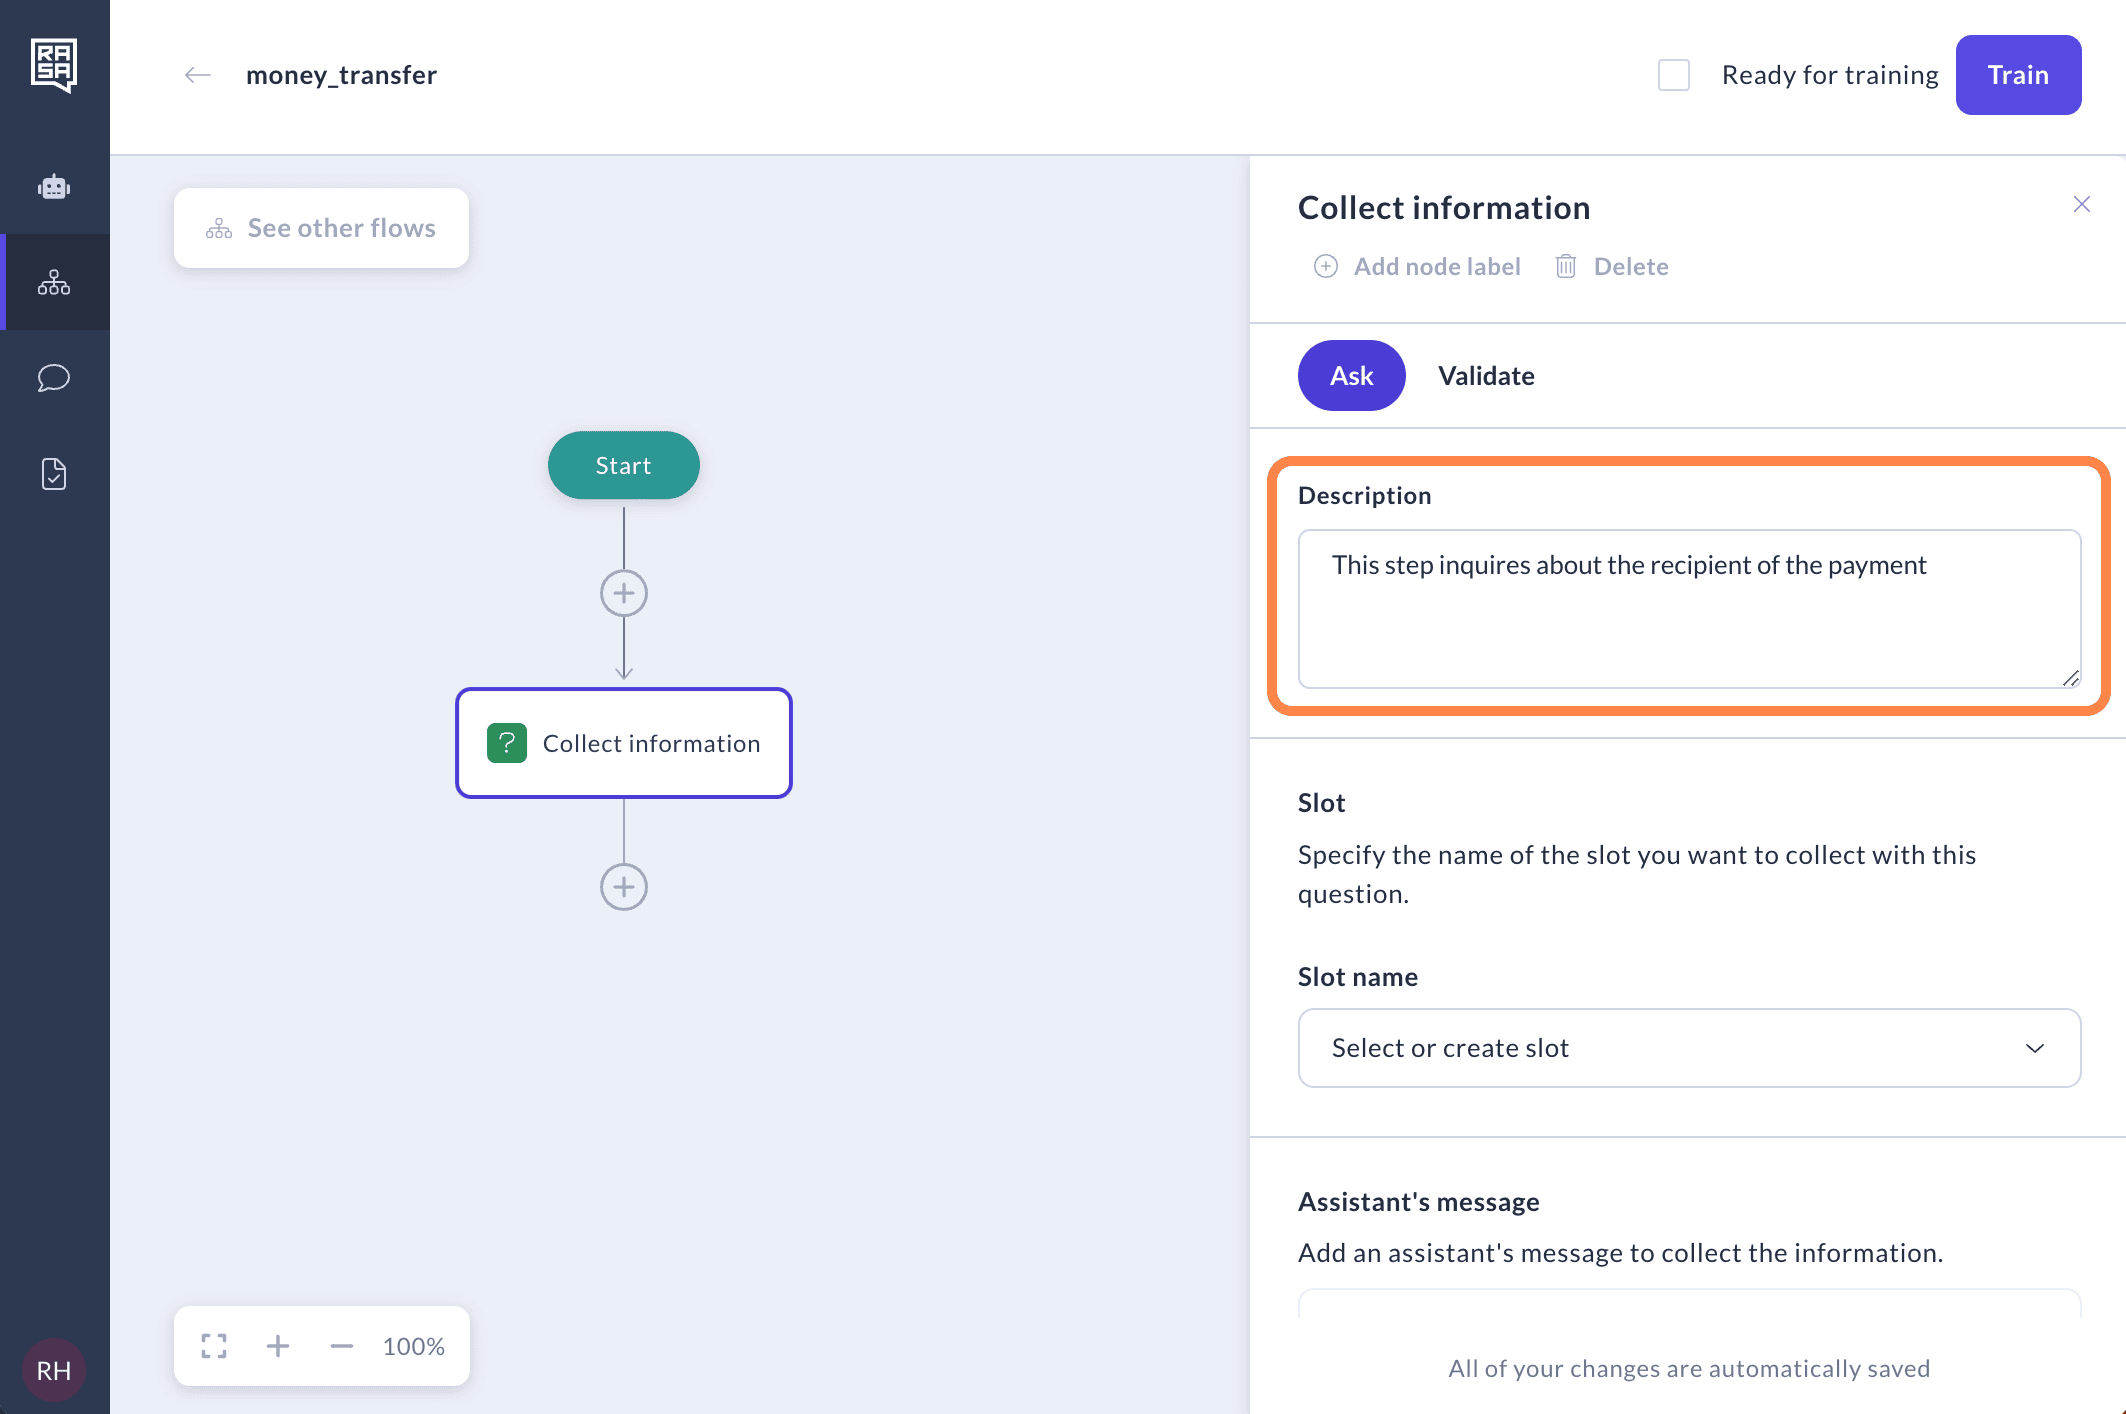
The Collect Information step lets your assistant pose a question, usually to obtain information from the user. For example, if a user wants to make a money transfer, the assistant might ask for the recipient. This will populate the "recipient" memory slot making it available to be used in the next steps and future conversation.

Ask
Once you've set up the Collect Information step, instruct the assistant what information it should collect in the "Description" field. It’s advised that you standardise these prompts format across your assistant to optimise its performance.
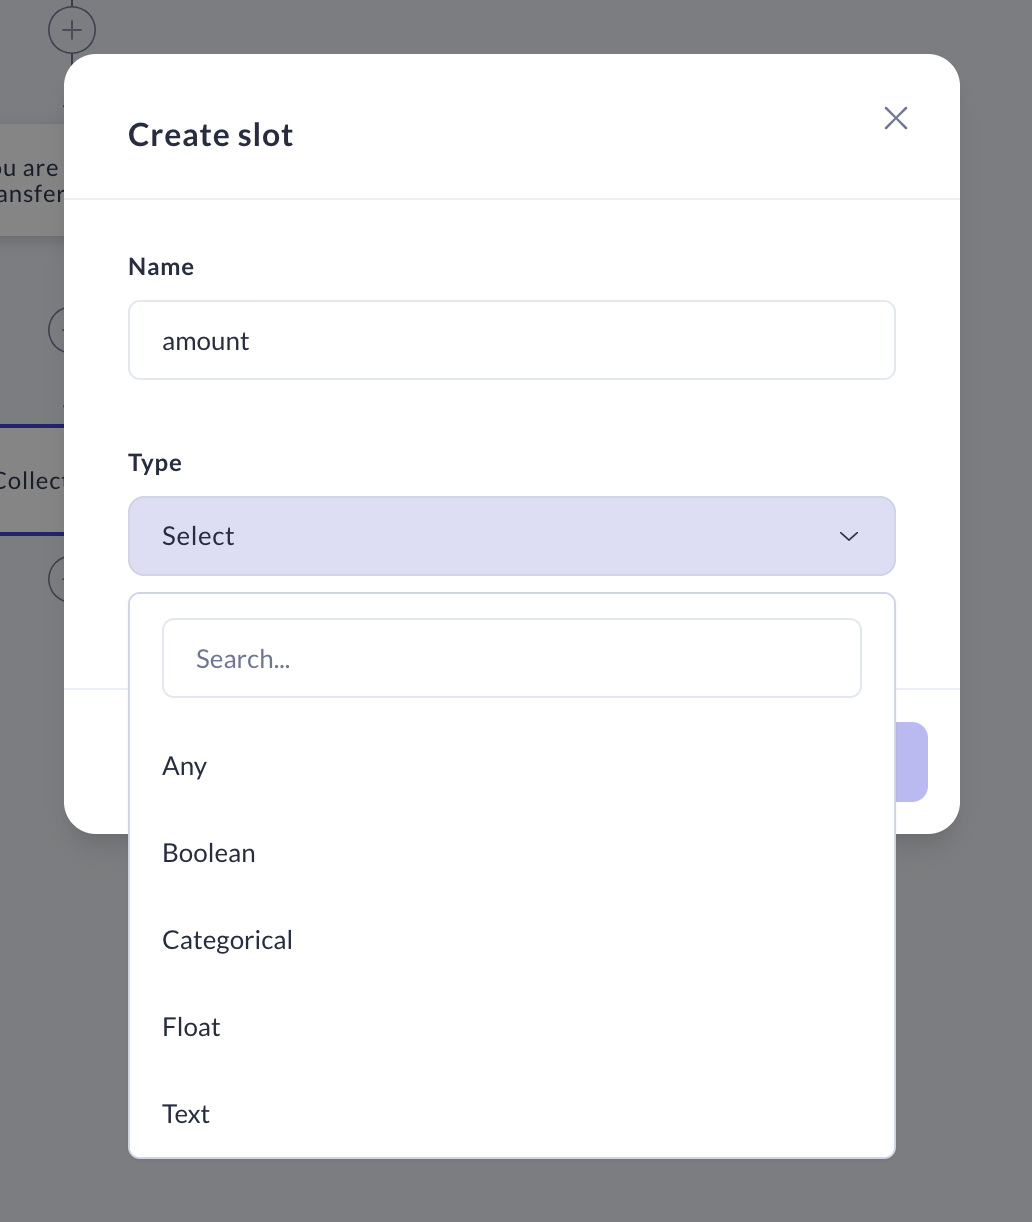
You'll also need to define what kind of information the assistant should collect from the user's reply. To do this, create a new slot.

Name your slot descriptively to indicate the information you aim to gather. It’s advisable to distinguish between slots used in specific flows and slots used everywhere so can you manage them easier. One way to do it is to use the flow name as prefix of the slot name if the slot is only meant to be used for that specific flow. Another way to is for global, universal slots, use prefix "global_". It’s also best to check if a slot already exists before creating a new one to avoid duplication. Choose the type of the slot with care, as changing the slot type may result in data loss and impact conditional logic.
Slot types
Text Slot A text slot is used to store textual information such as names of countries, cities, or personal names. It's designed to hold various types of alphanumeric characters, making it suitable for a wide range of textual data.
Boolean Slot A boolean slot is designed to store binary information, representing either a true or false value. It's commonly used for yes/no questions or scenarios where only two opposing options exist, like true/false statements.
Categorical Slot A categorical slot is used to store data that can take on one of a specific set of values. It's well-suited for scenarios where data can be classified into distinct categories, like labels such as low, medium, or high to describe levels of something.
Float Slot A float slot is employed for storing numerical values that can have decimal points. It's suitable for handling continuous numeric data, such as age, temperature, or monetary amounts involving fractions.
Any Slot An any slot is capable of storing a wide variety of data types without any specific constraints. It's a flexible option for cases where the data type might vary or is not well-defined in advance, allowing you to store arbitrary values with diverse characteristics.
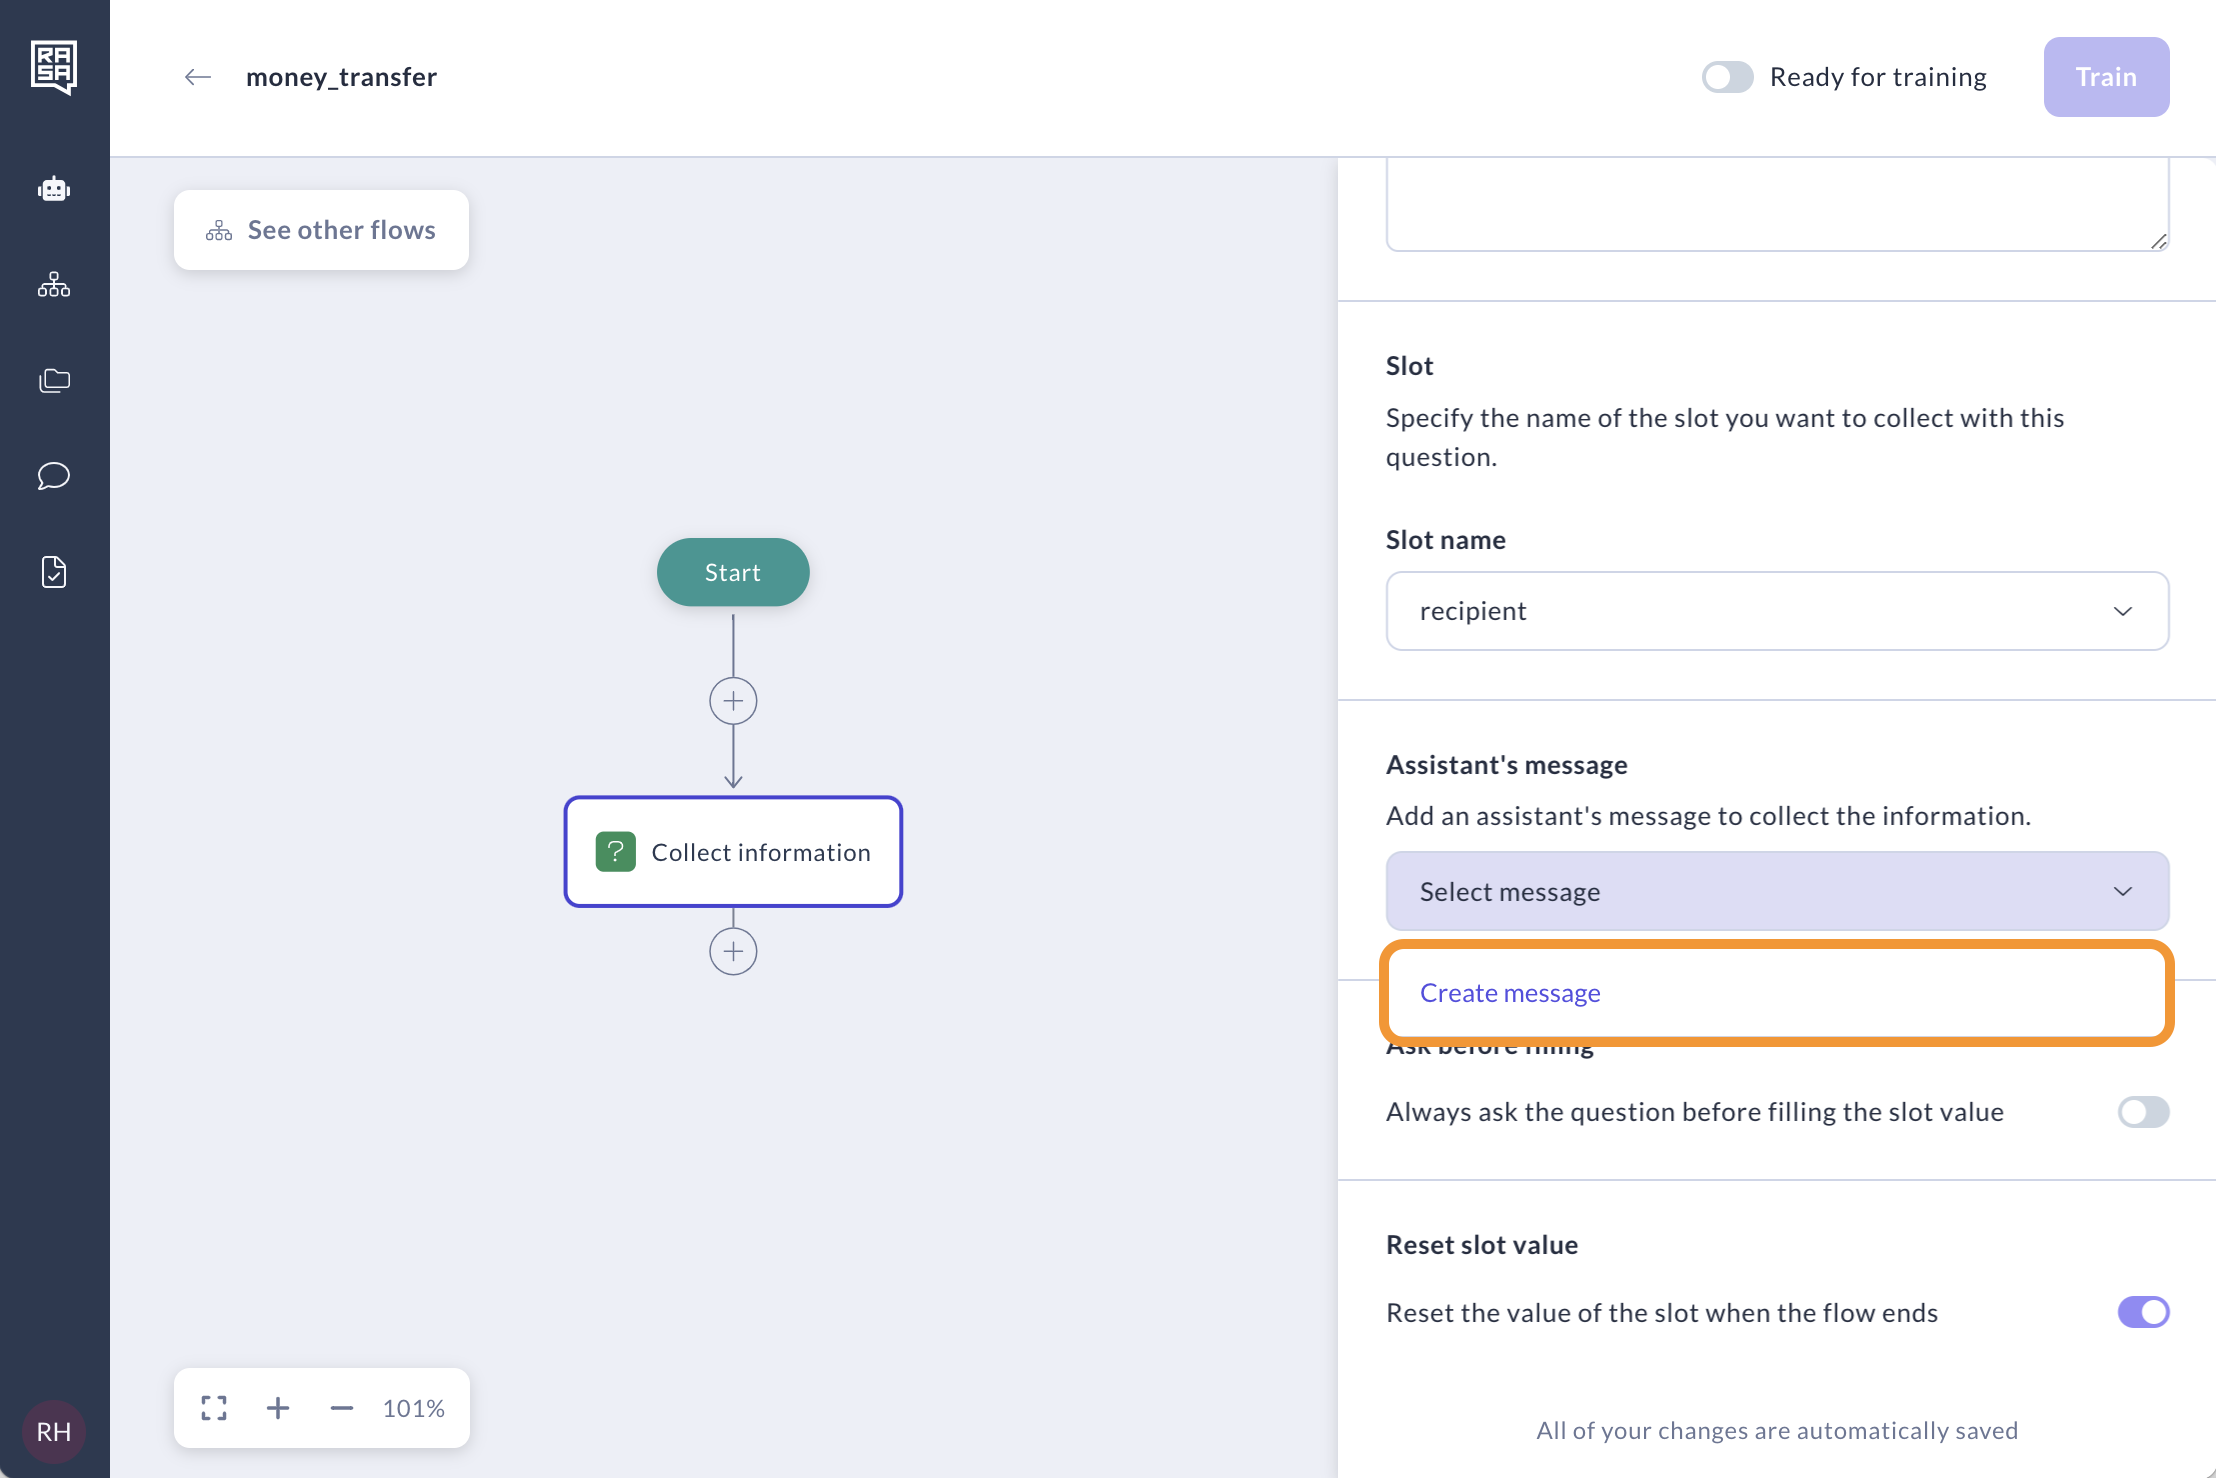
Finally, generate a message that the assistant will use to collect this information from the user. Click "Create message" to do so.
Enter the message name and specify the content of the message. Note: It’s recommended to match the slot name with the message name like
utter_ask_{slot name}, i.e if slot name isaccount_typethen the message name should beutter_ask_account_type. However, if you use the same information in different questions or different flows, it’s also ok that you can’t match the slot name with every message name. Just need to note that you are aware of where the slot is used and understand when it can be filled/updated.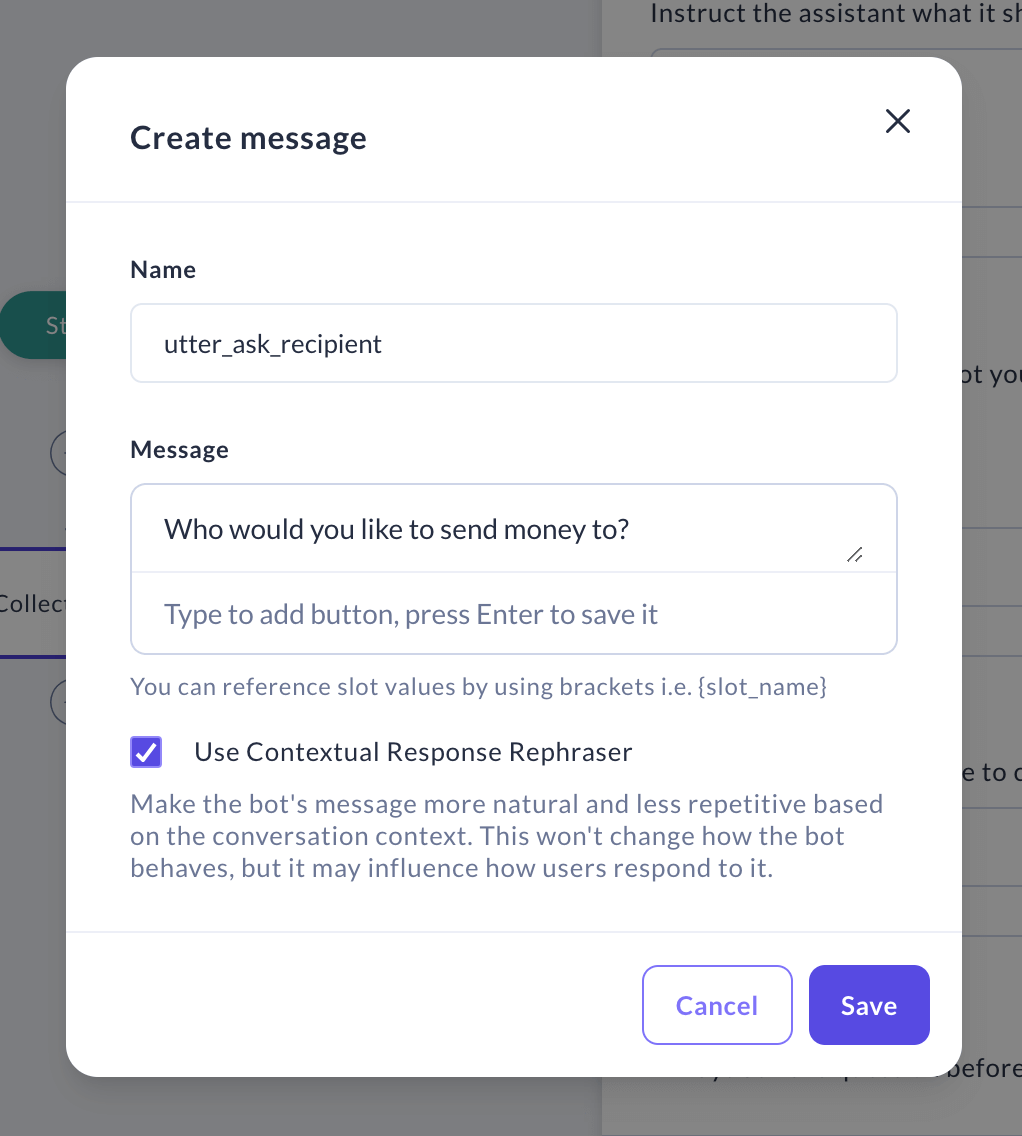
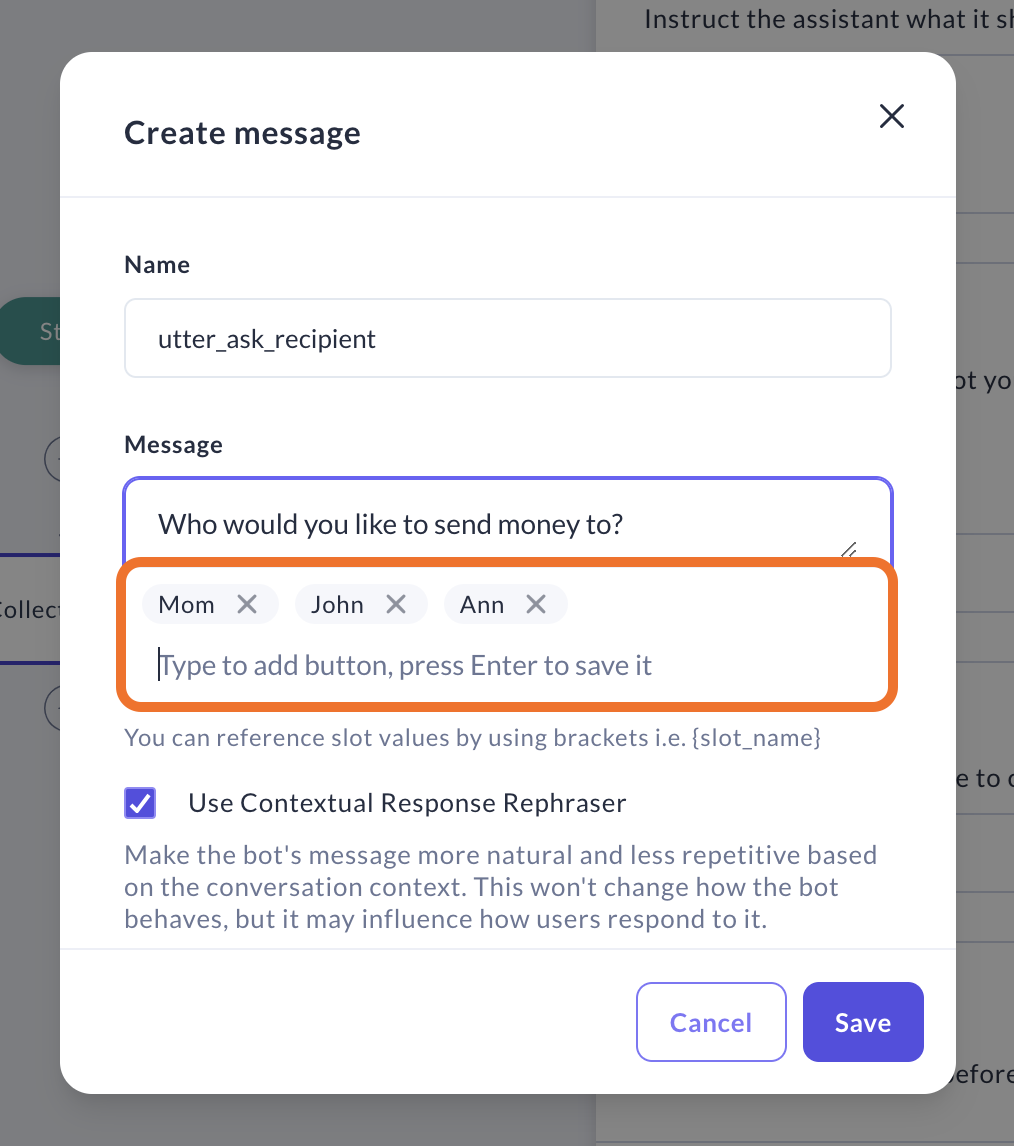
Optionally, you can add buttons to allow the user to select an answer more quickly and present user with structured choices. This is particularly helpful for complex tasks or when the assistant needs specific information to proceed.
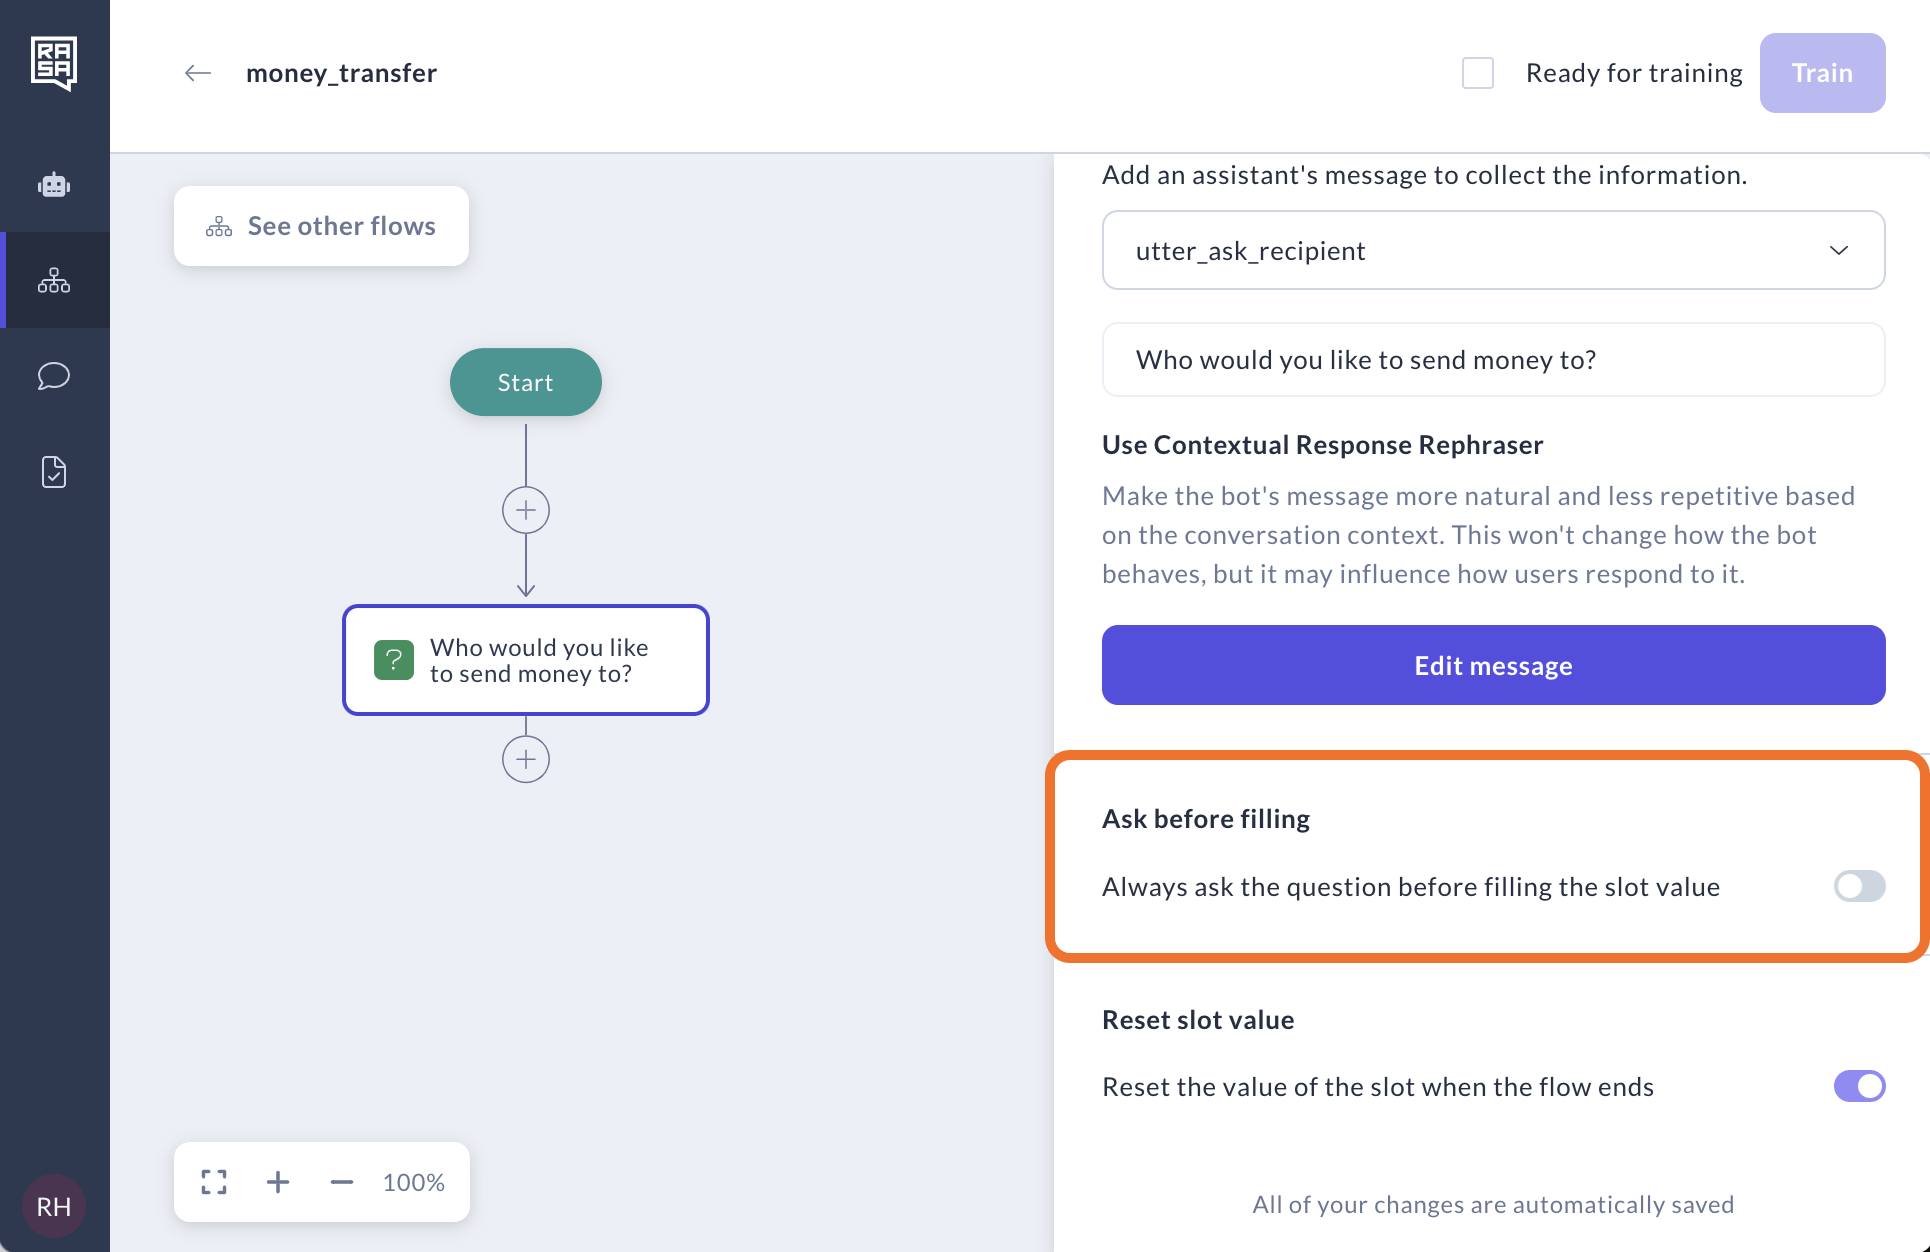
By default, a "Collect Information" step can be skipped if the slot is already filled. For instance, if a user says "I want to transfer money to John," the assistant will already know the recipient's name and won't need to ask this question to fill the slot. If you prefer the assistant to always ask the question, regardless of whether the slot is already filled, enable the "Ask before filling" option.
By default, the "Reset slot value" option is turned on. This means the value of the slot will be reset after the flow reaches one of its final steps. When a slot is reset, its value is cleared, and the corresponding question will be asked again the next time it's triggered. This feature is particularly useful for slots that usually have different values in separate sessions, such as
transfer_amount,recipient_name, ormood. If you disable this option, the slot value will remain once set, and the question will be skipped if 'Ask before filling' is turned off.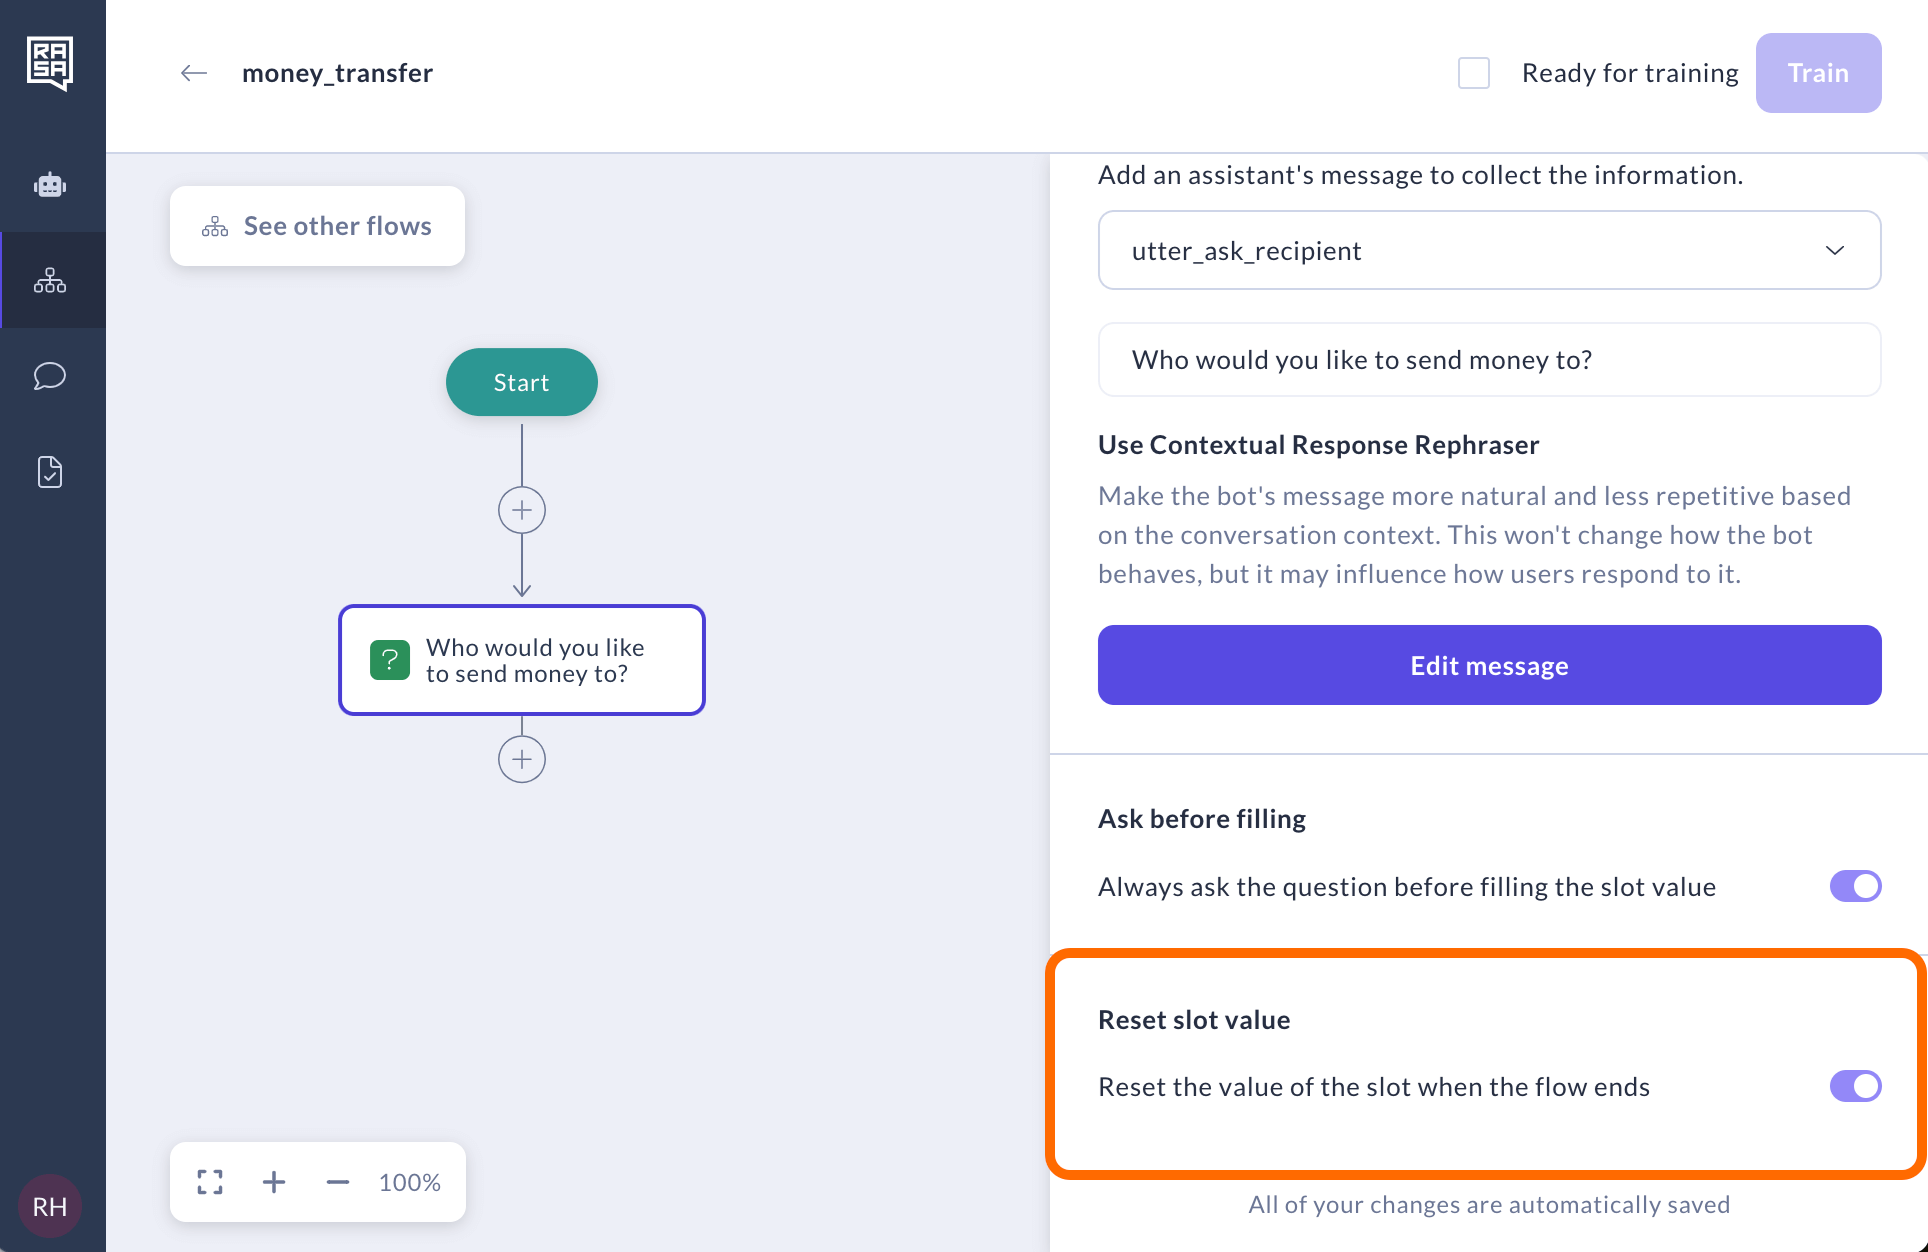
Validate
This is optional but sometimes you may want to validate a slot to ensure the user has provided the correct information before proceeding to the next step in the dialogue.
To do this, go to the Validate tab of Collect information step.
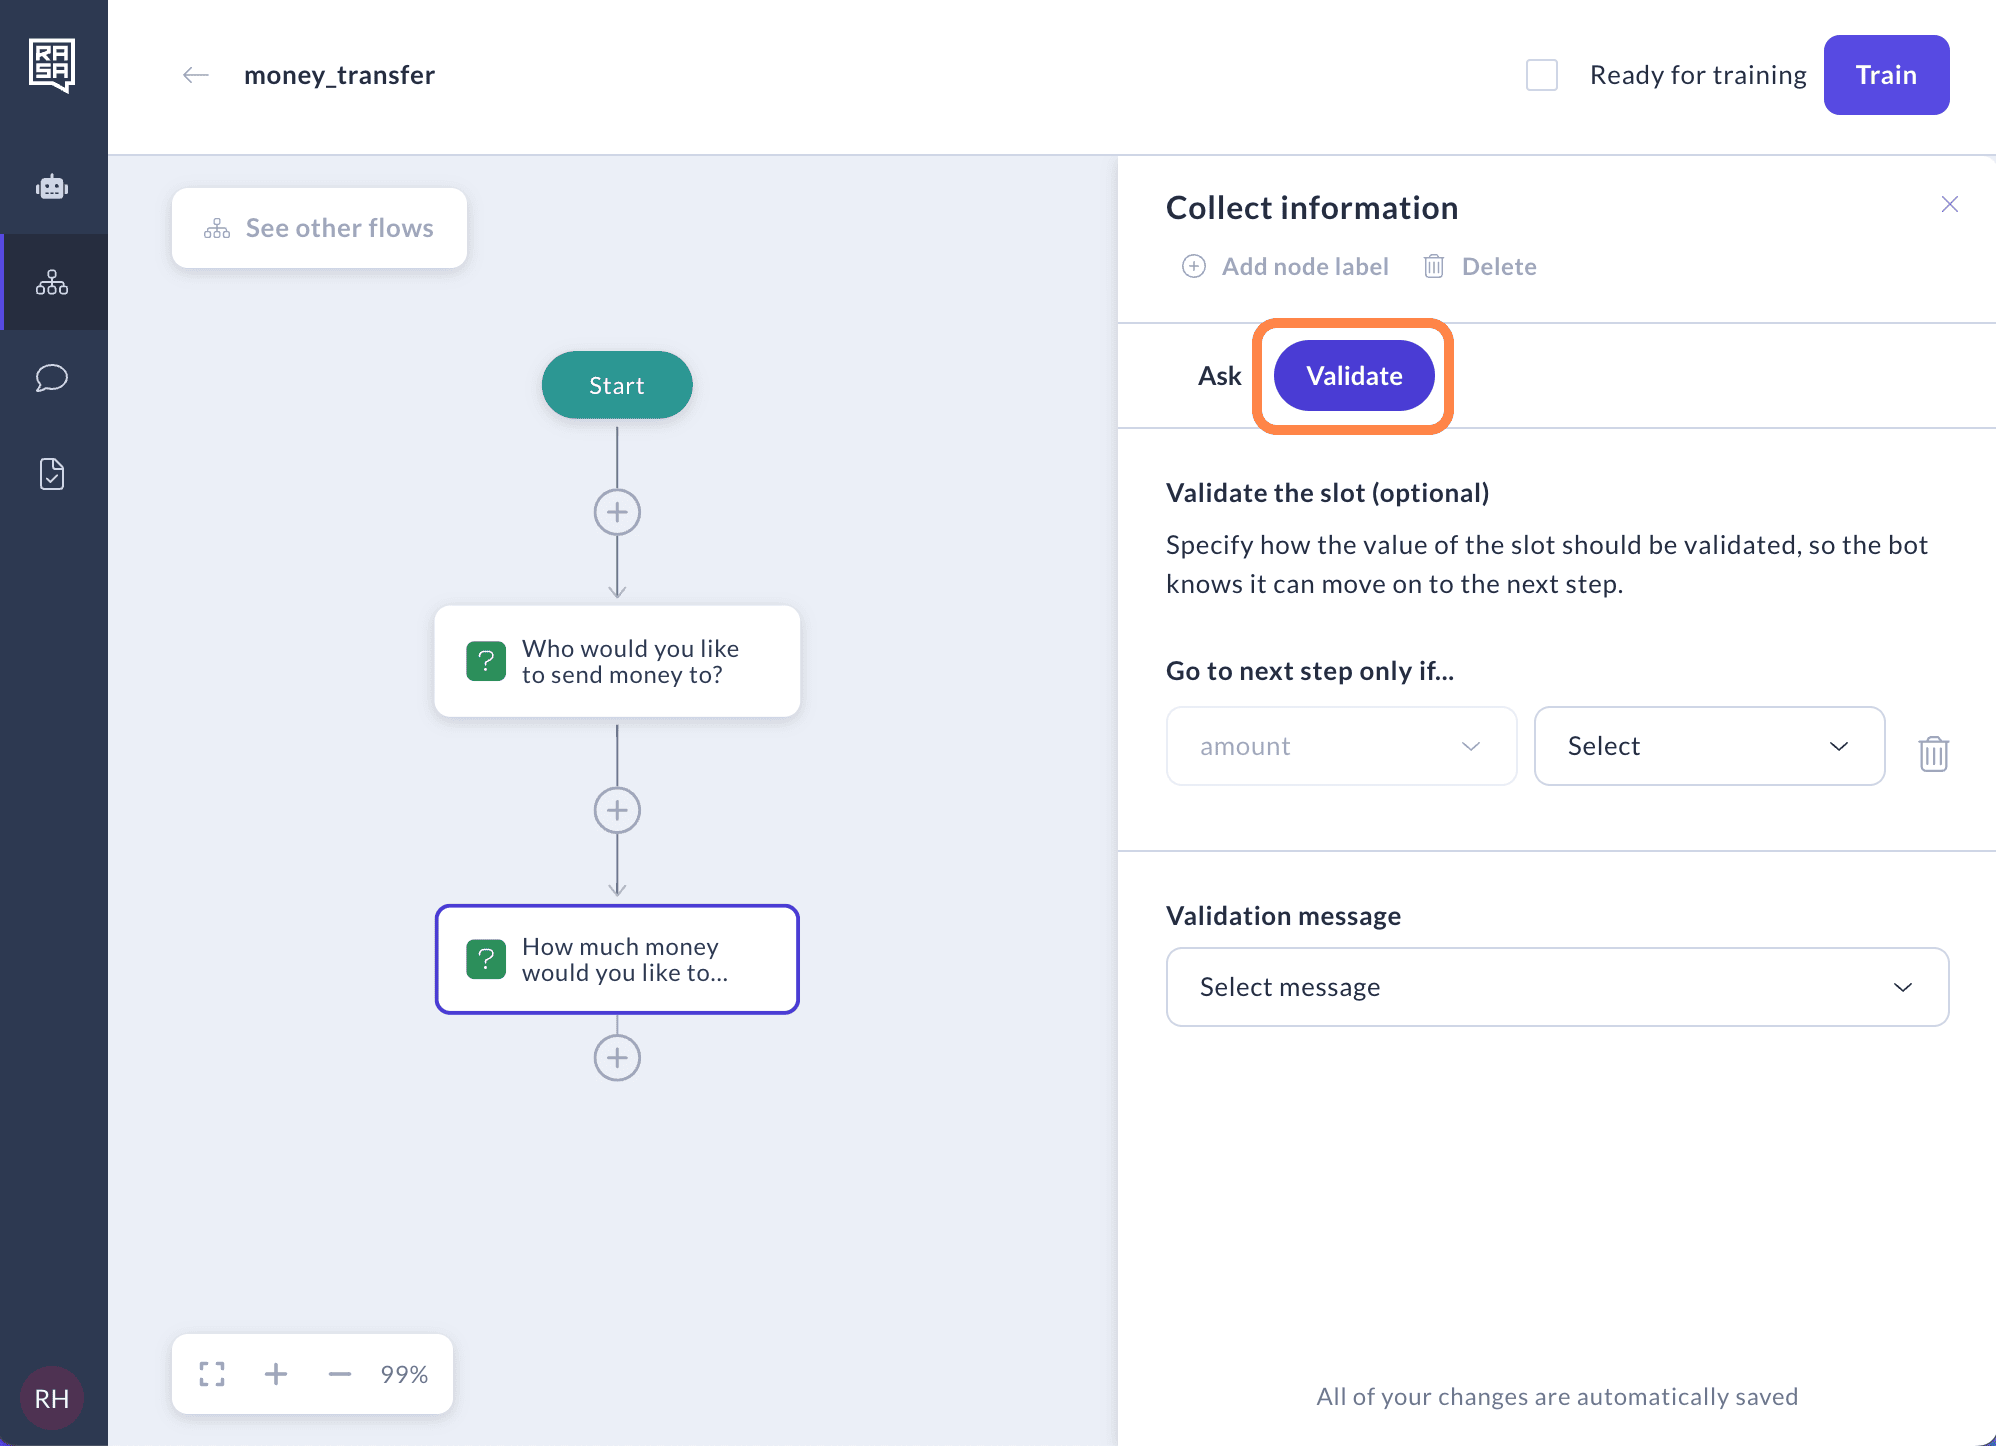
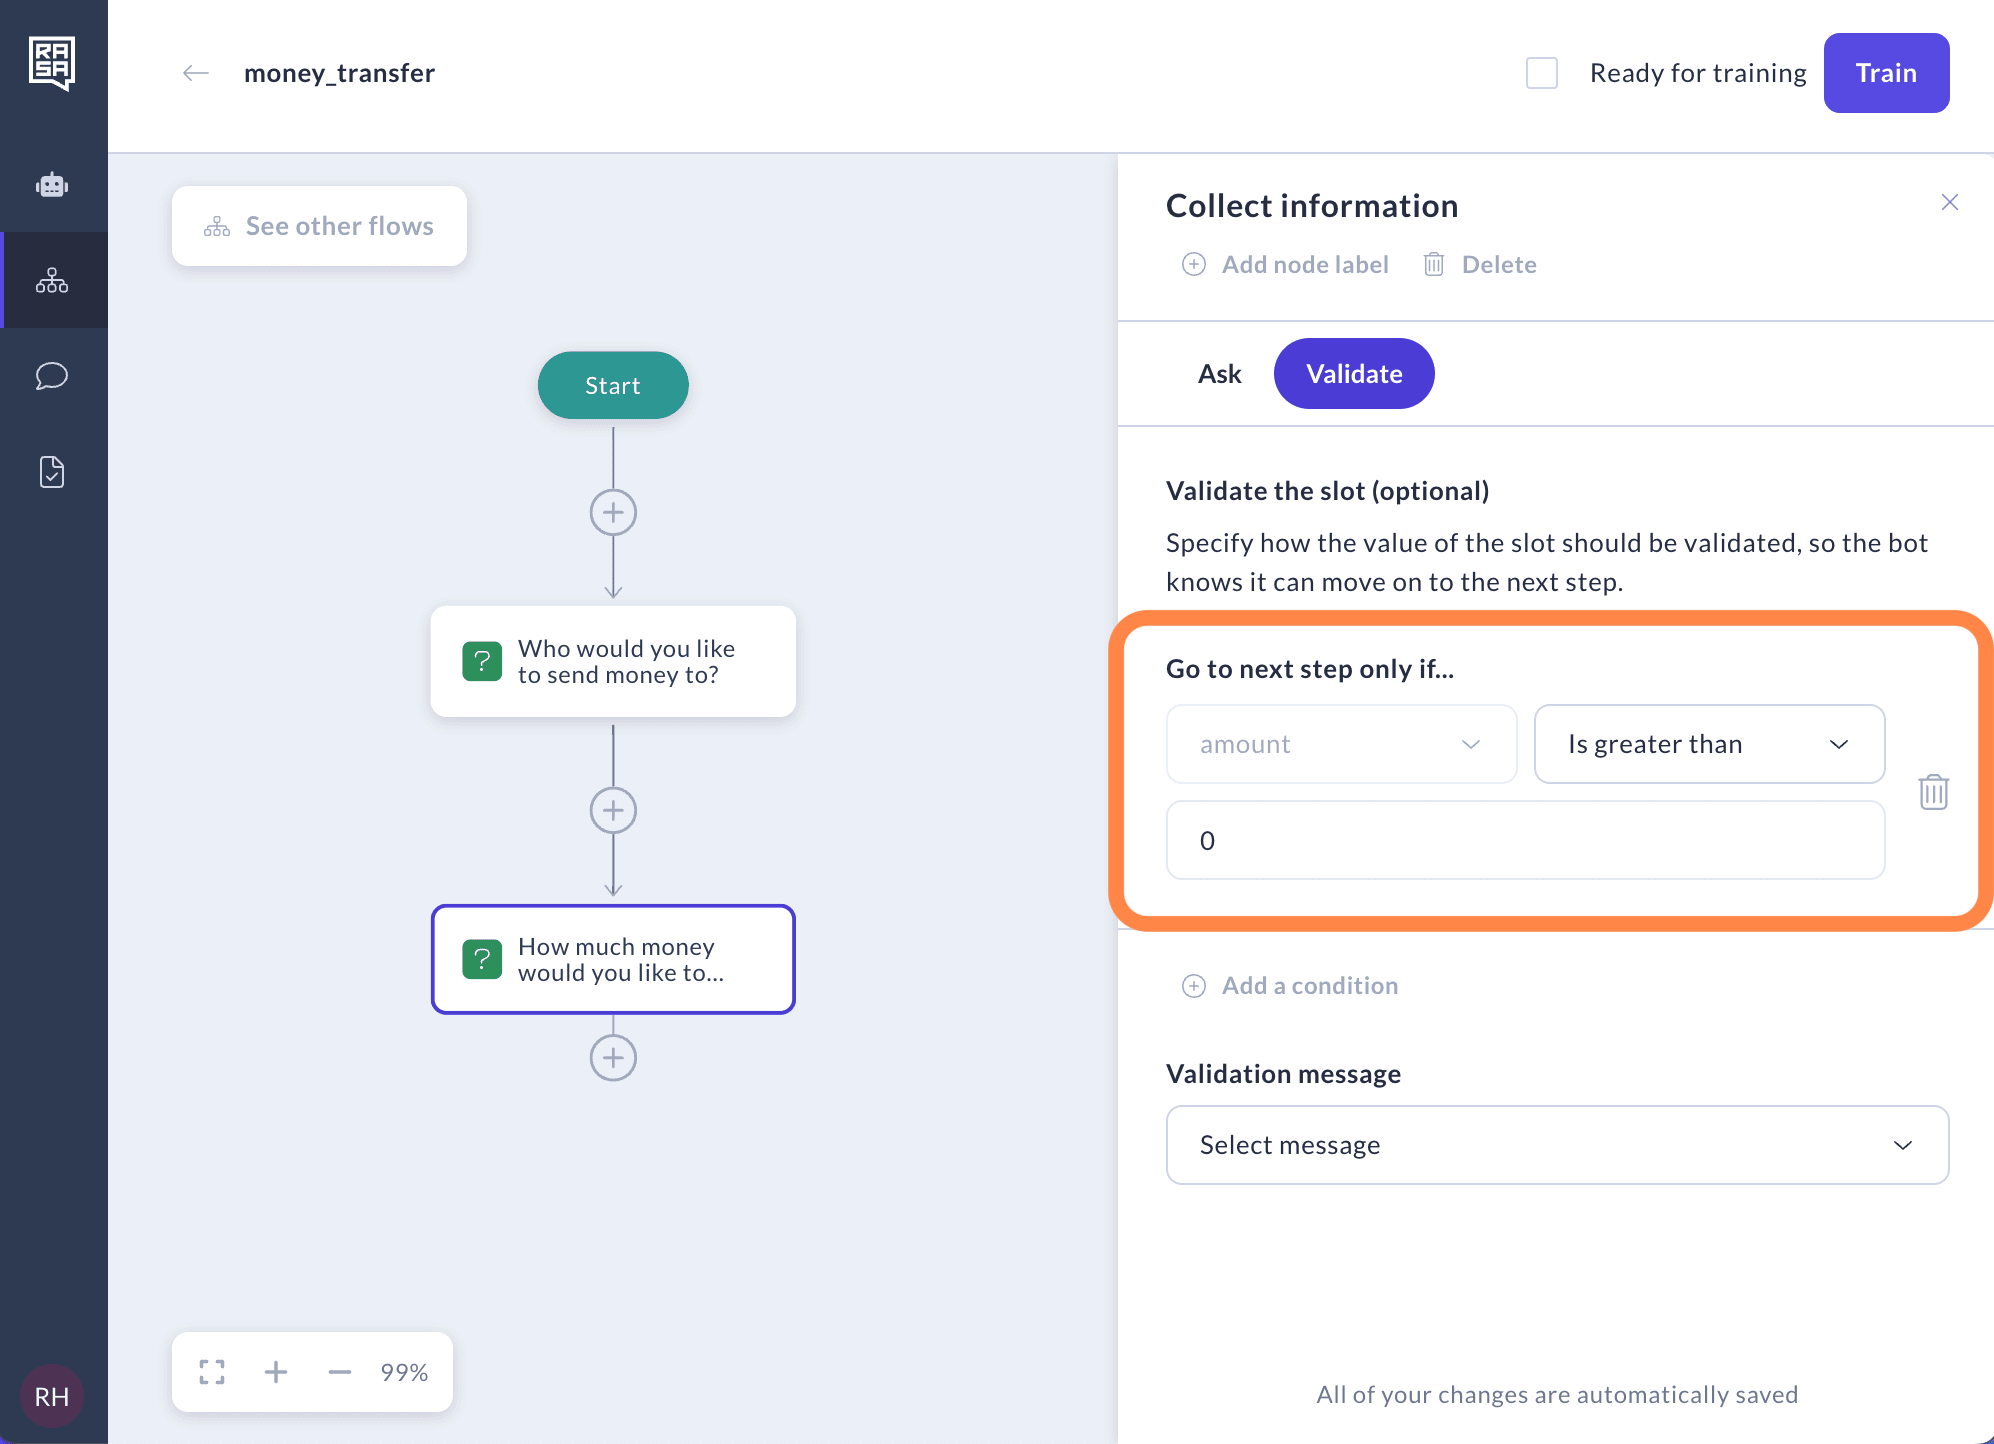
Prevent user from going to the next step if certain conditions are not met.
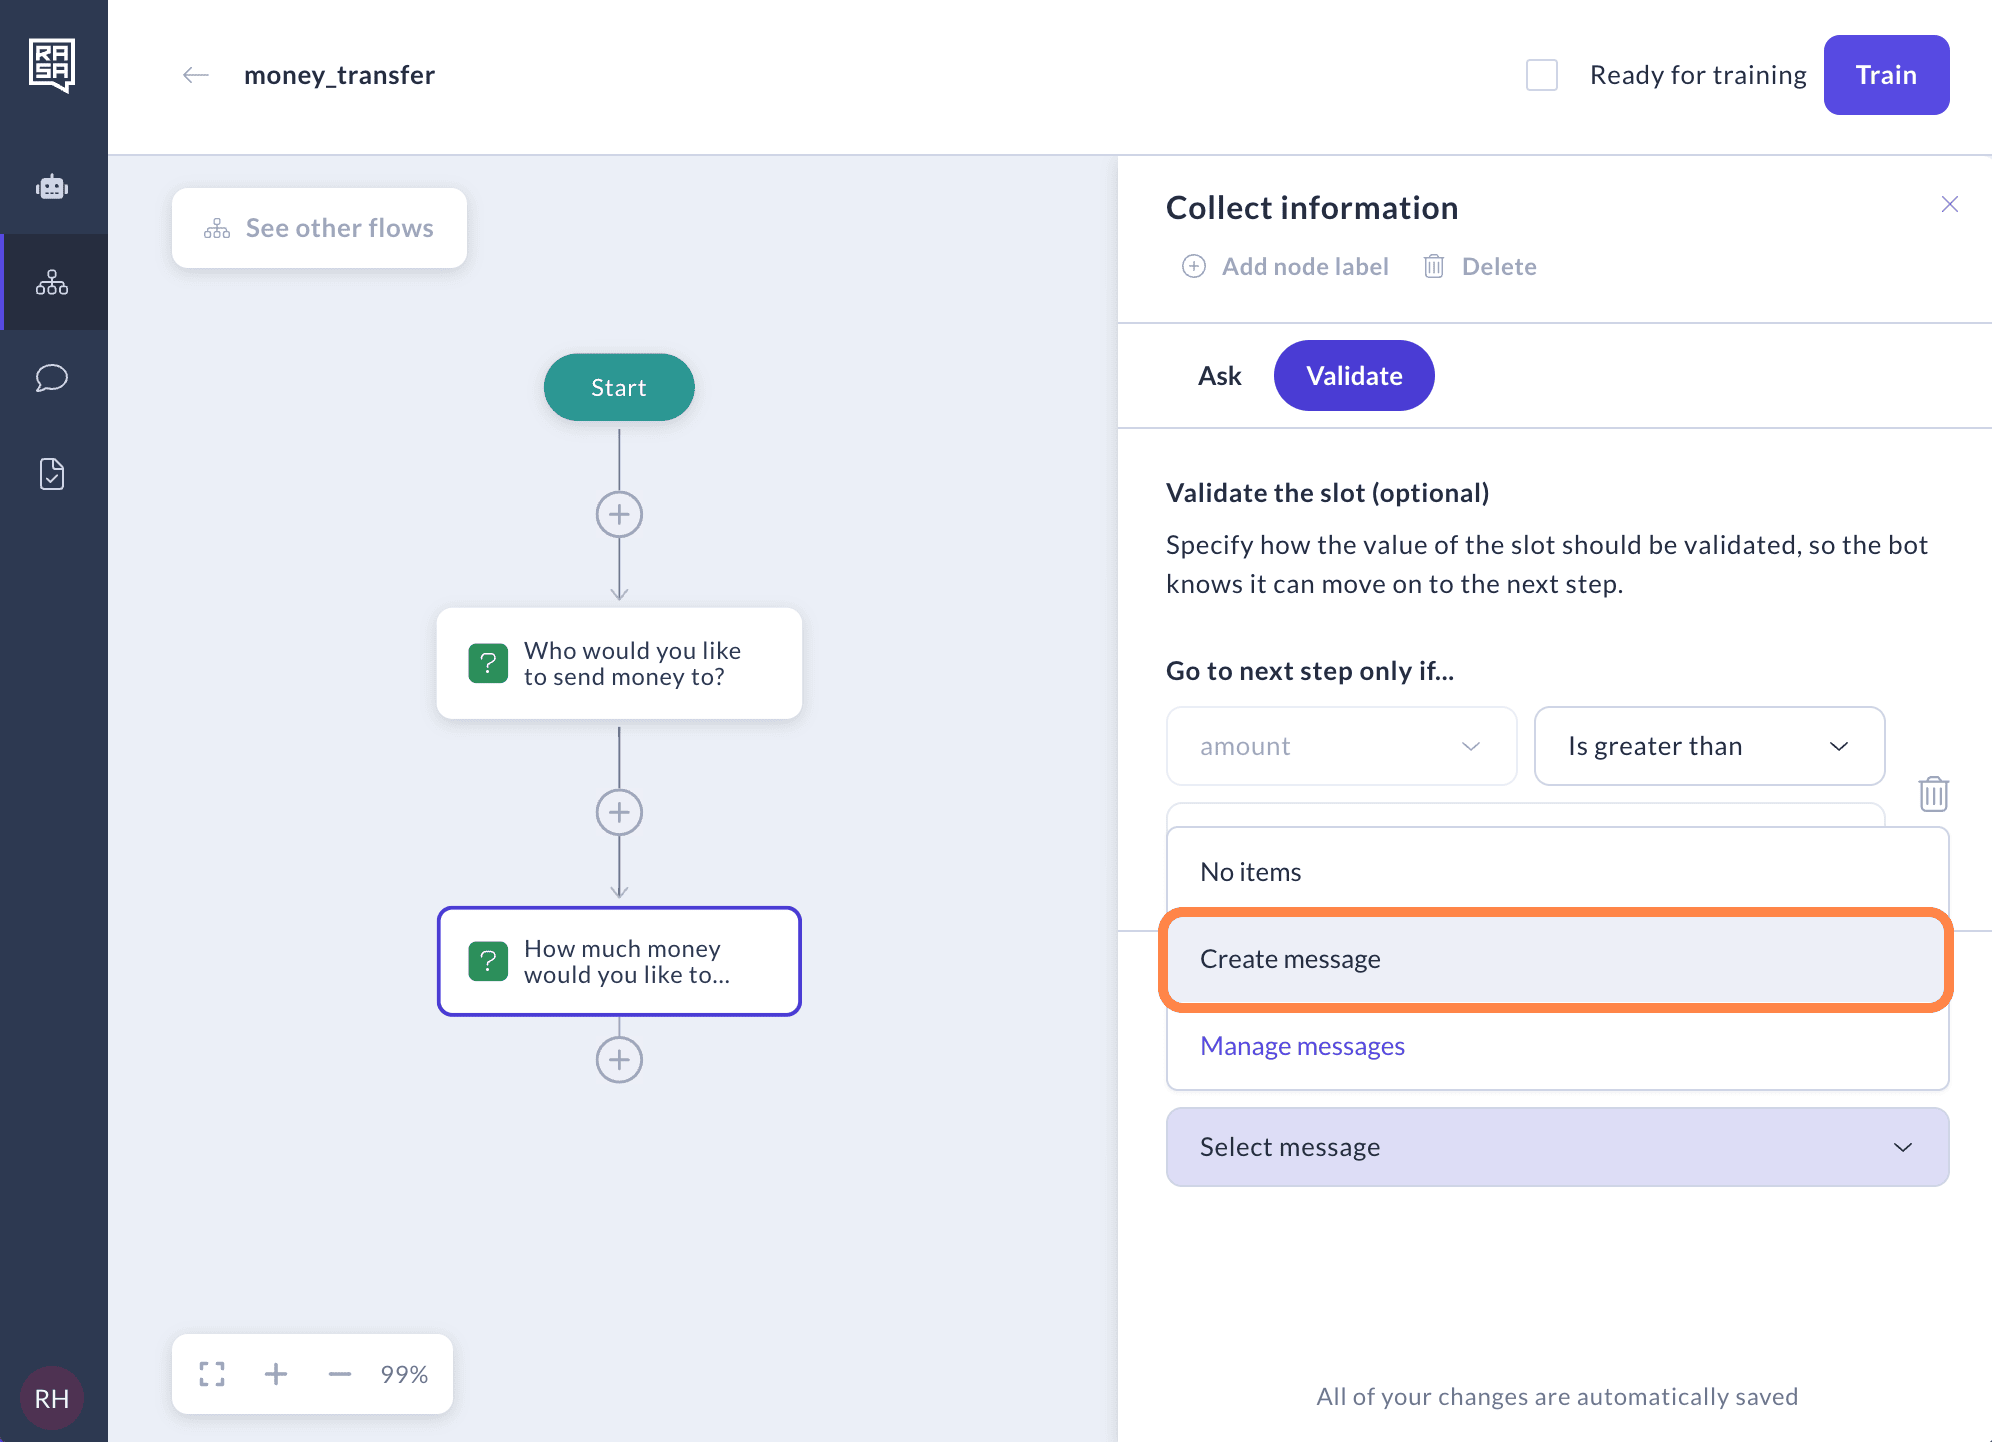
Select an existing validation message or click "Create validation message" to create a new validation message. If the user's answer deviates from these values, a validation message will be displayed to them.
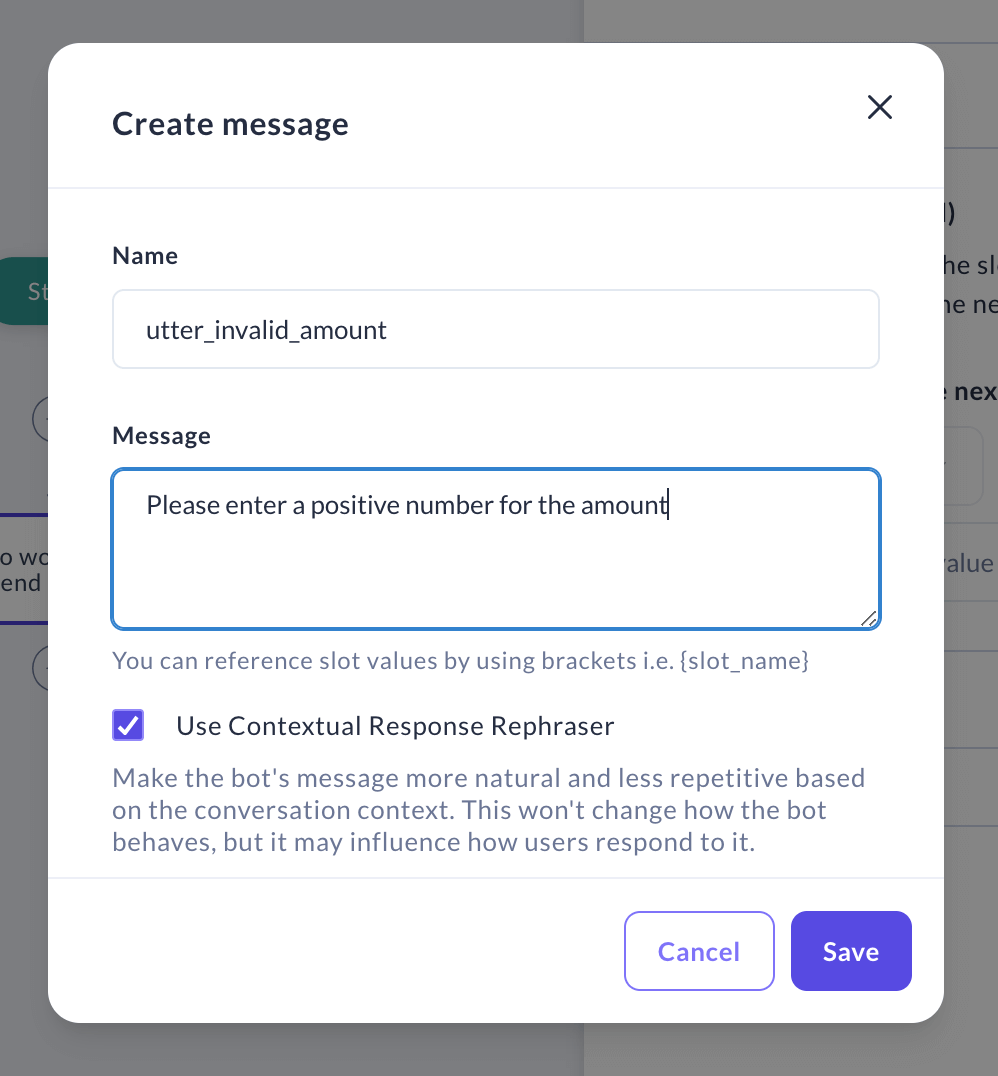
In the window that appears, specify the text for this message, and then click "Save."
You can edit or delete previously created validation messages by clicking on the drop-down menu and choosing the "Manage validation messages" option. The process is exactly the same as working with a regular message.
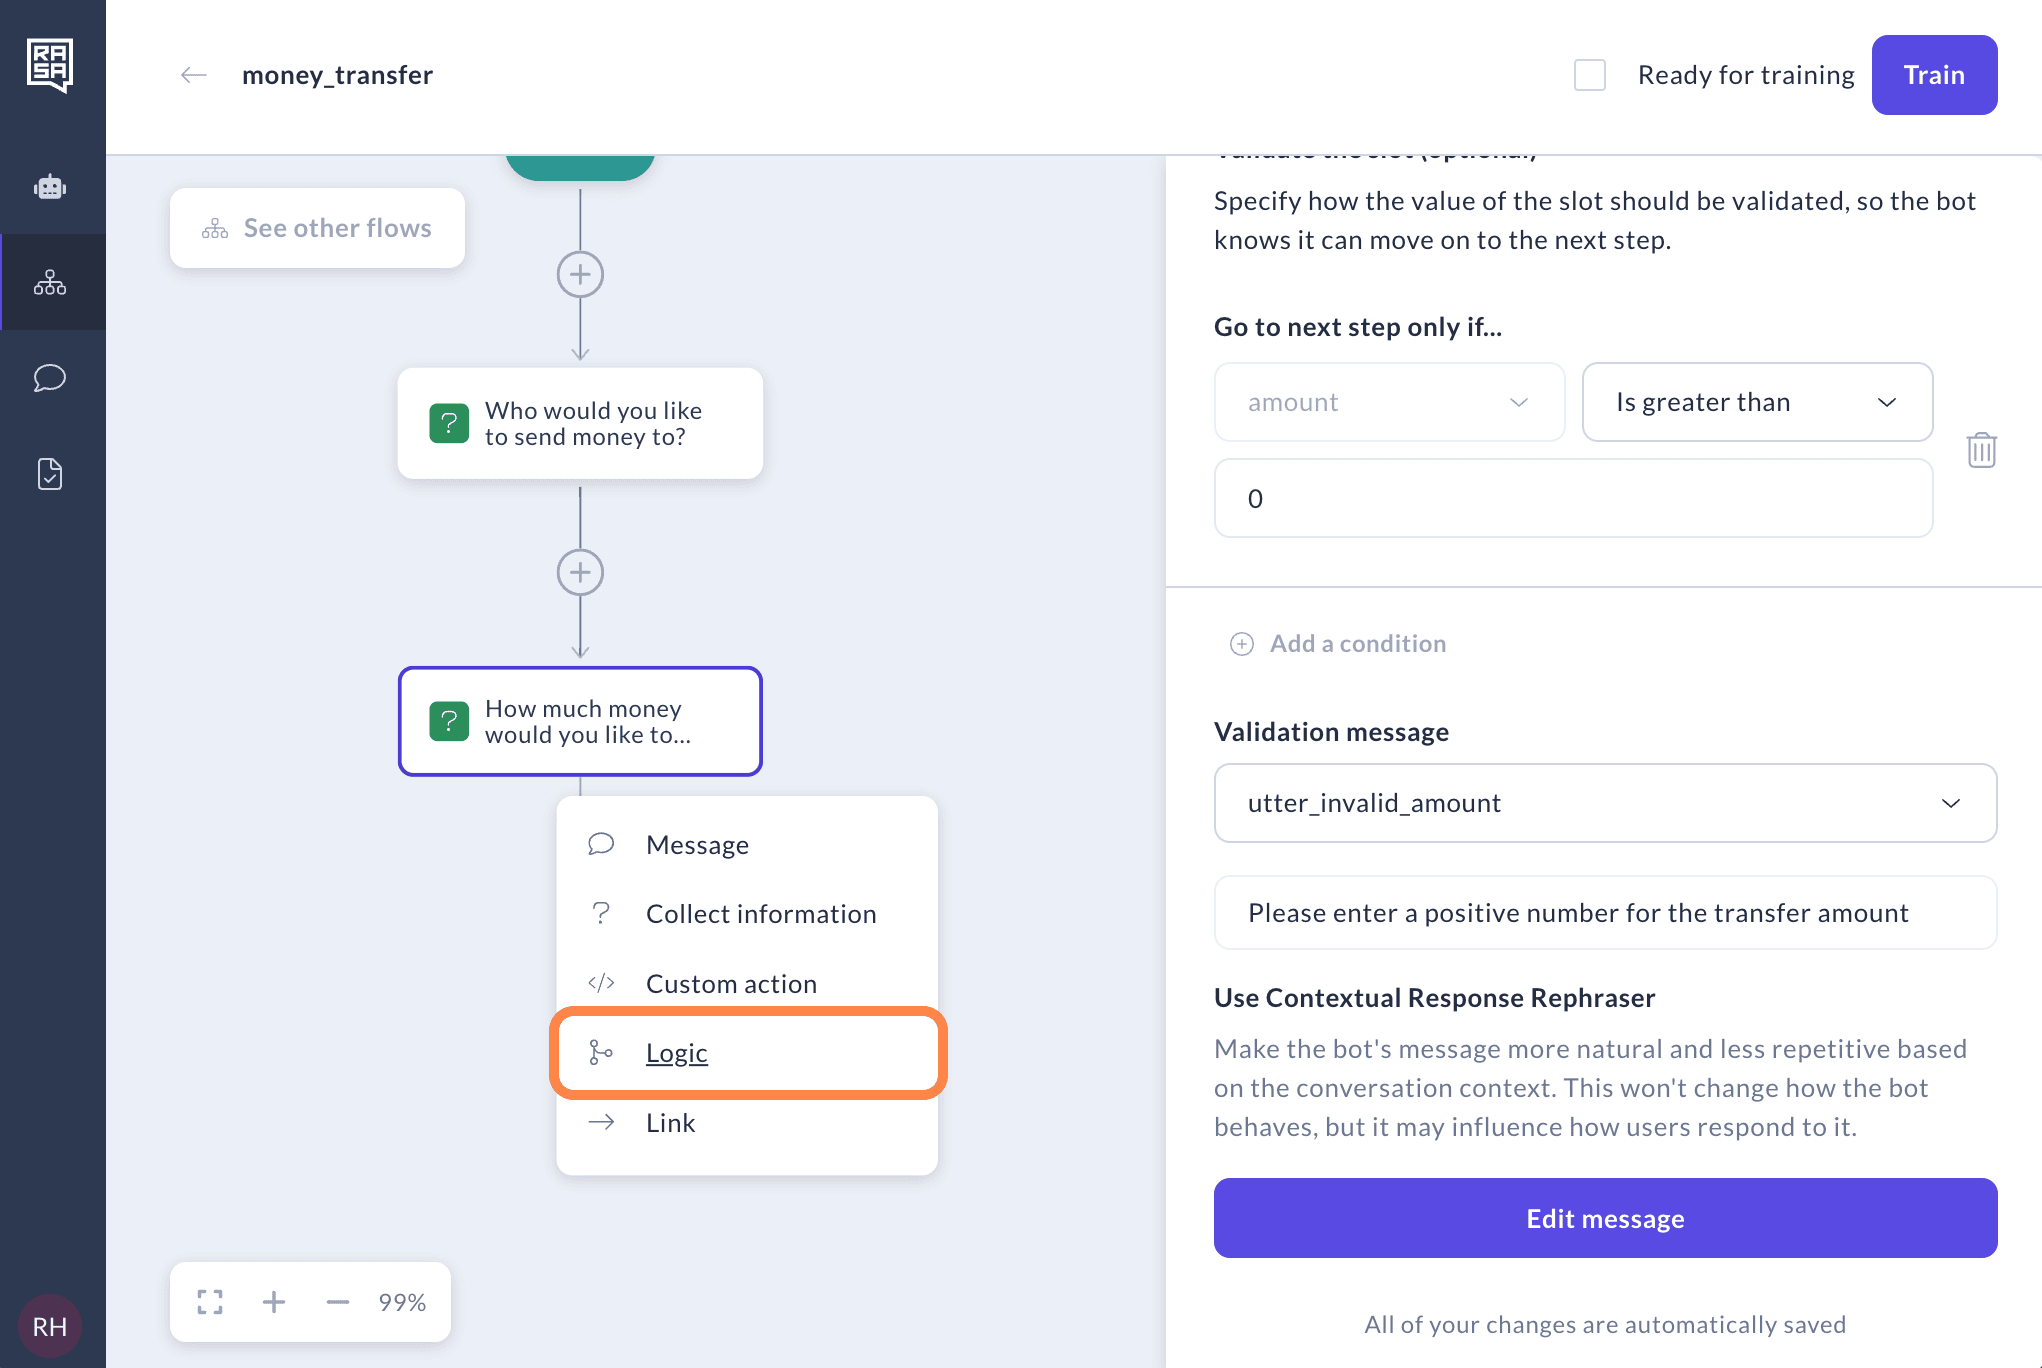
Logic
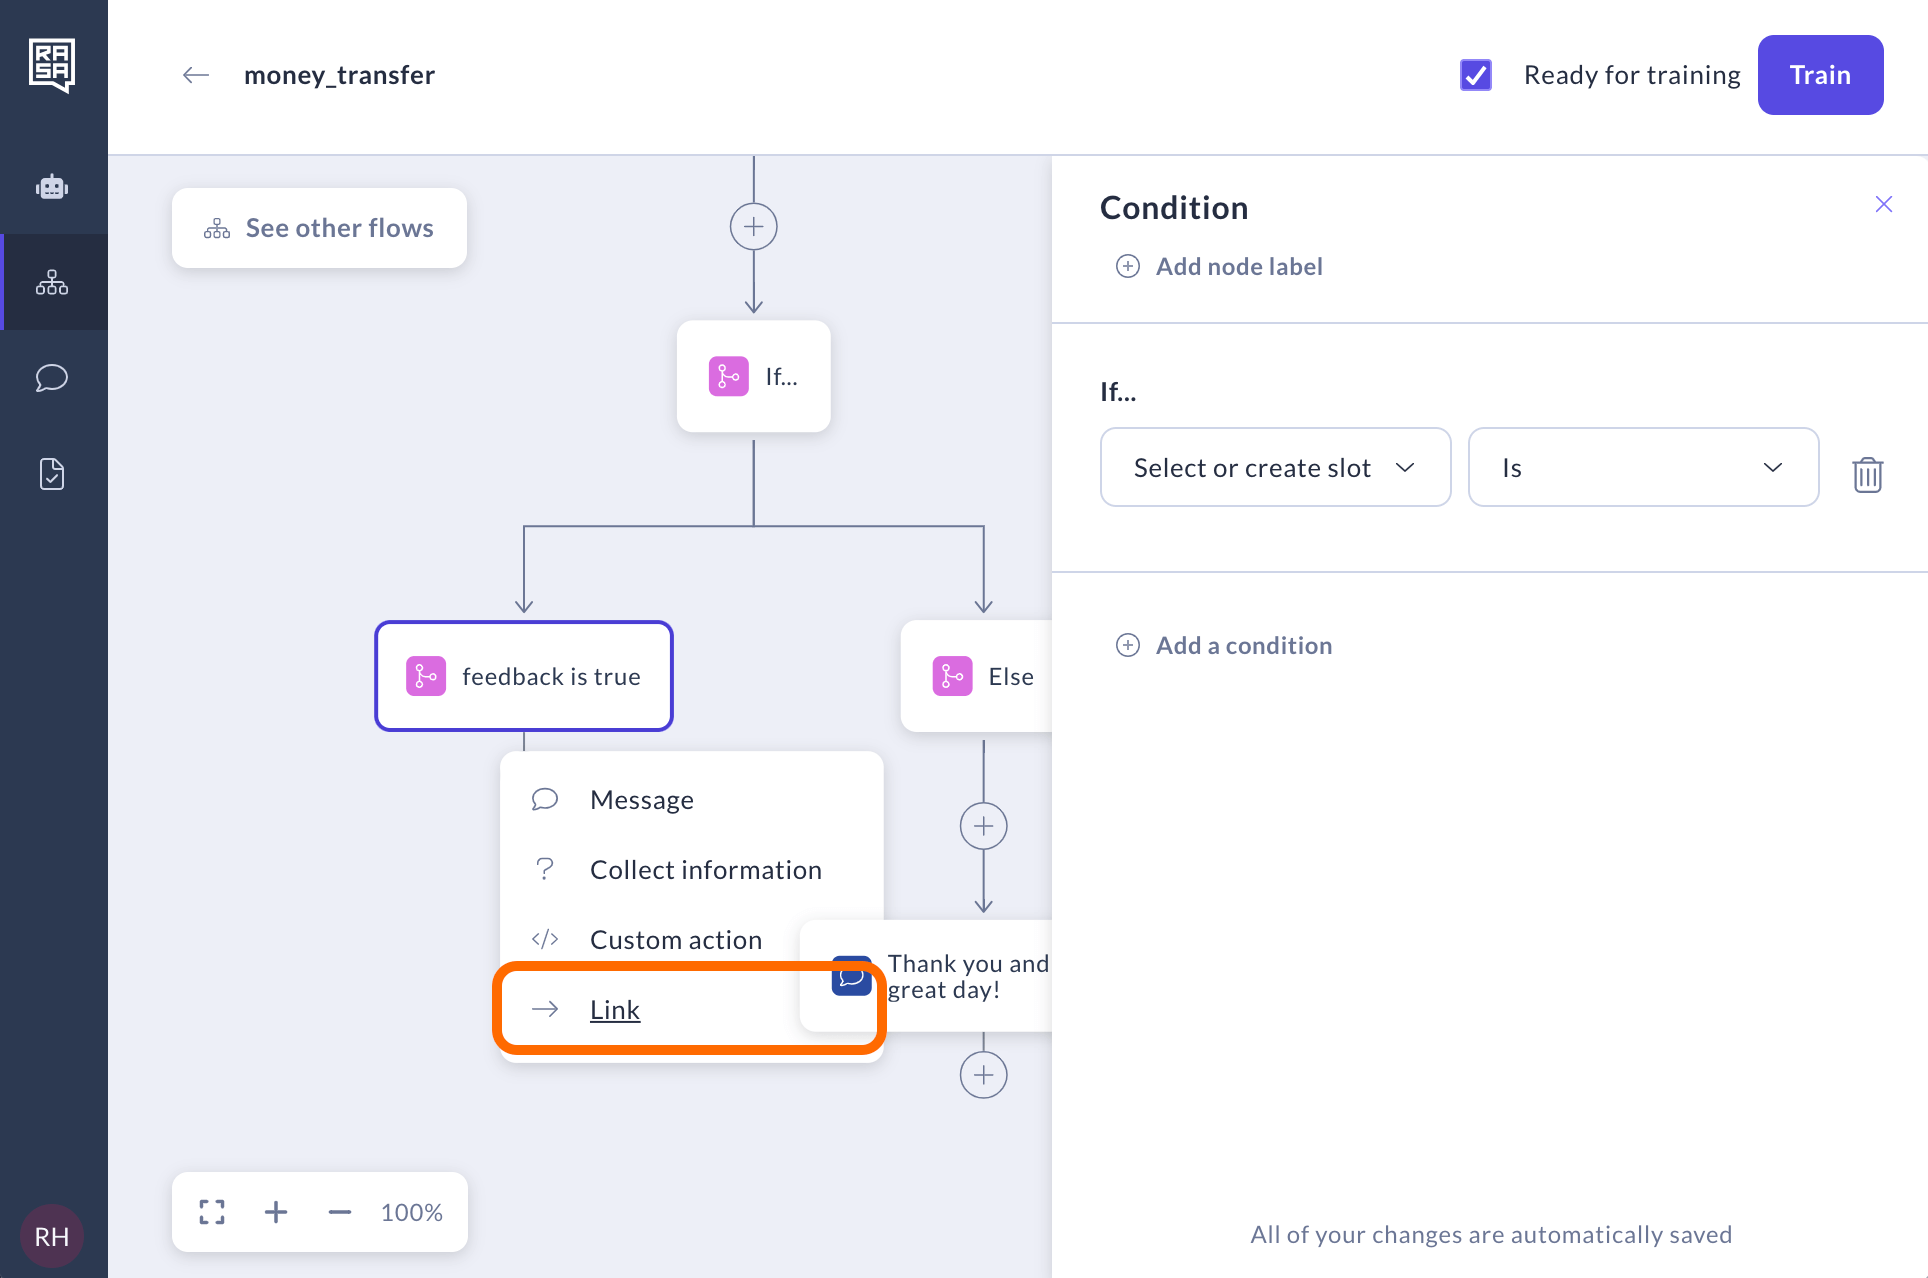
A Logic step allows you to branch the further flow based on a condition. For example, you can direct the user to one branch if they choose to reserve a restaurant for today, and to another one if they need the reservation for another date.
Select "Logic" from the list to branch your flow.
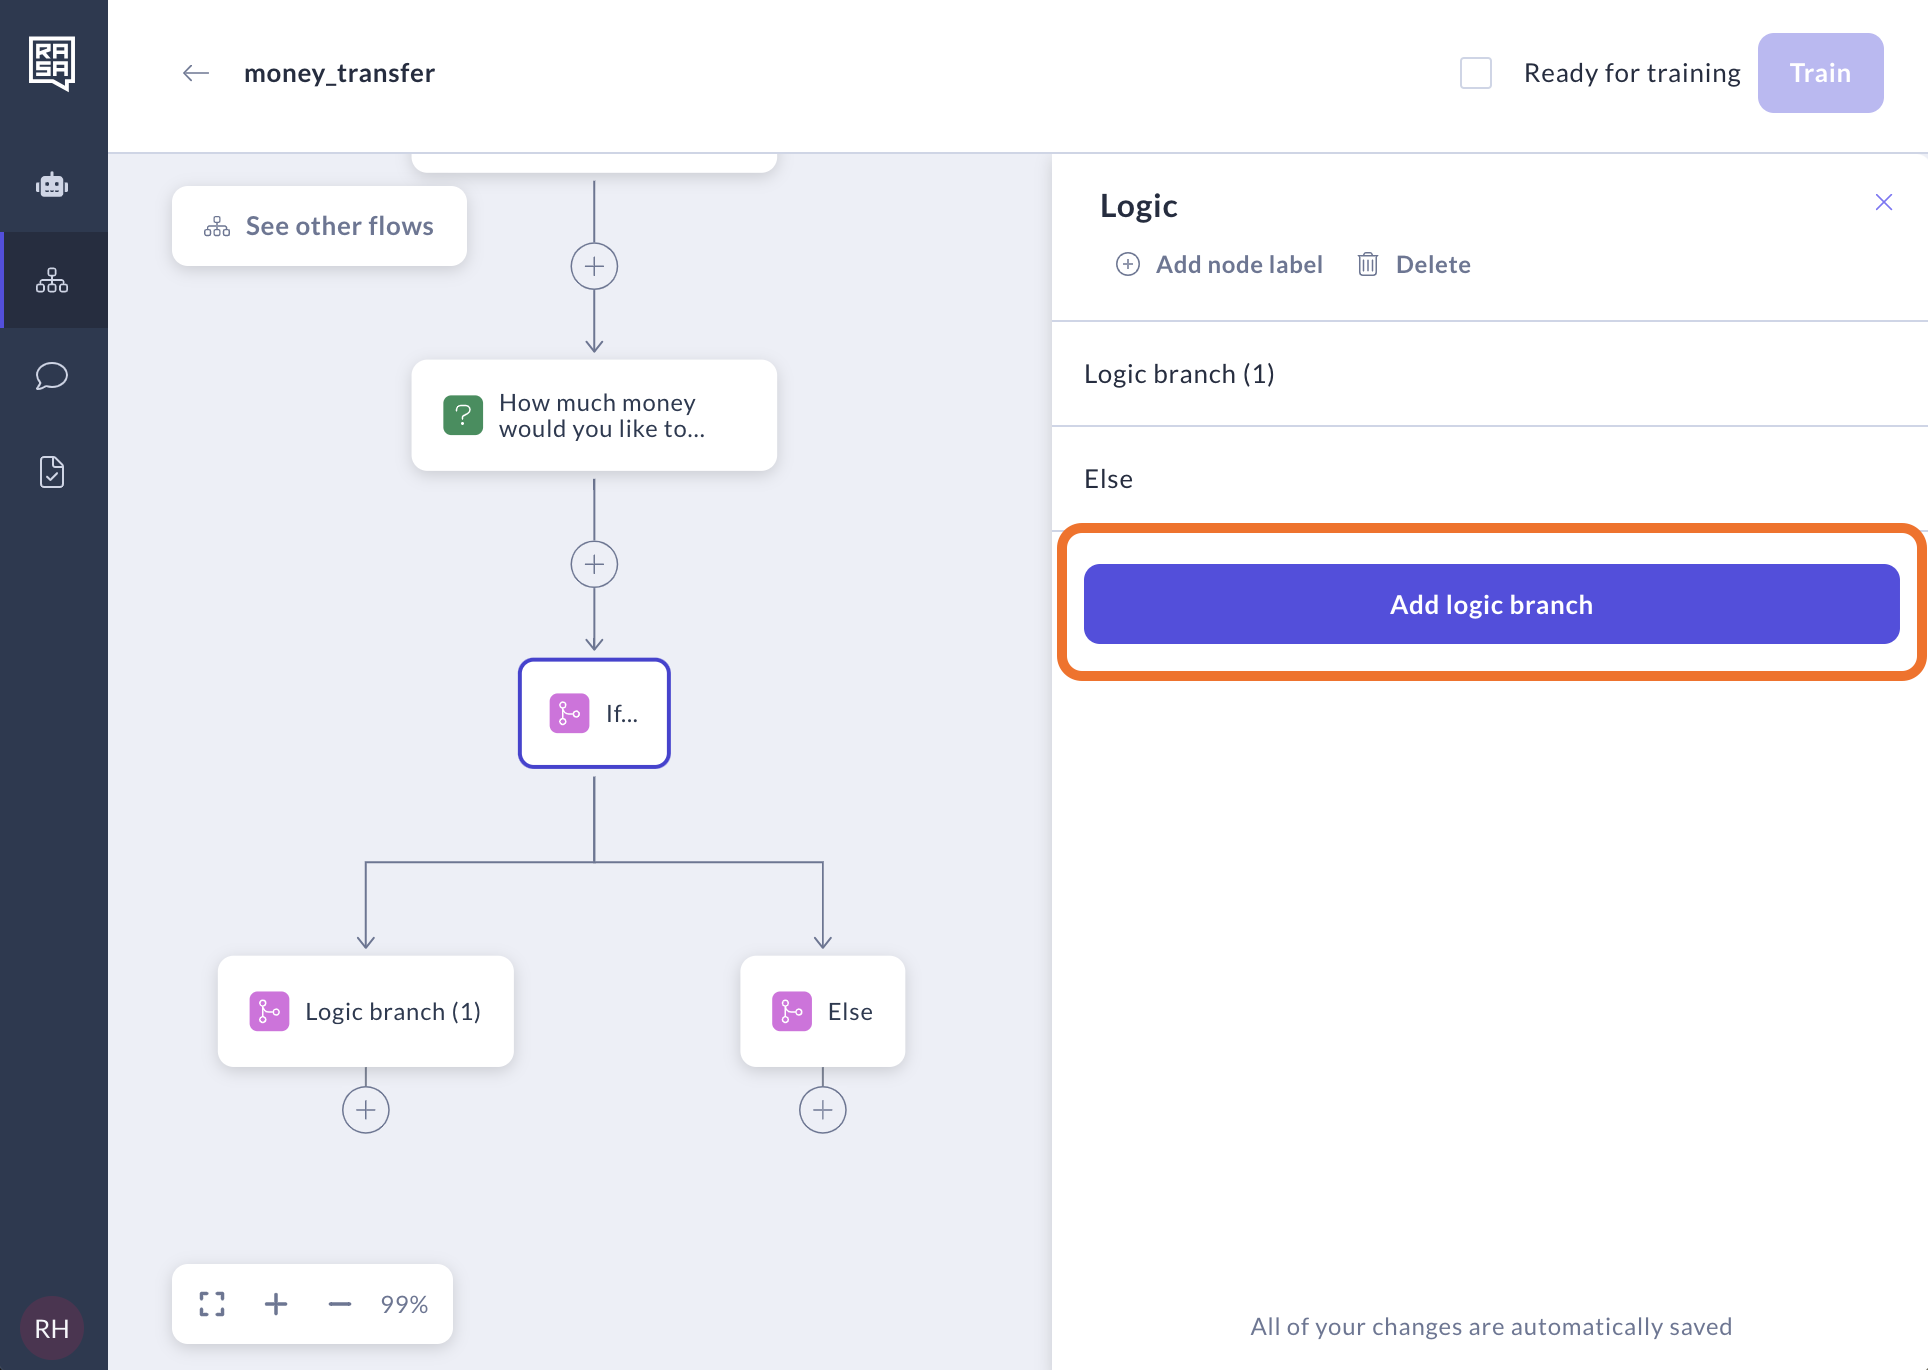
It immediately creates the branching structure. By clicking "Add logic branch" button you can add as many condition branches as you need.
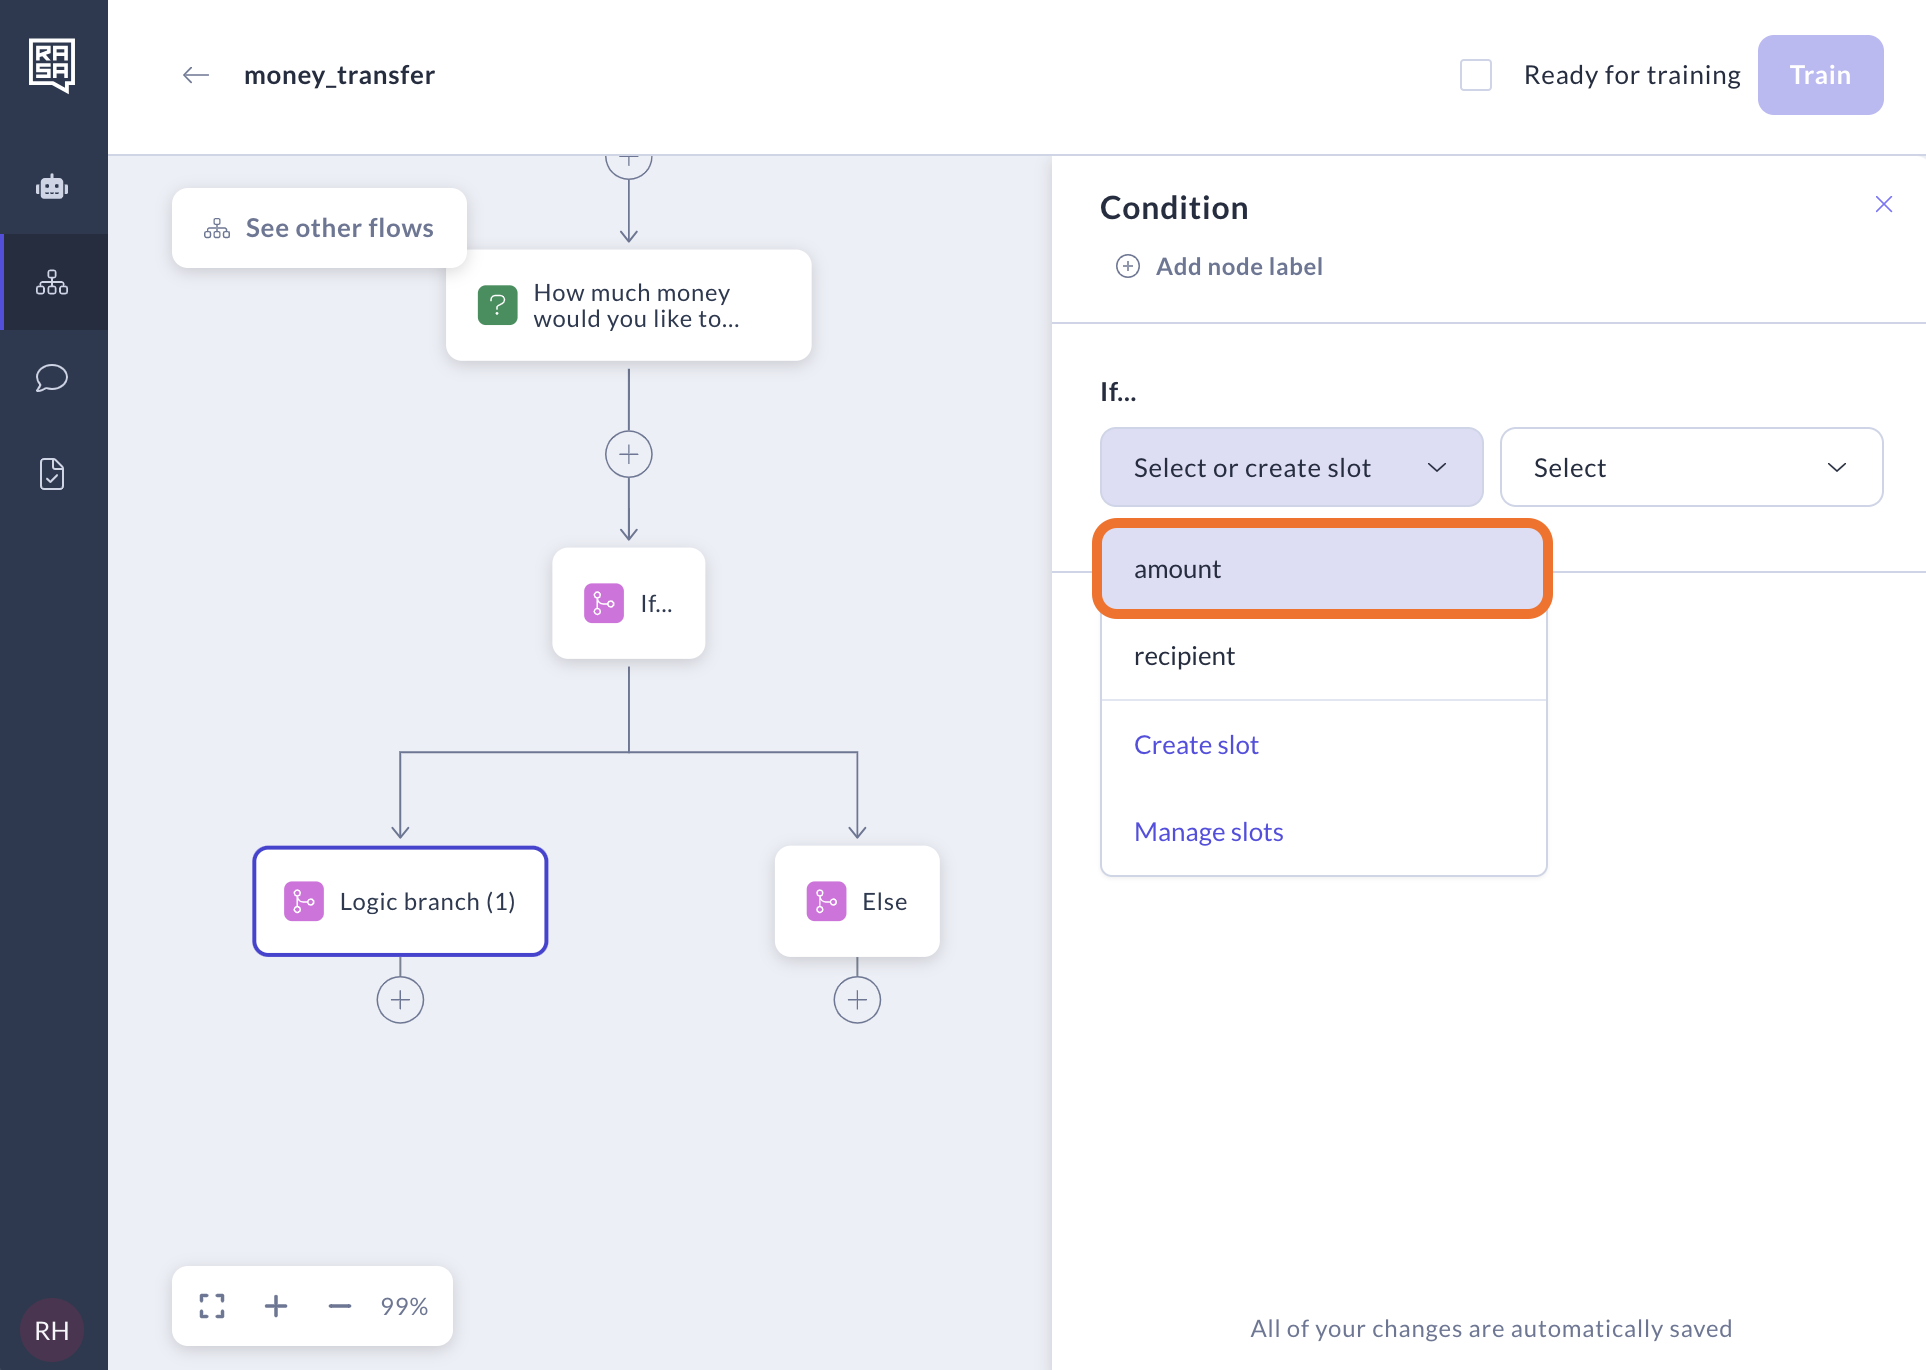
Click on one of the branching nodes to start describing the condition(s) in it.
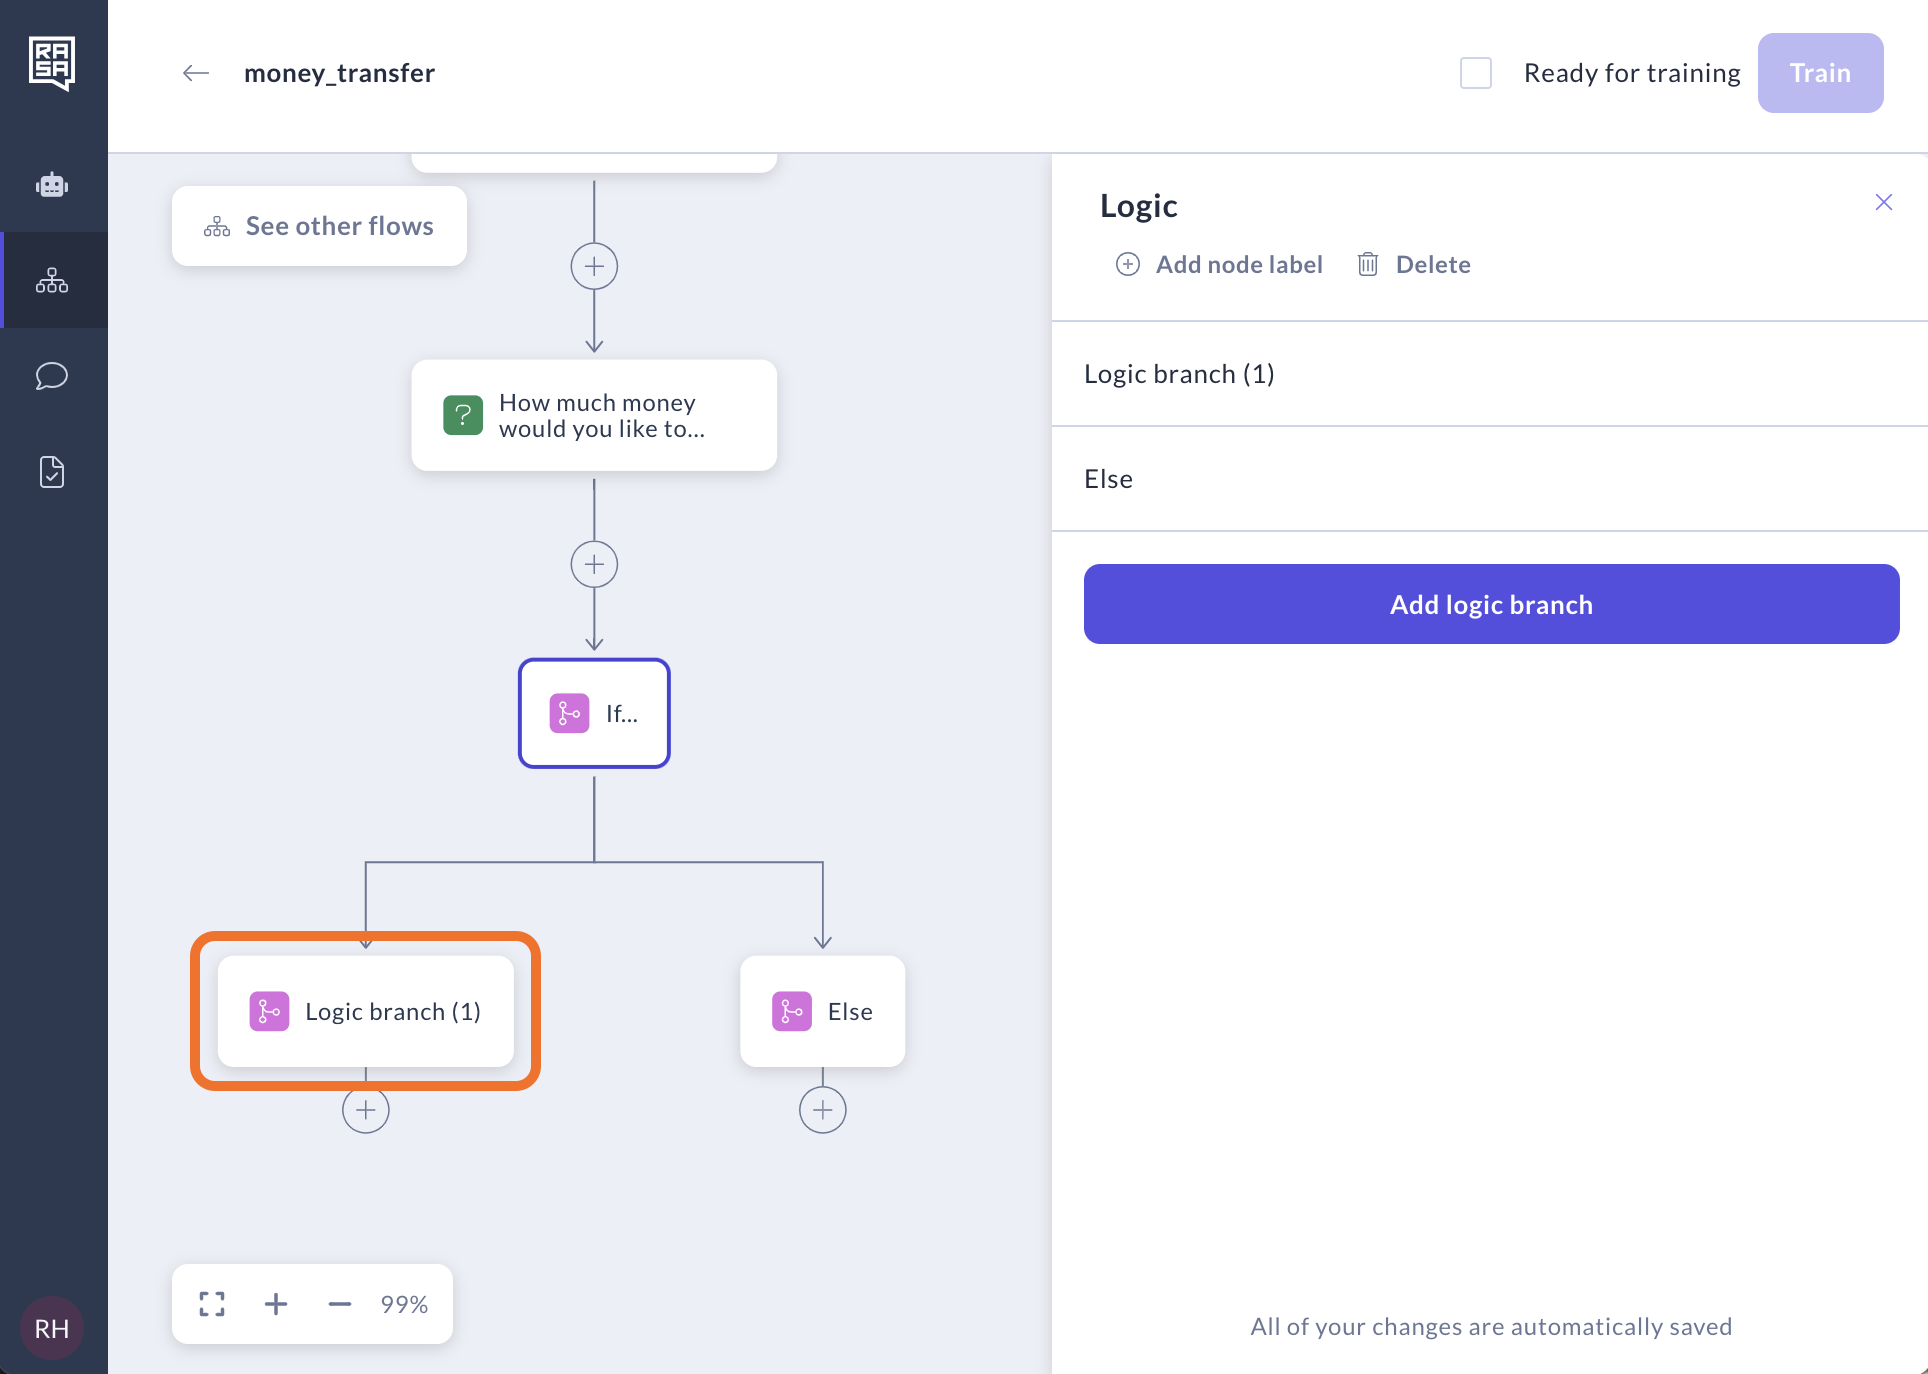
Select the slot from the dropdown. You can also create new slots from here, if they were used in custom actions created before. In that case, make sure that the custom action uses the exact slot names created here.
Note: Slots defined in custom actions can be used in Logic step, but they won’t be visible in Collect Information or Message.
Select an operator
We support the following operators:
-and: Combines two conditions with logical AND.
-or: Combines two conditions with logical OR.
->: Greater than.
->=: Greater than or equal to.
-<: Less than.
-<=: Less than or equal to.
-=: Equal to.
-!=: Not equal to.
-is: Checks for identity.
-is not: Checks for non-identity.
-contains: Checks if a value is contained within another value.
-matches: Uses regular expressions to match strings.
-notmaches: Uses regular expressions to negate strings.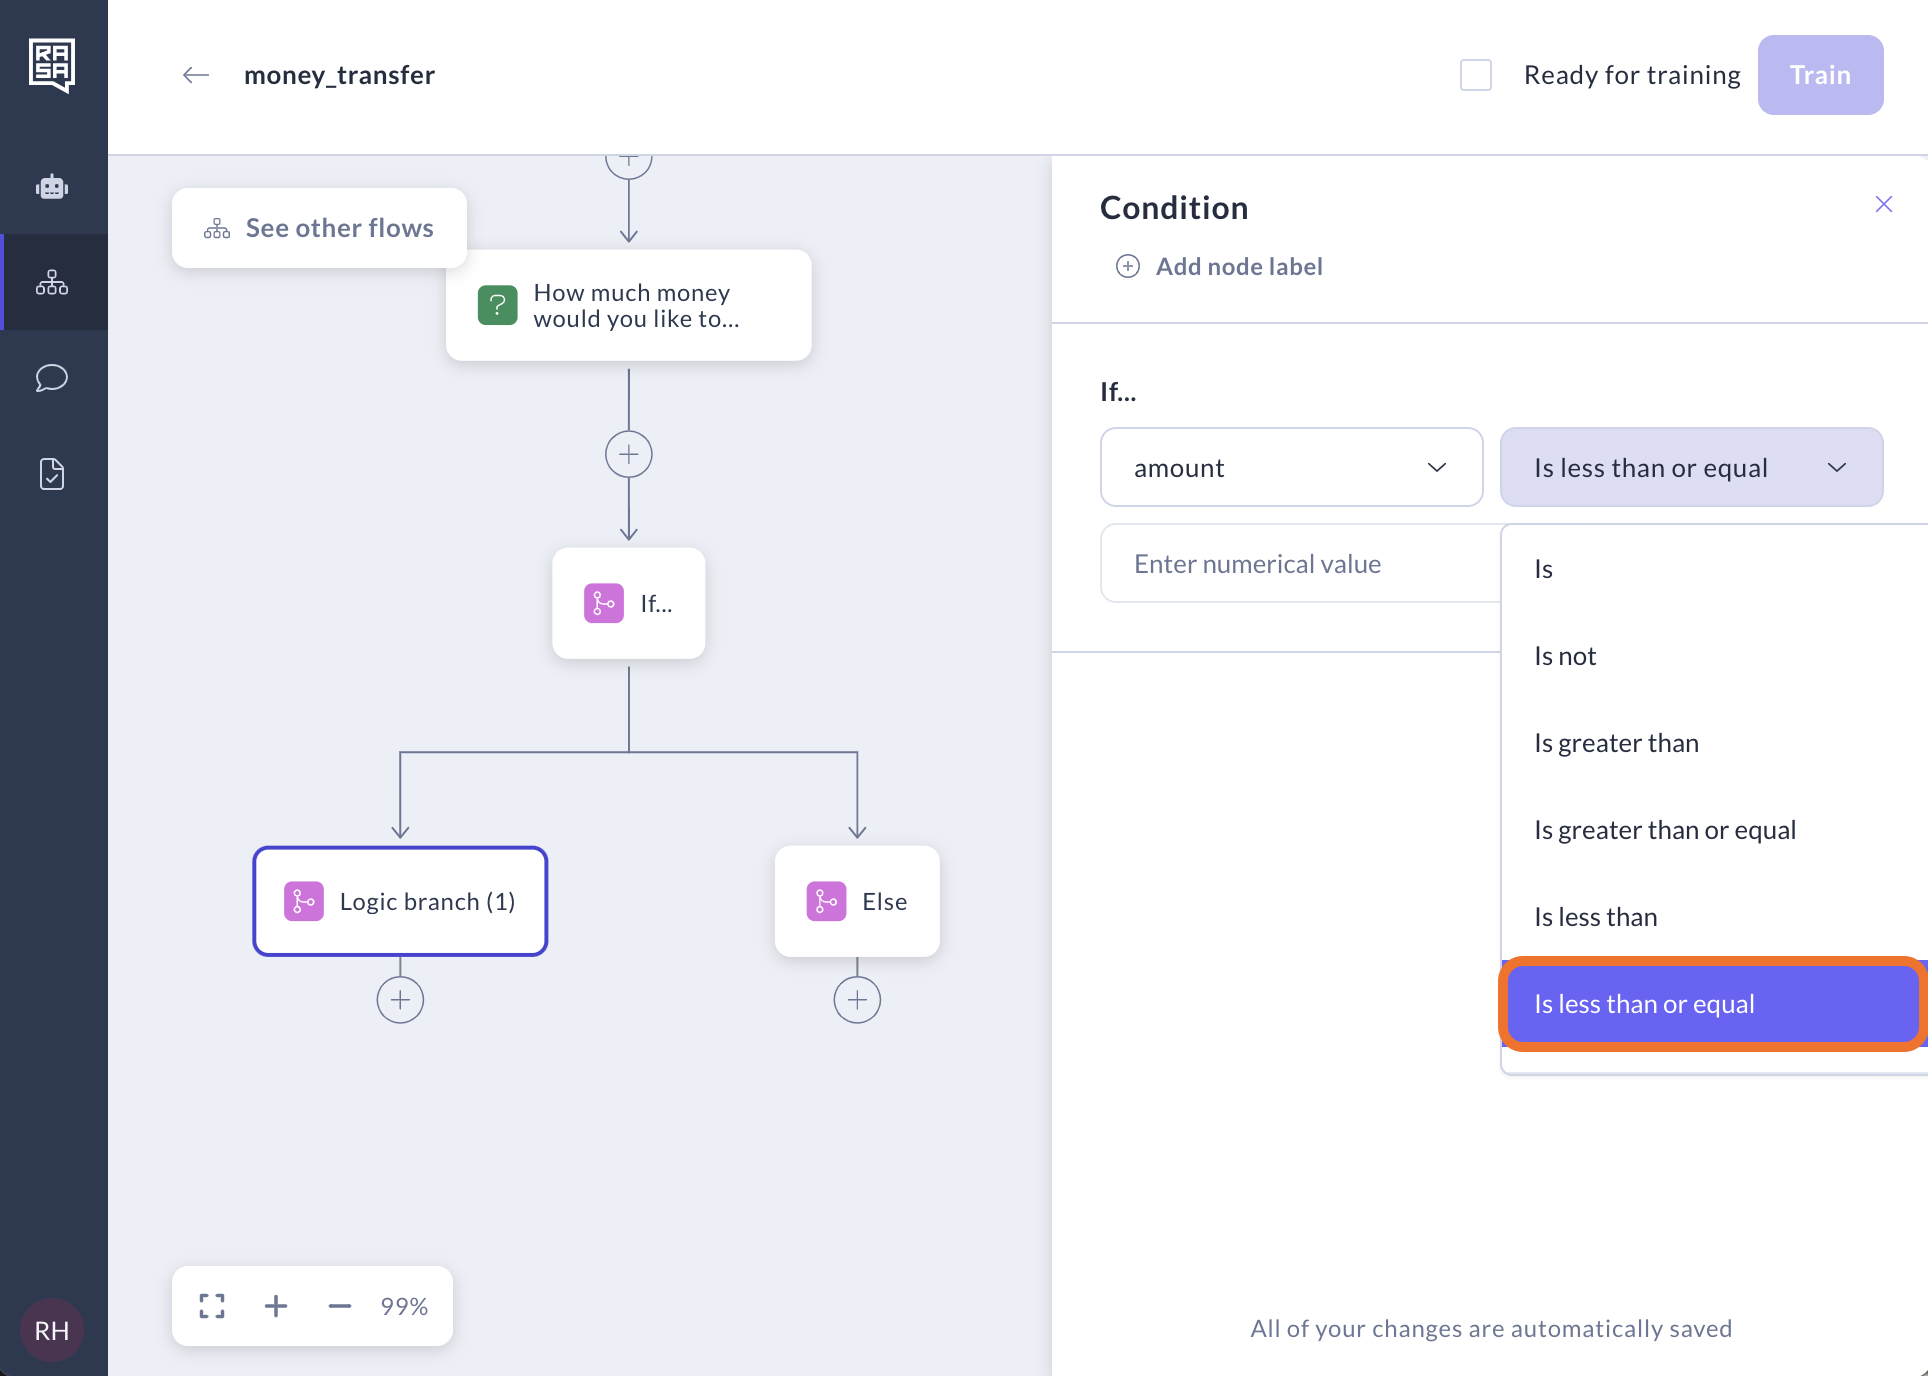
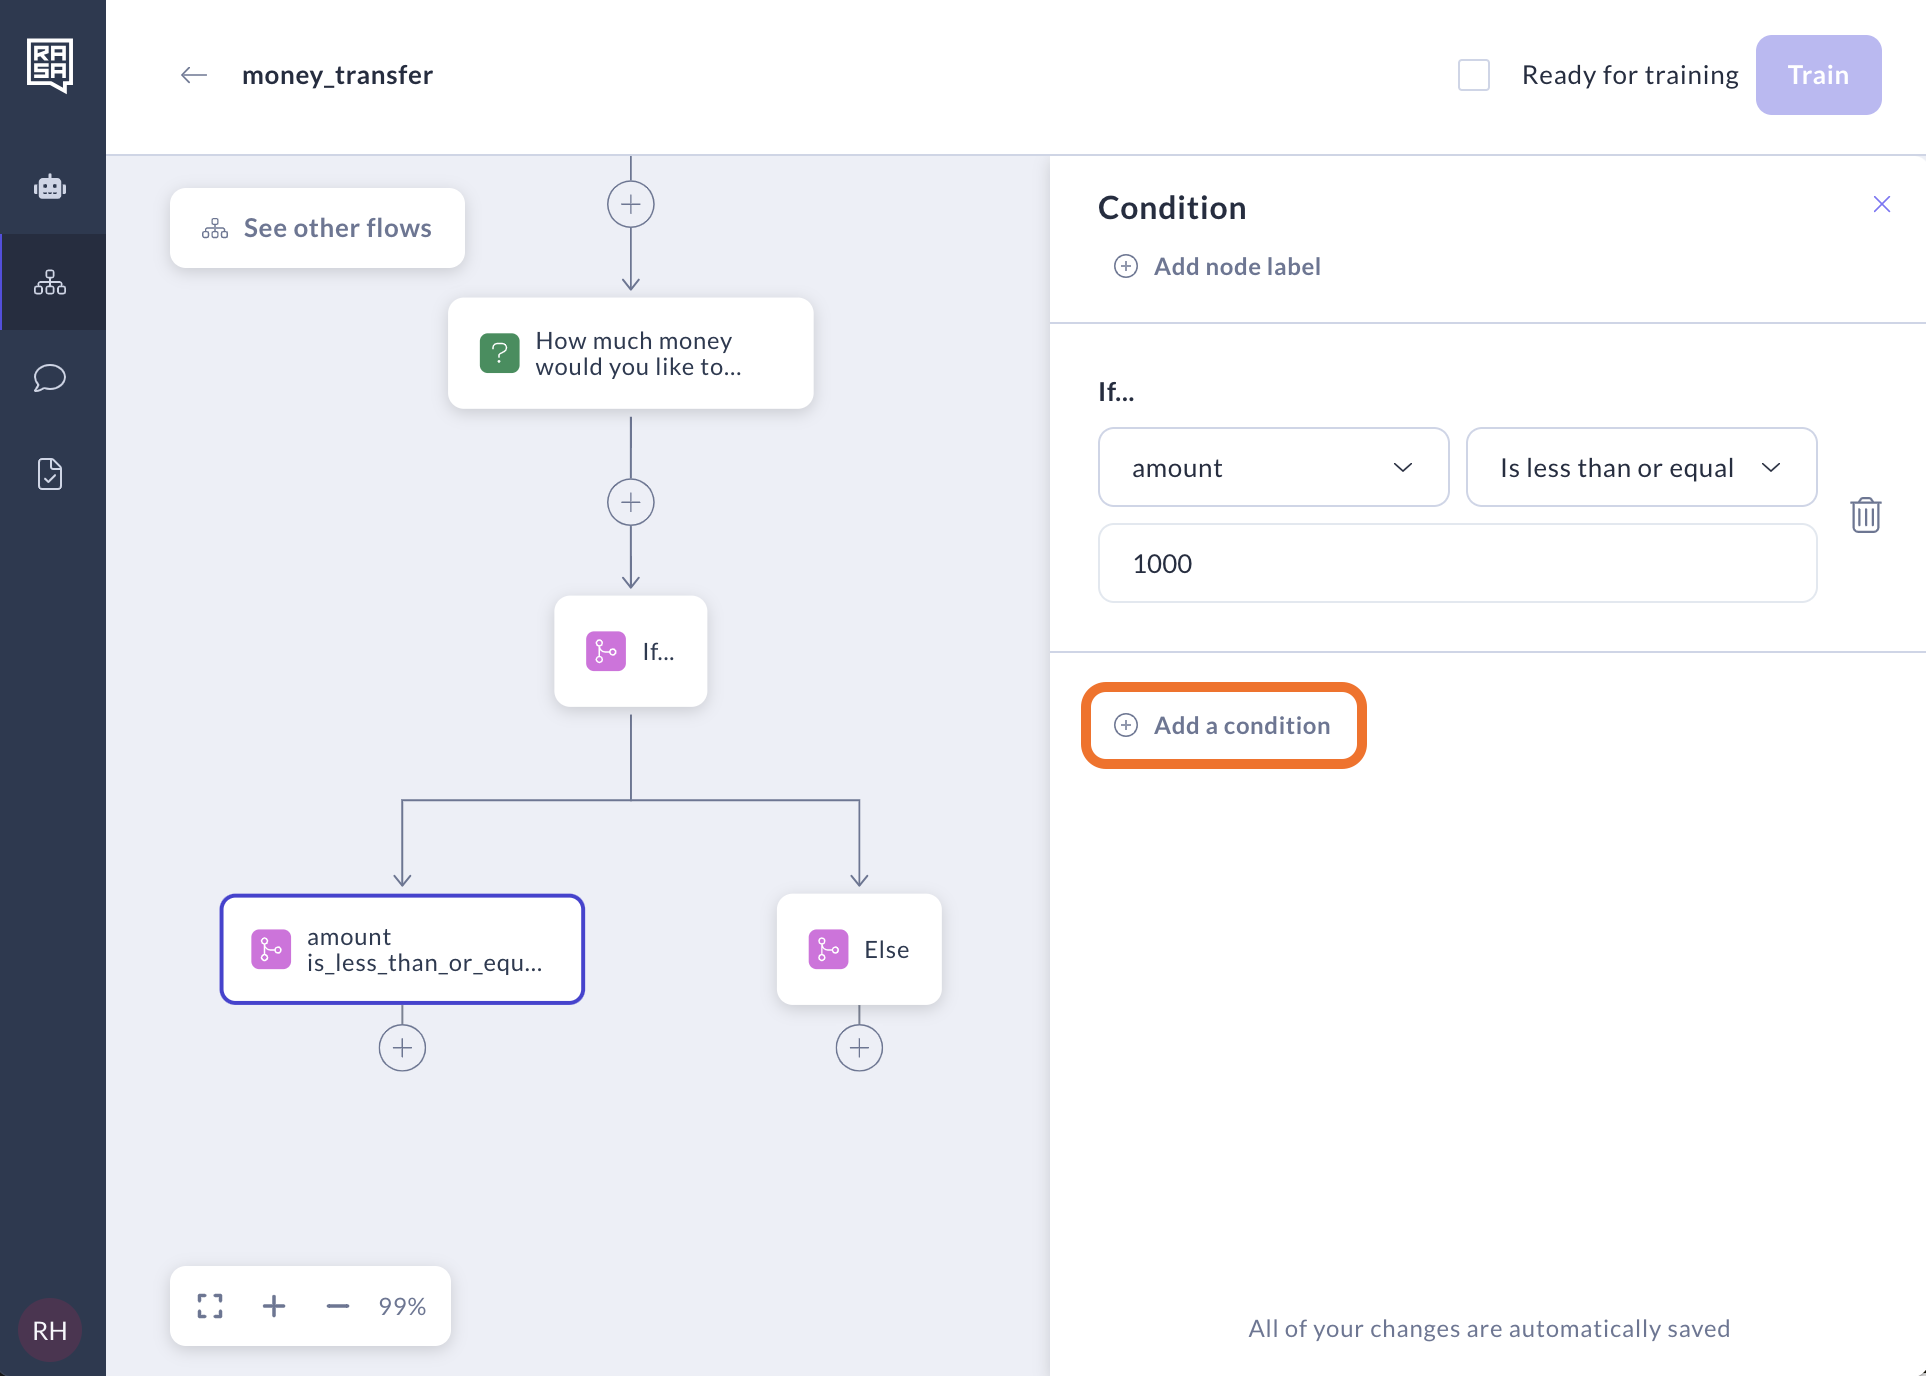
Enter the value
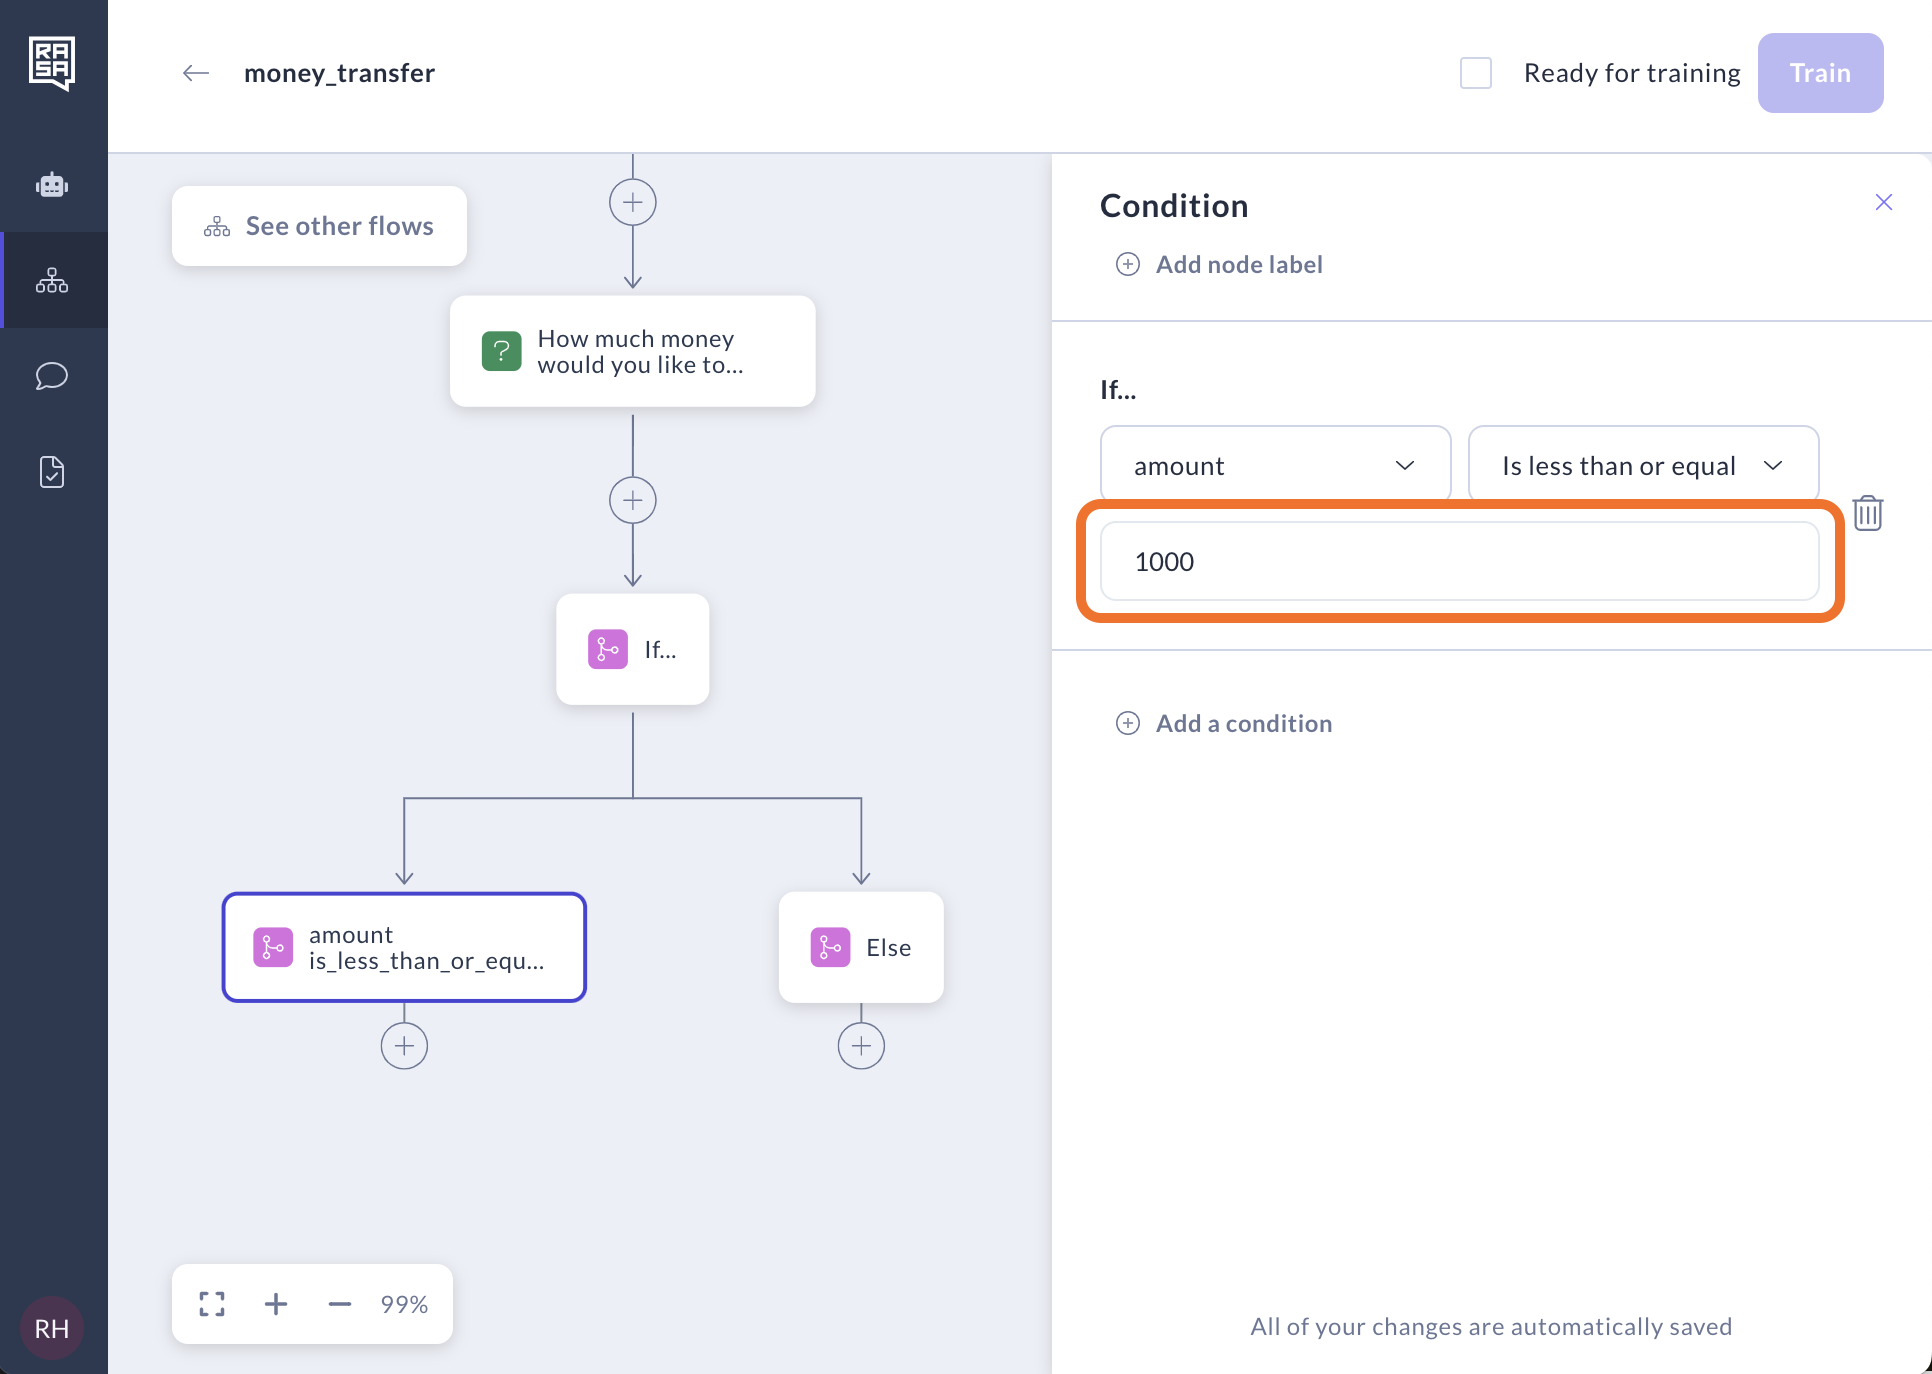
If you want to add more conditions into this branch, click "Add condition". The relationships between the condition is "And" meaning all the conditions need to be met for this branch to move forward.
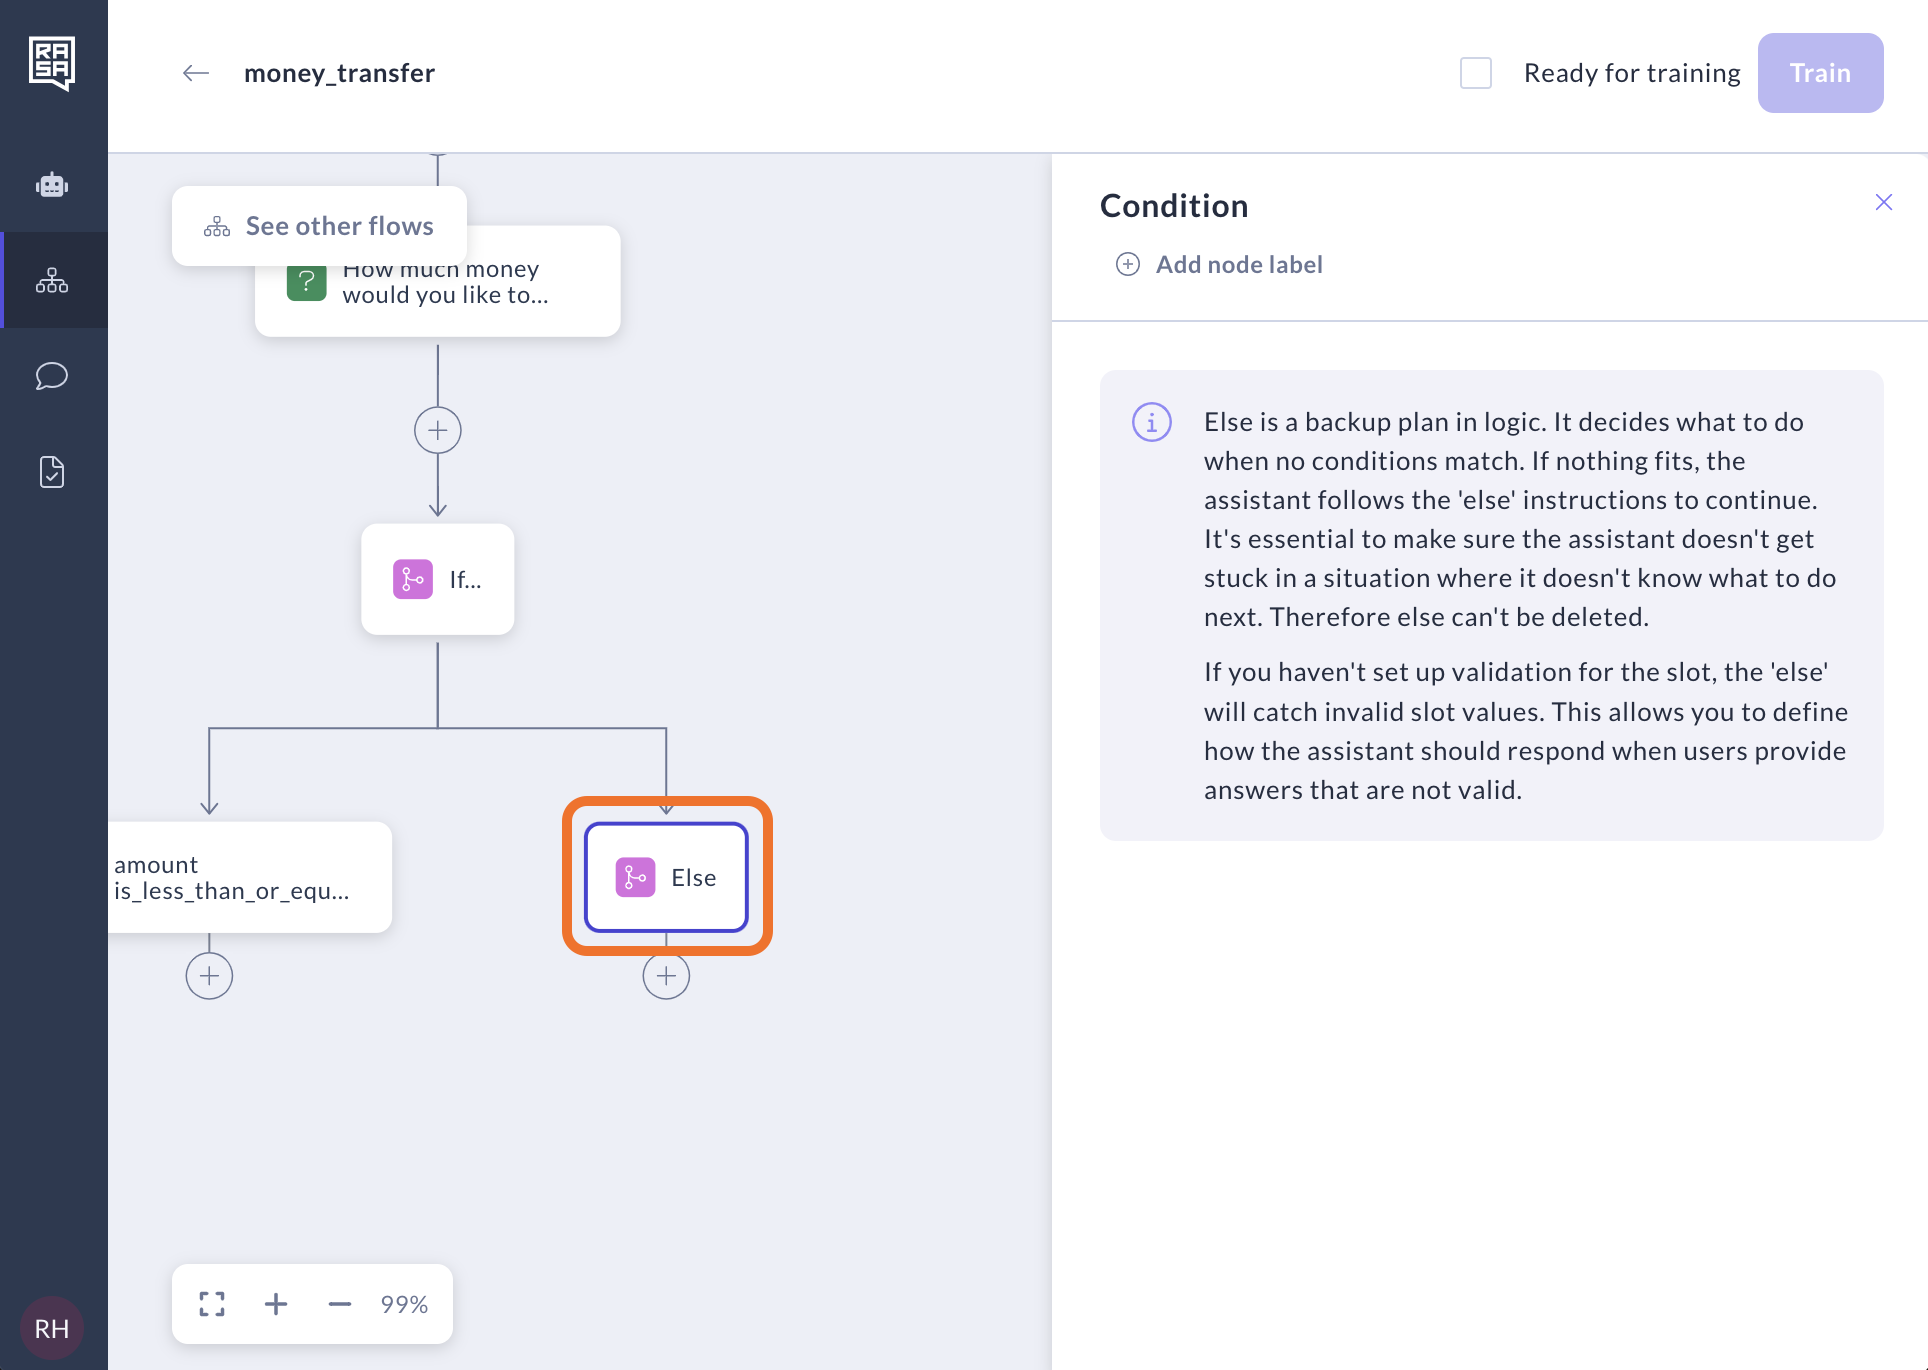
Else
"Else" is the last logic branch and serves as a backup plan in logic. You don’t need to create any conditions for it but you also can’t delete it. It’s there to make sure the assistant always knows what to do even when no condition that you created for this scenarios matches with what happens in the current dialog.
A next step for "Else" is highly dependent on your use case but it could be a human handoff flow or a generic answer to reply to a user’s answer.
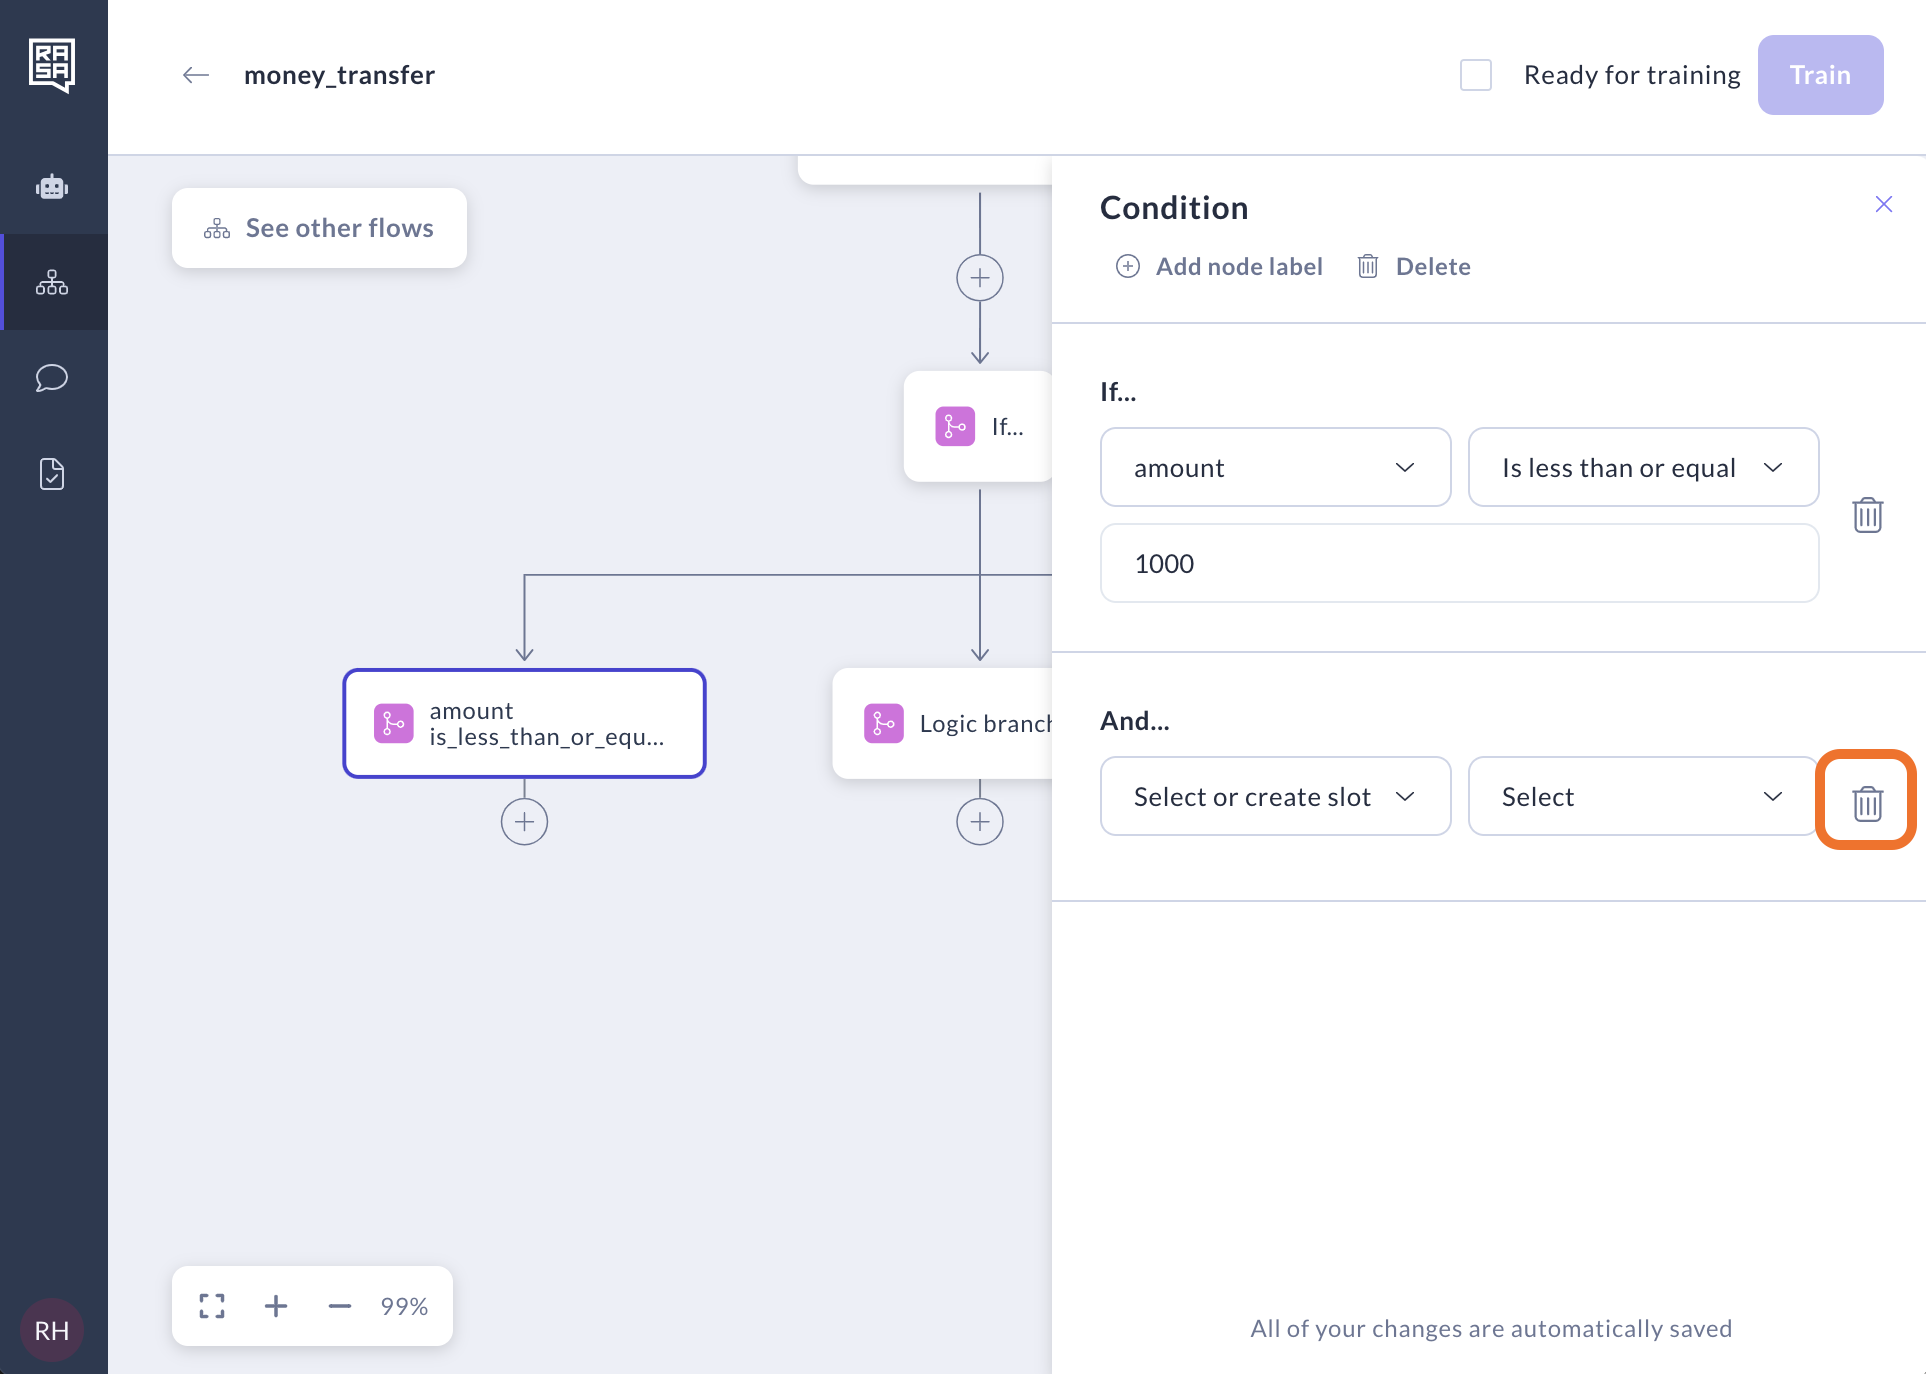
Delete conditions
There are 2 ways to delete conditions.
Delete conditions inside Logic step:
Click the delete icon next to the condition you want to delete. You can delete all but one.
Confirm the deletion.
Delete logic branches
Select the logic branch and click the Delete button. You can delete all branches but one.
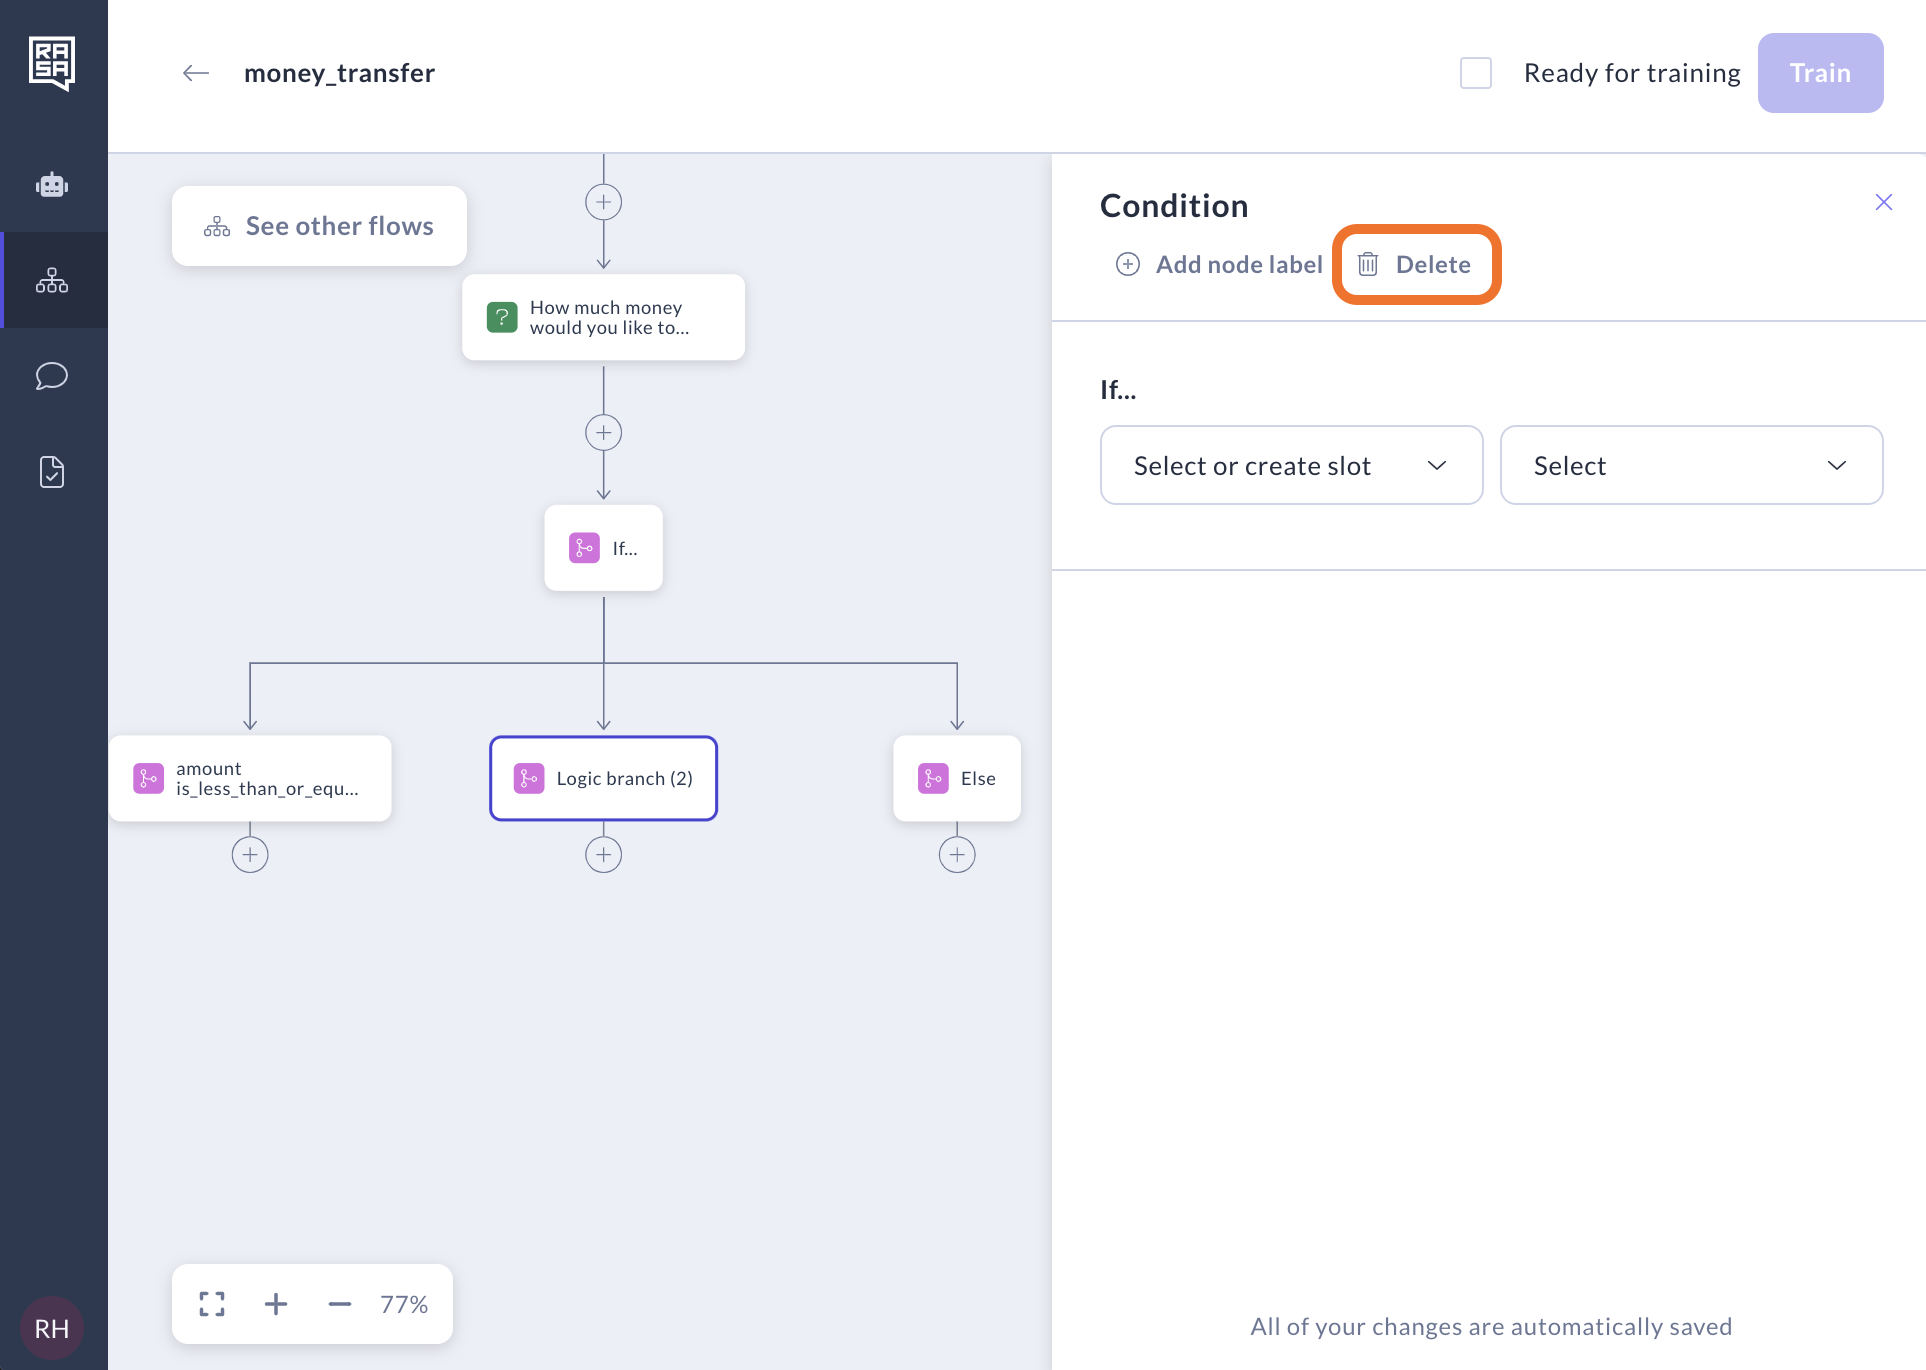
Warning: all the steps that are subsequent to this condition will be deleted as well. Therefore we advise you to edit the condition or add new steps before the logic step and only resort to deleting a condition if you have no other choice.
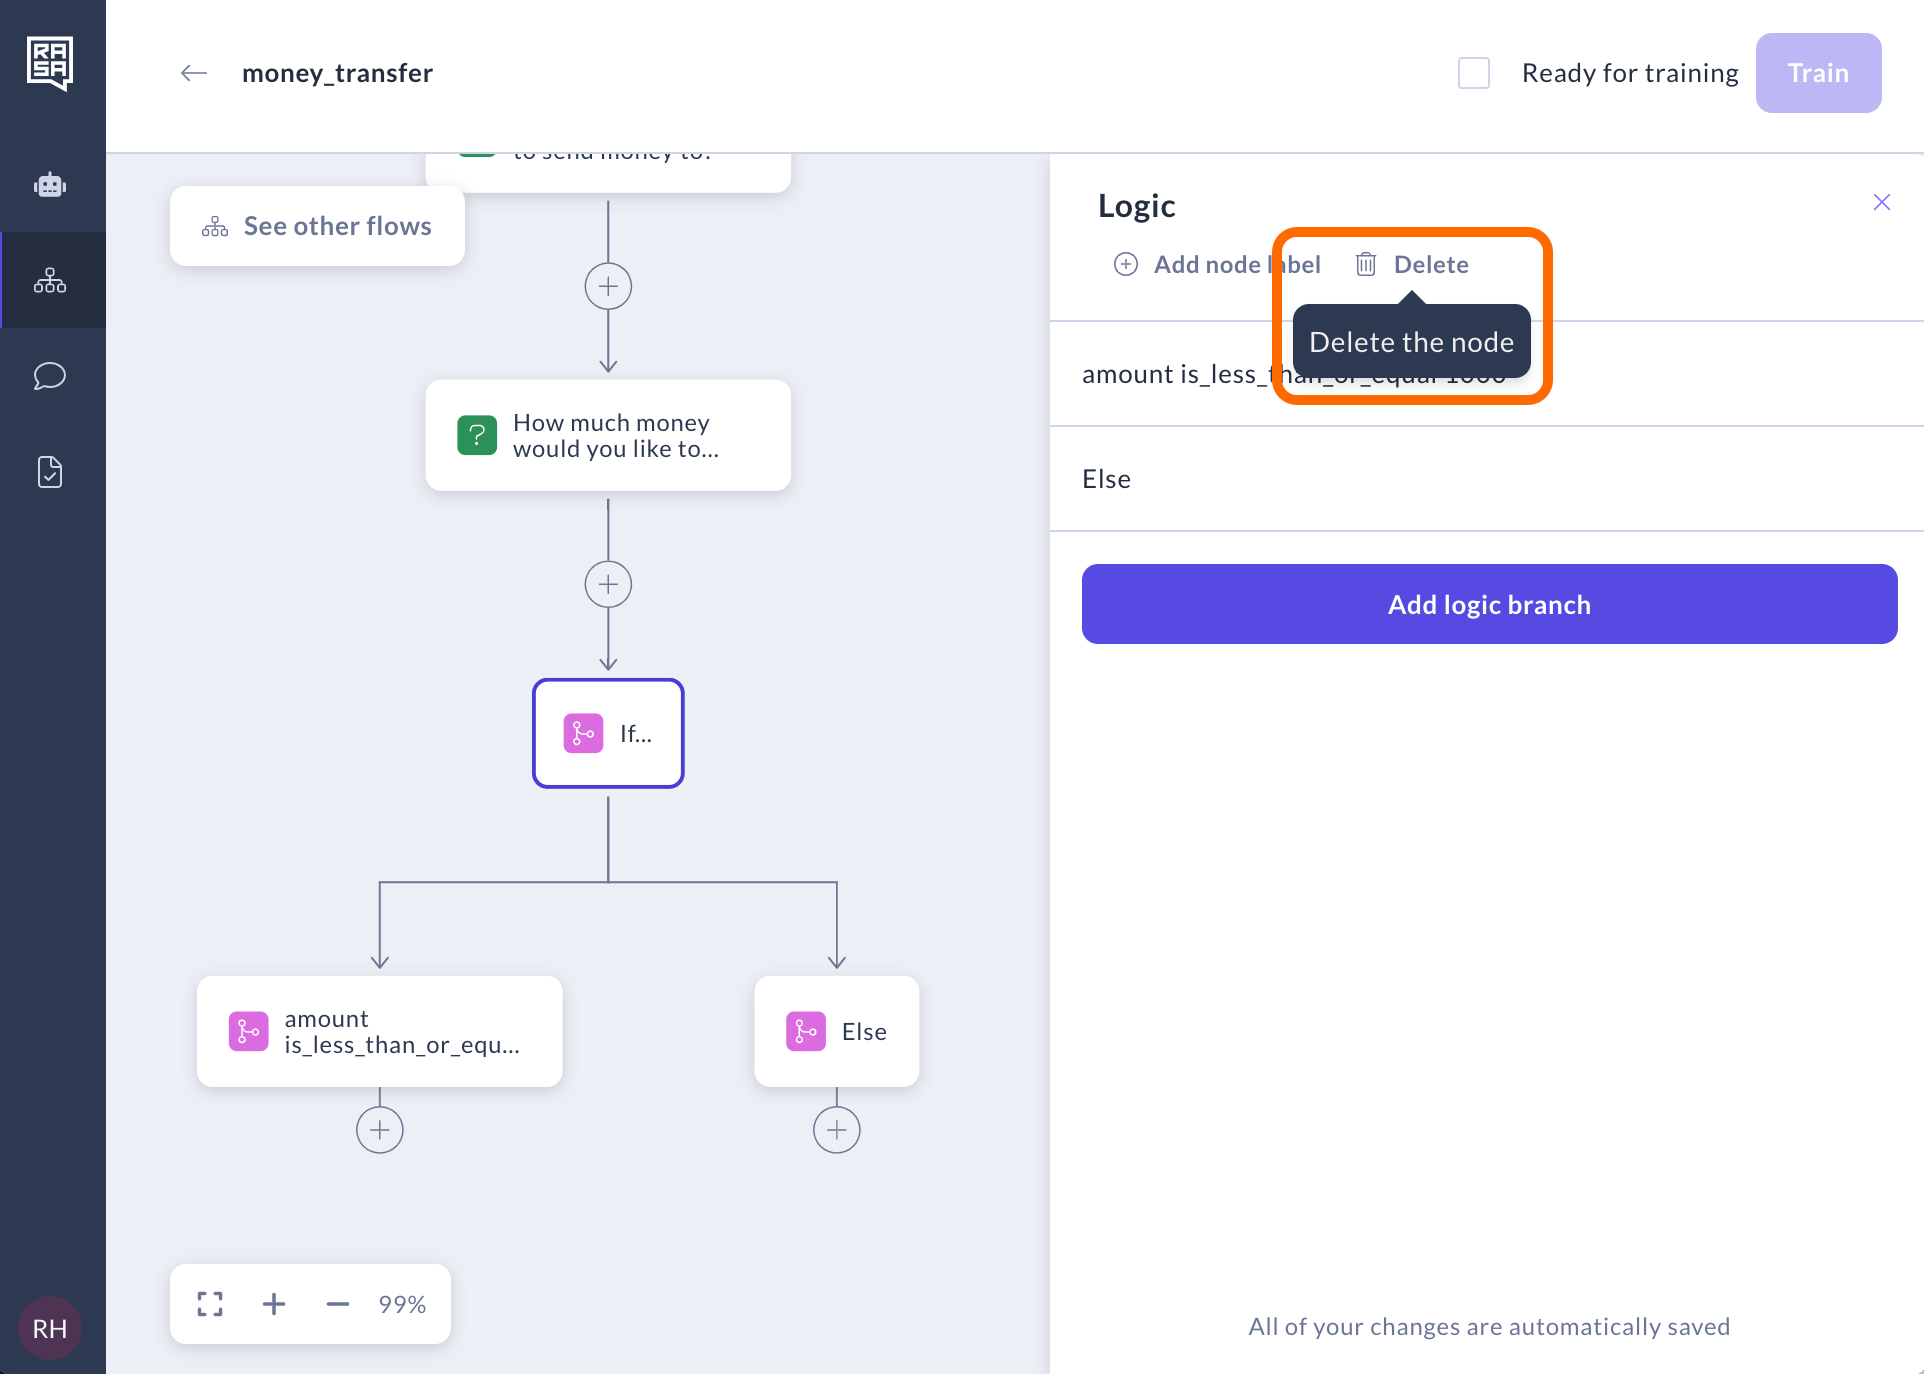
Delete logic step
You can delete logic step the same way you delete any other step which is clicking on the delete icon. However, you will see a warning that all conditions and steps subsequent to them will be deleted as well and you will need to confirm that you want to delete all of them.
Note: As deleting the entire logic step can be very destructive, we advise you to either update the logic and conditions or add new steps before the logic step instead of deleting it.
Custom Action
A custom action can execute any code you desire, including API calls, database queries, and more. Whether it's turning on the lights, adding an event to a calendar, checking a user's bank balance, or anything else you can imagine, custom actions offer extensive flexibility.
As of now, custom actions can only be implemented outside of Studio. For details on how to implement a custom action, please refer to the SDK Doc. Any custom action that you want to use in flows should be added into the actions section of your domain.
To add a custom action to your flow:
Select the "Custom action" step from the menu.
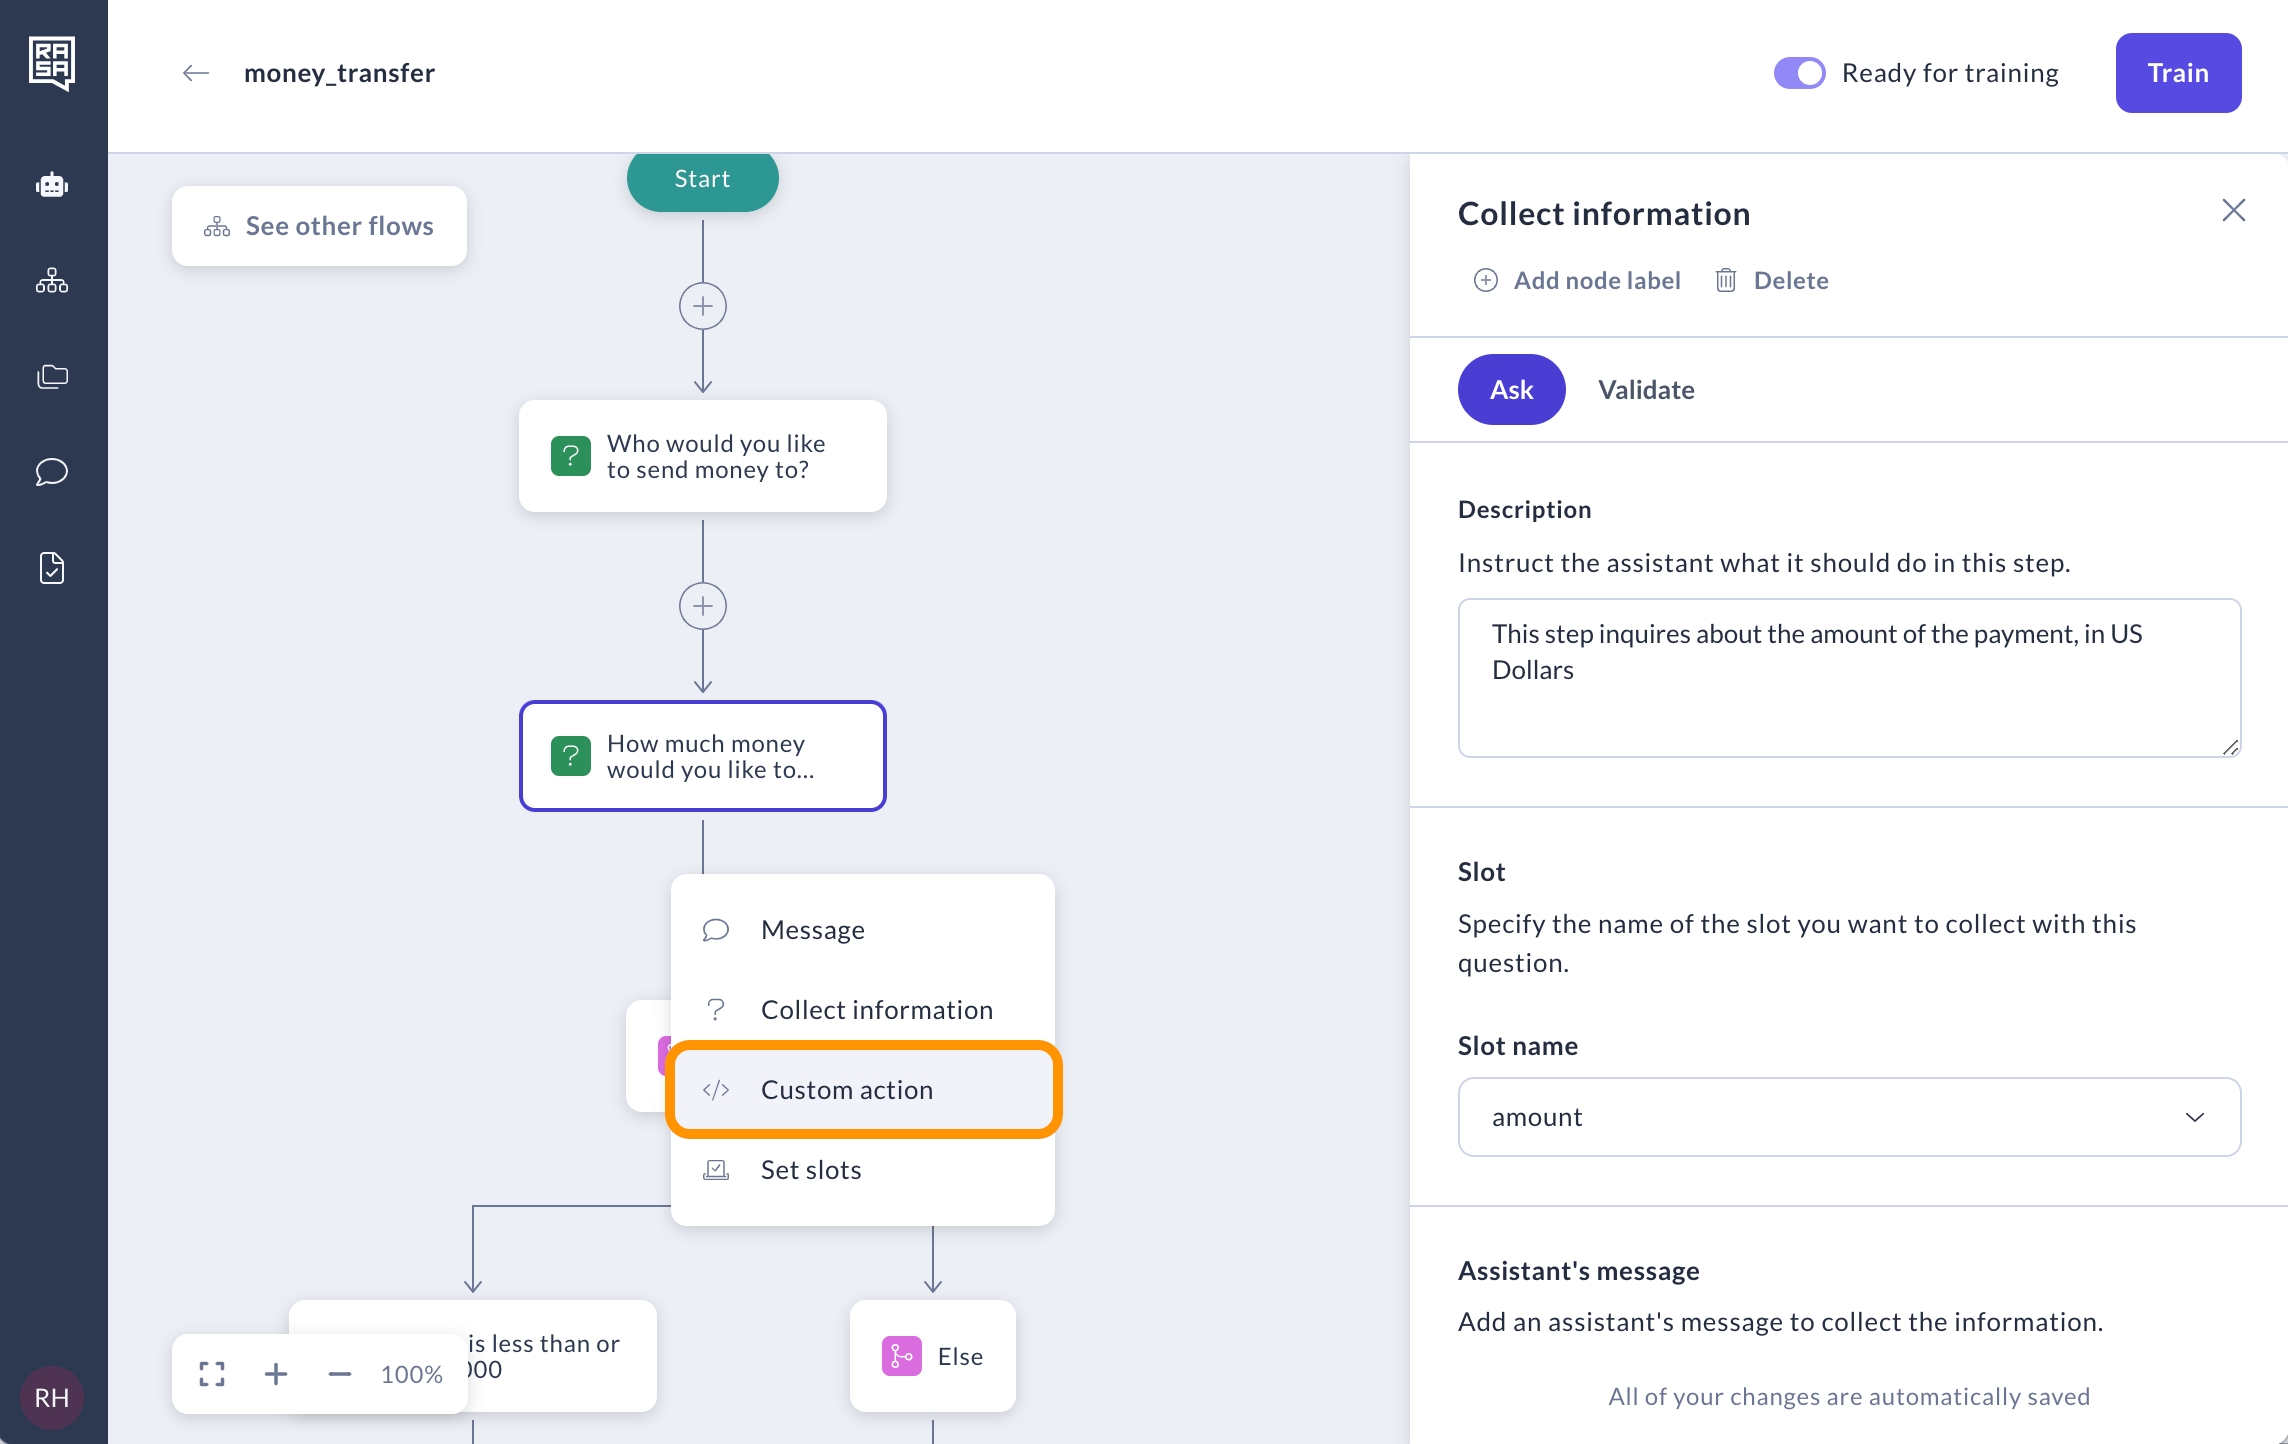
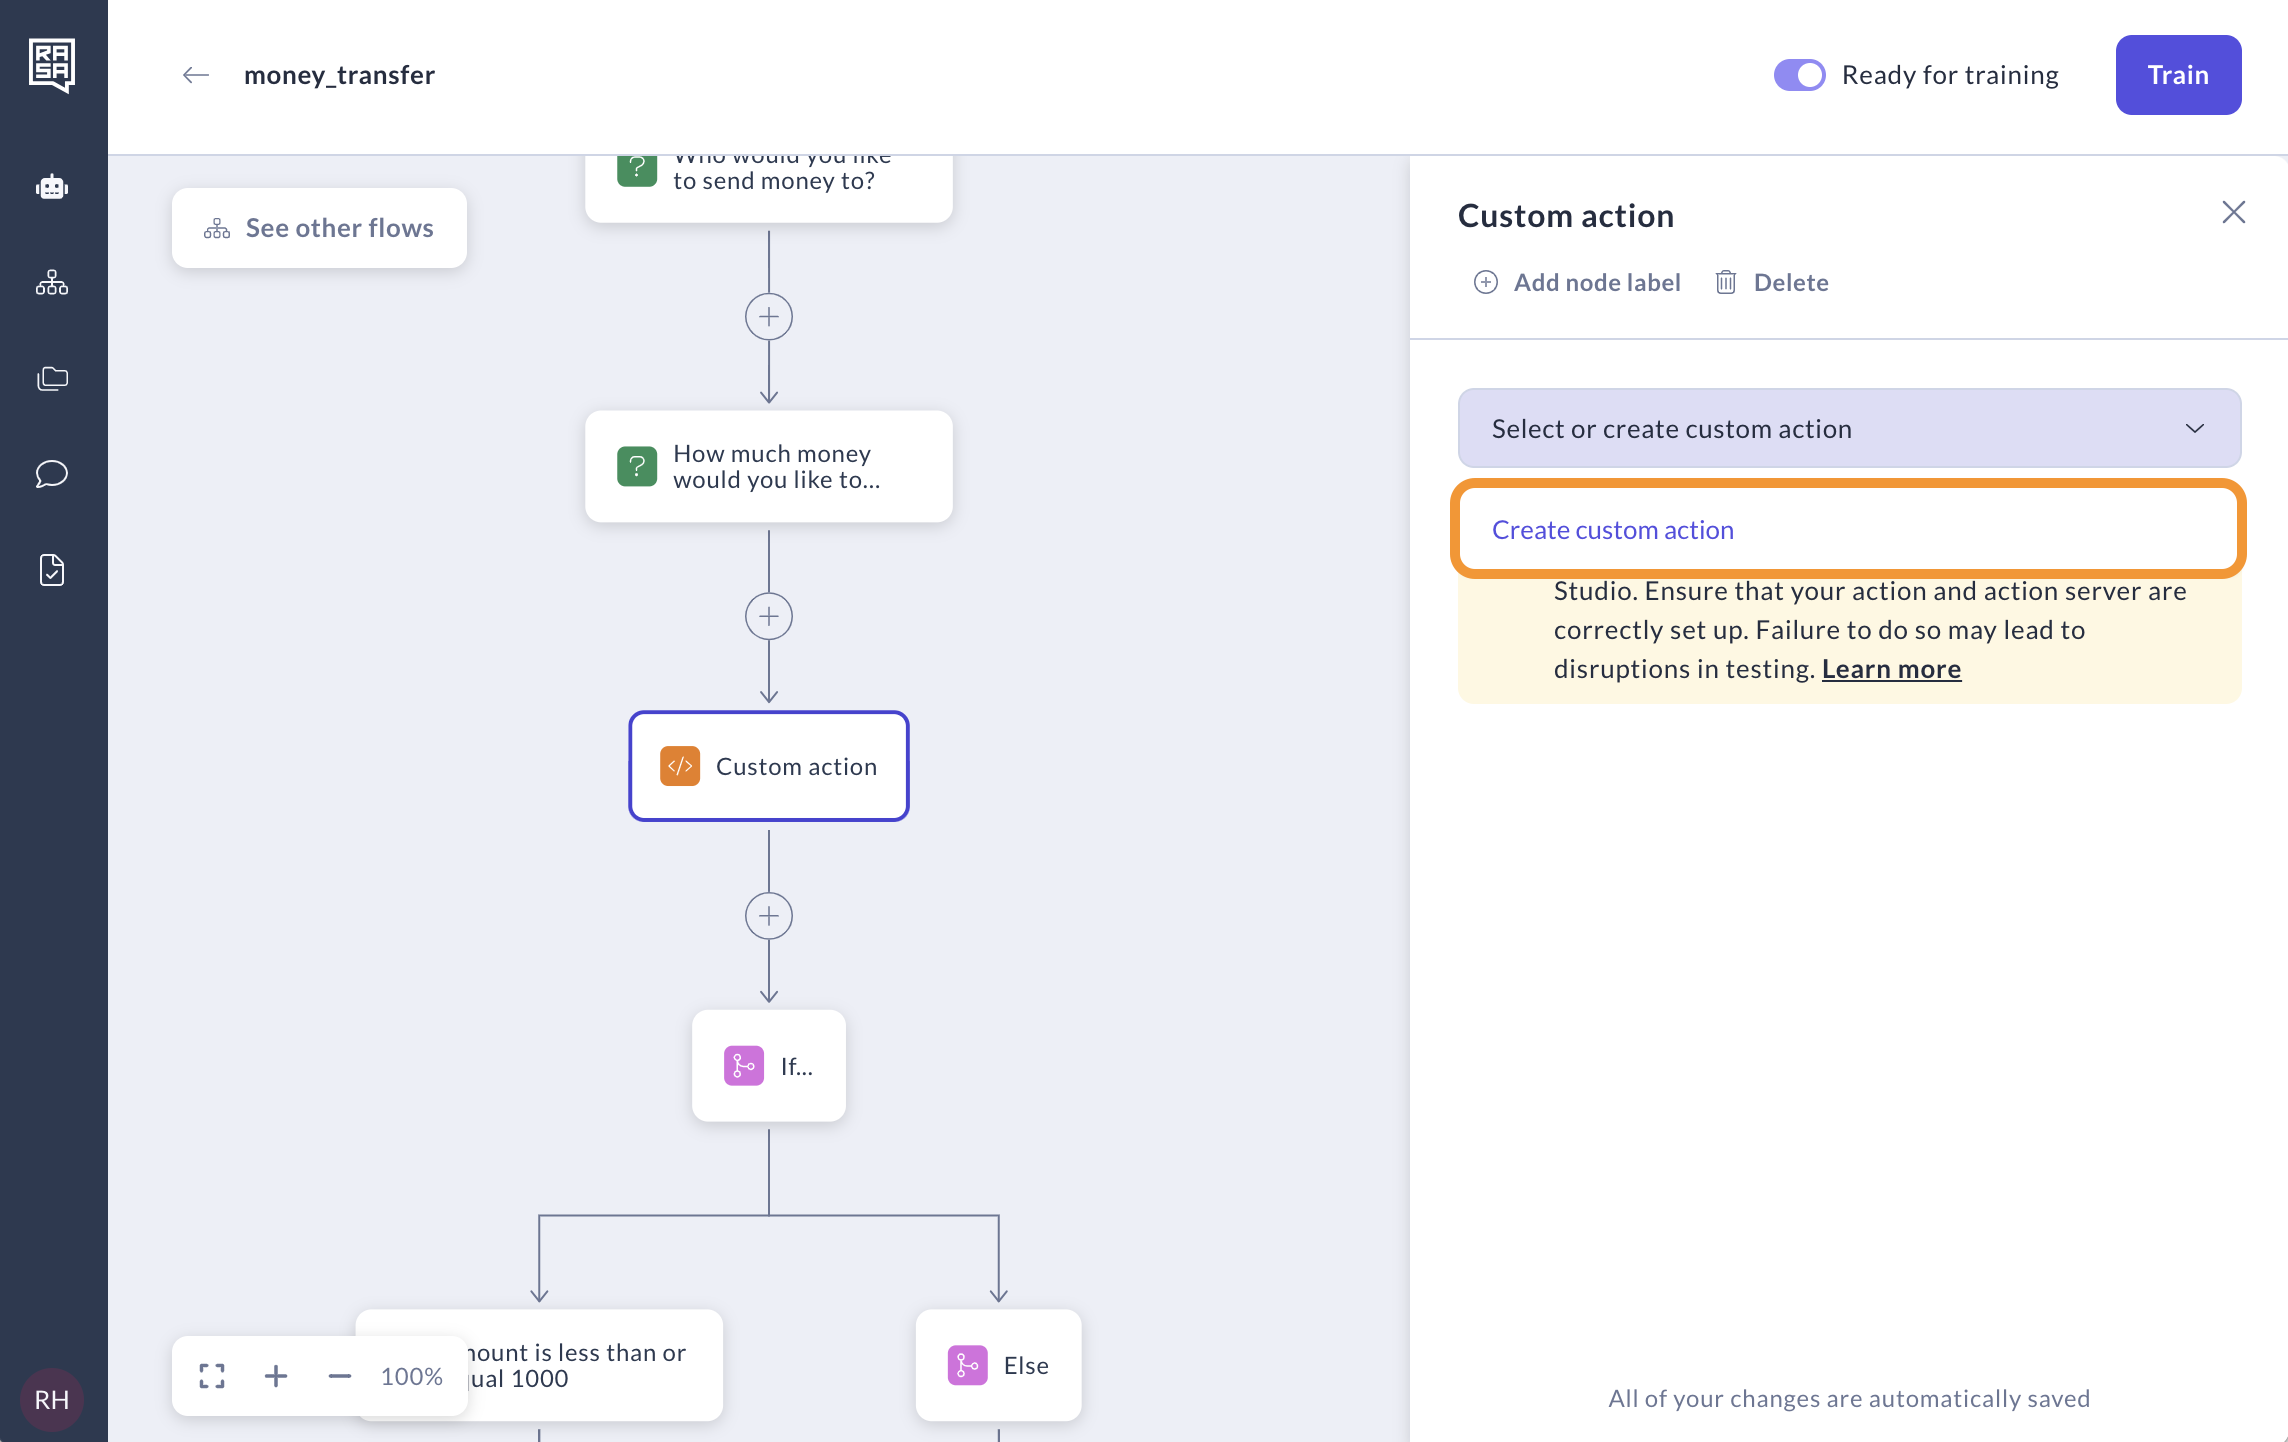
Select an existing custom action or click on "Create custom action" to create a new one.
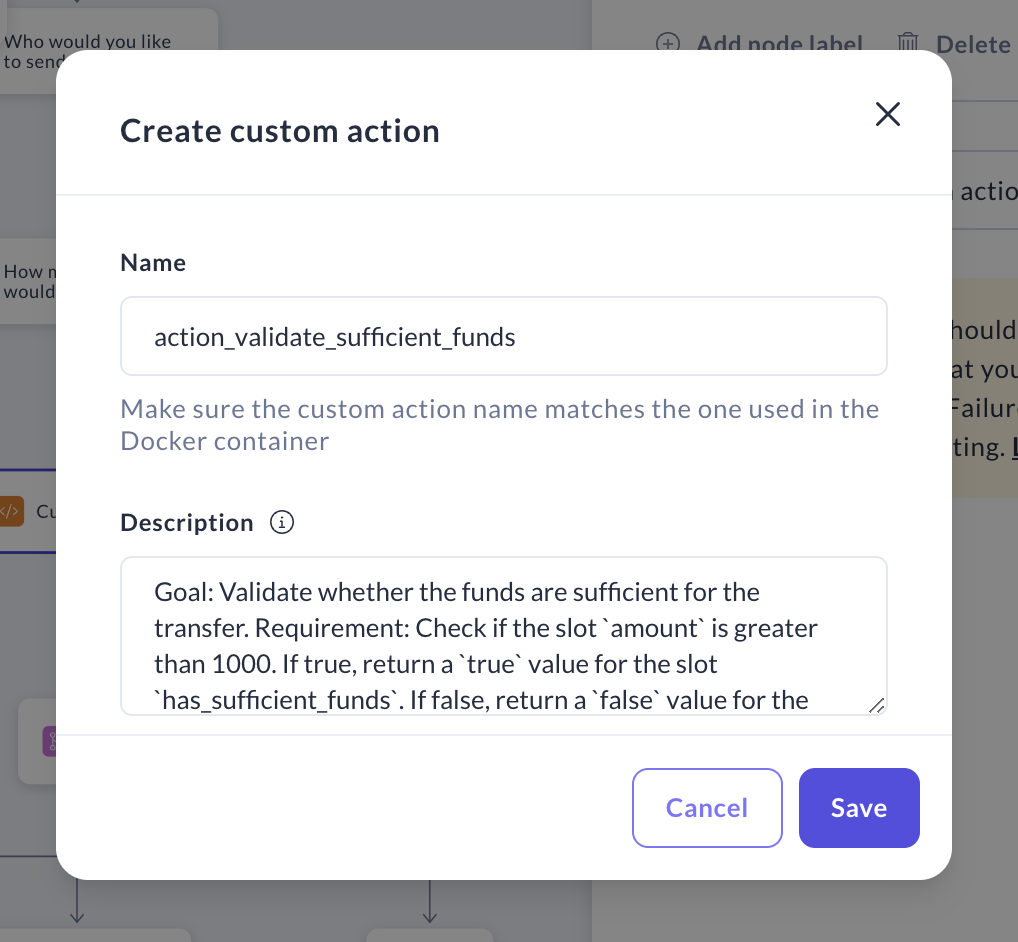
In the window that appears, enter the name of the custom action, ensuring it exactly matches the one implemented in your Docker container. In the "Description field "provide a detailed description of what the action does in free form.
Note: This description will be read by whoever implements this action so it should describe what this action should achieve, what slot(s) it should use and what slot value to return in which case.
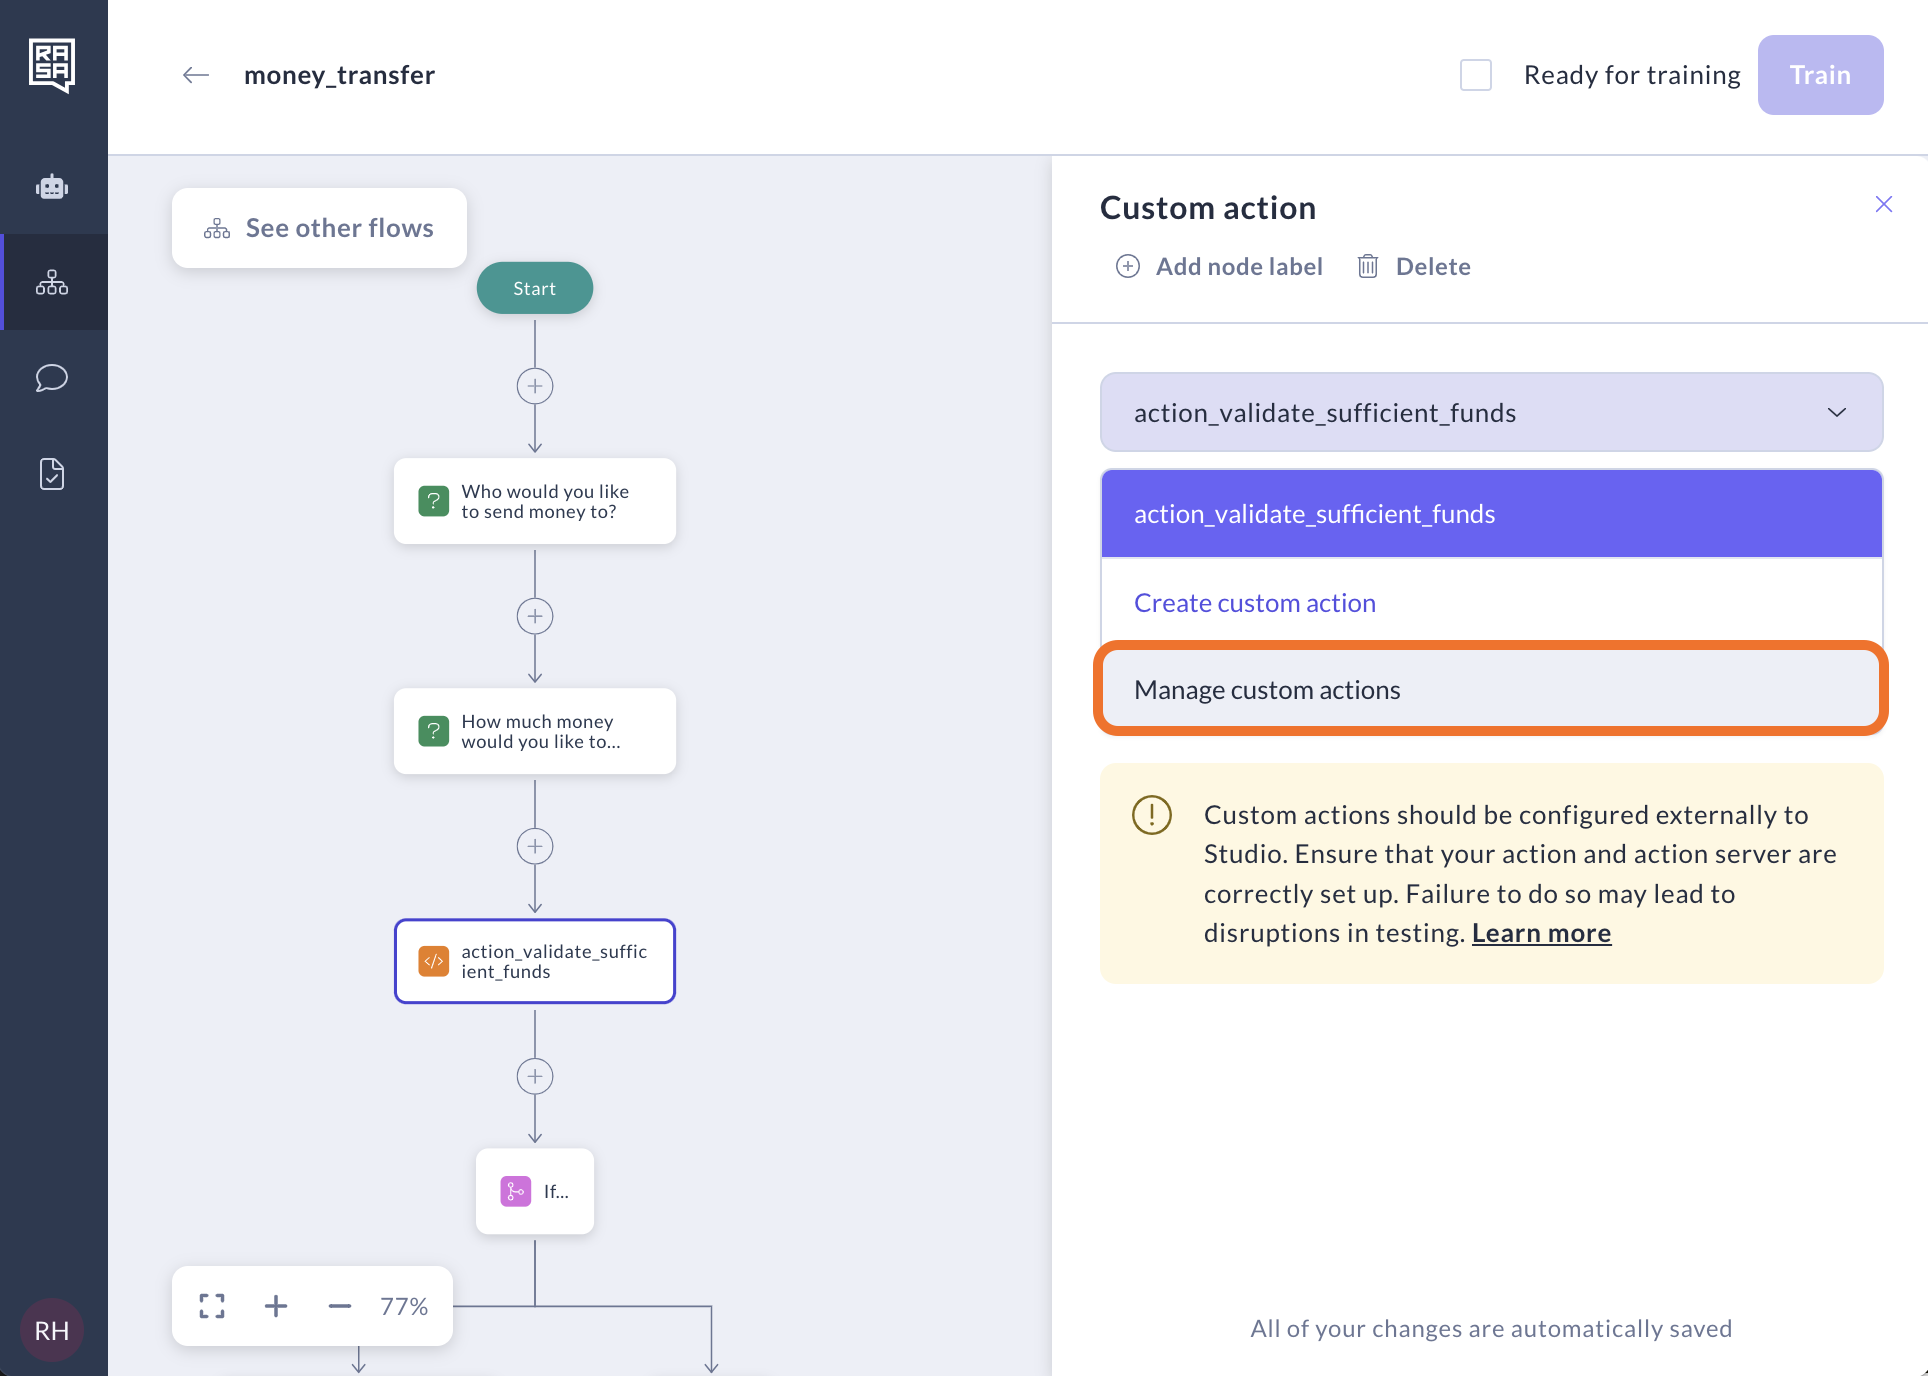
You can edit the name or description of a custom action, or delete it, by selecting "Manage custom actions" from the drop-down menu. Note that when you use a custom action in many places, when you edit or delete this action, it will also affect other flows and steps as well.
Link
A Link step is used to link a flow to another flow.
After adding the Link step, select a flow you want to link to from the list or create a new one.
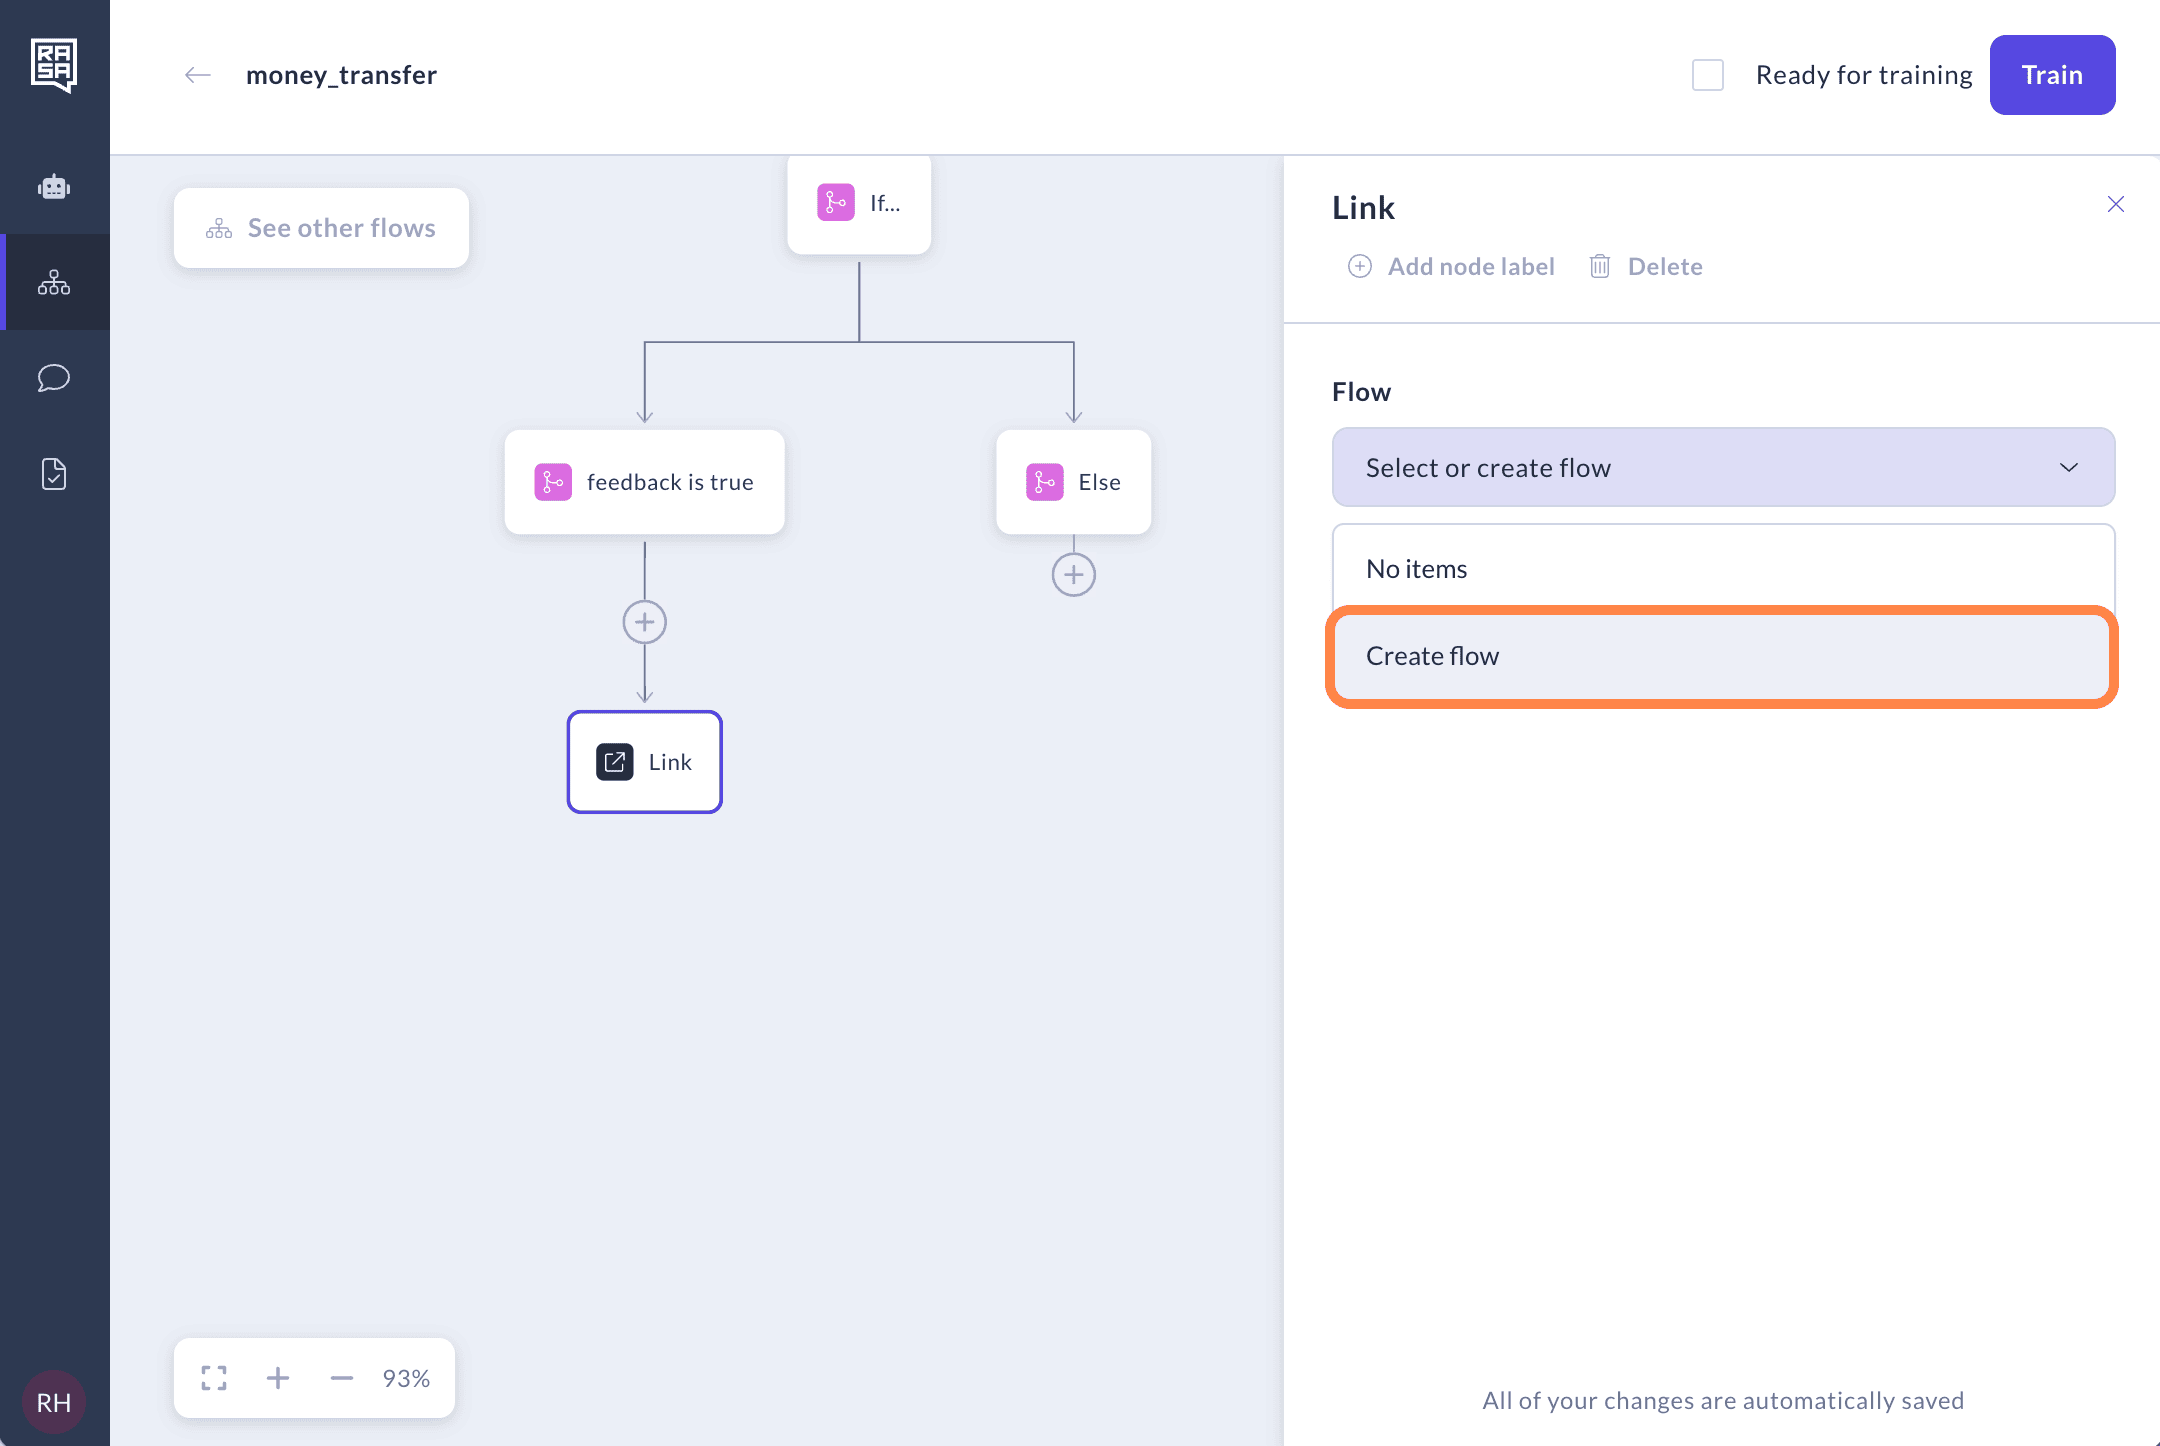
If you're creating a new one, fill in the details about the flow.
After the flow is selected, you can continue working on the current one or open the new one in a new tab. It’s not possible to add any subsequent step to the link step. If you want to design what happens after the linked flow is finished, you’ll need to create another flow and connect it to the linked flow.
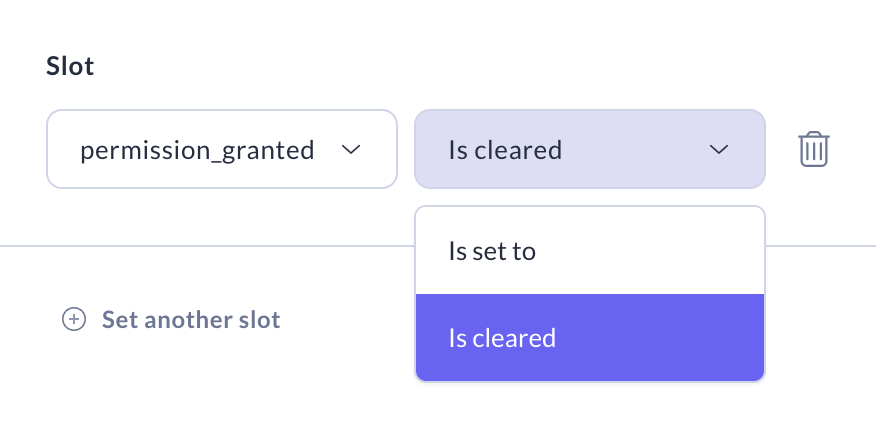
Set Slots
Set slots step is used to assign a value to a slot or to clear a slot value.
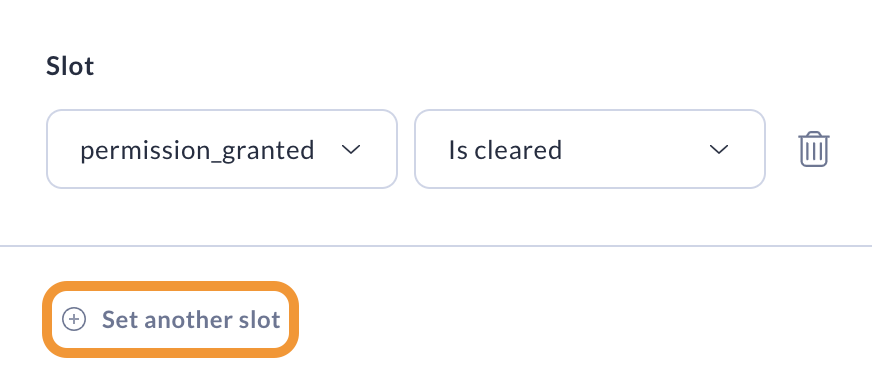
This is useful for creating logic independent of user input. For example, if the user mentions their birth year during a conversation, we can automatically set the age_category slot to Minor and clear the permission_granted slot, streamlining the interaction accordingly.
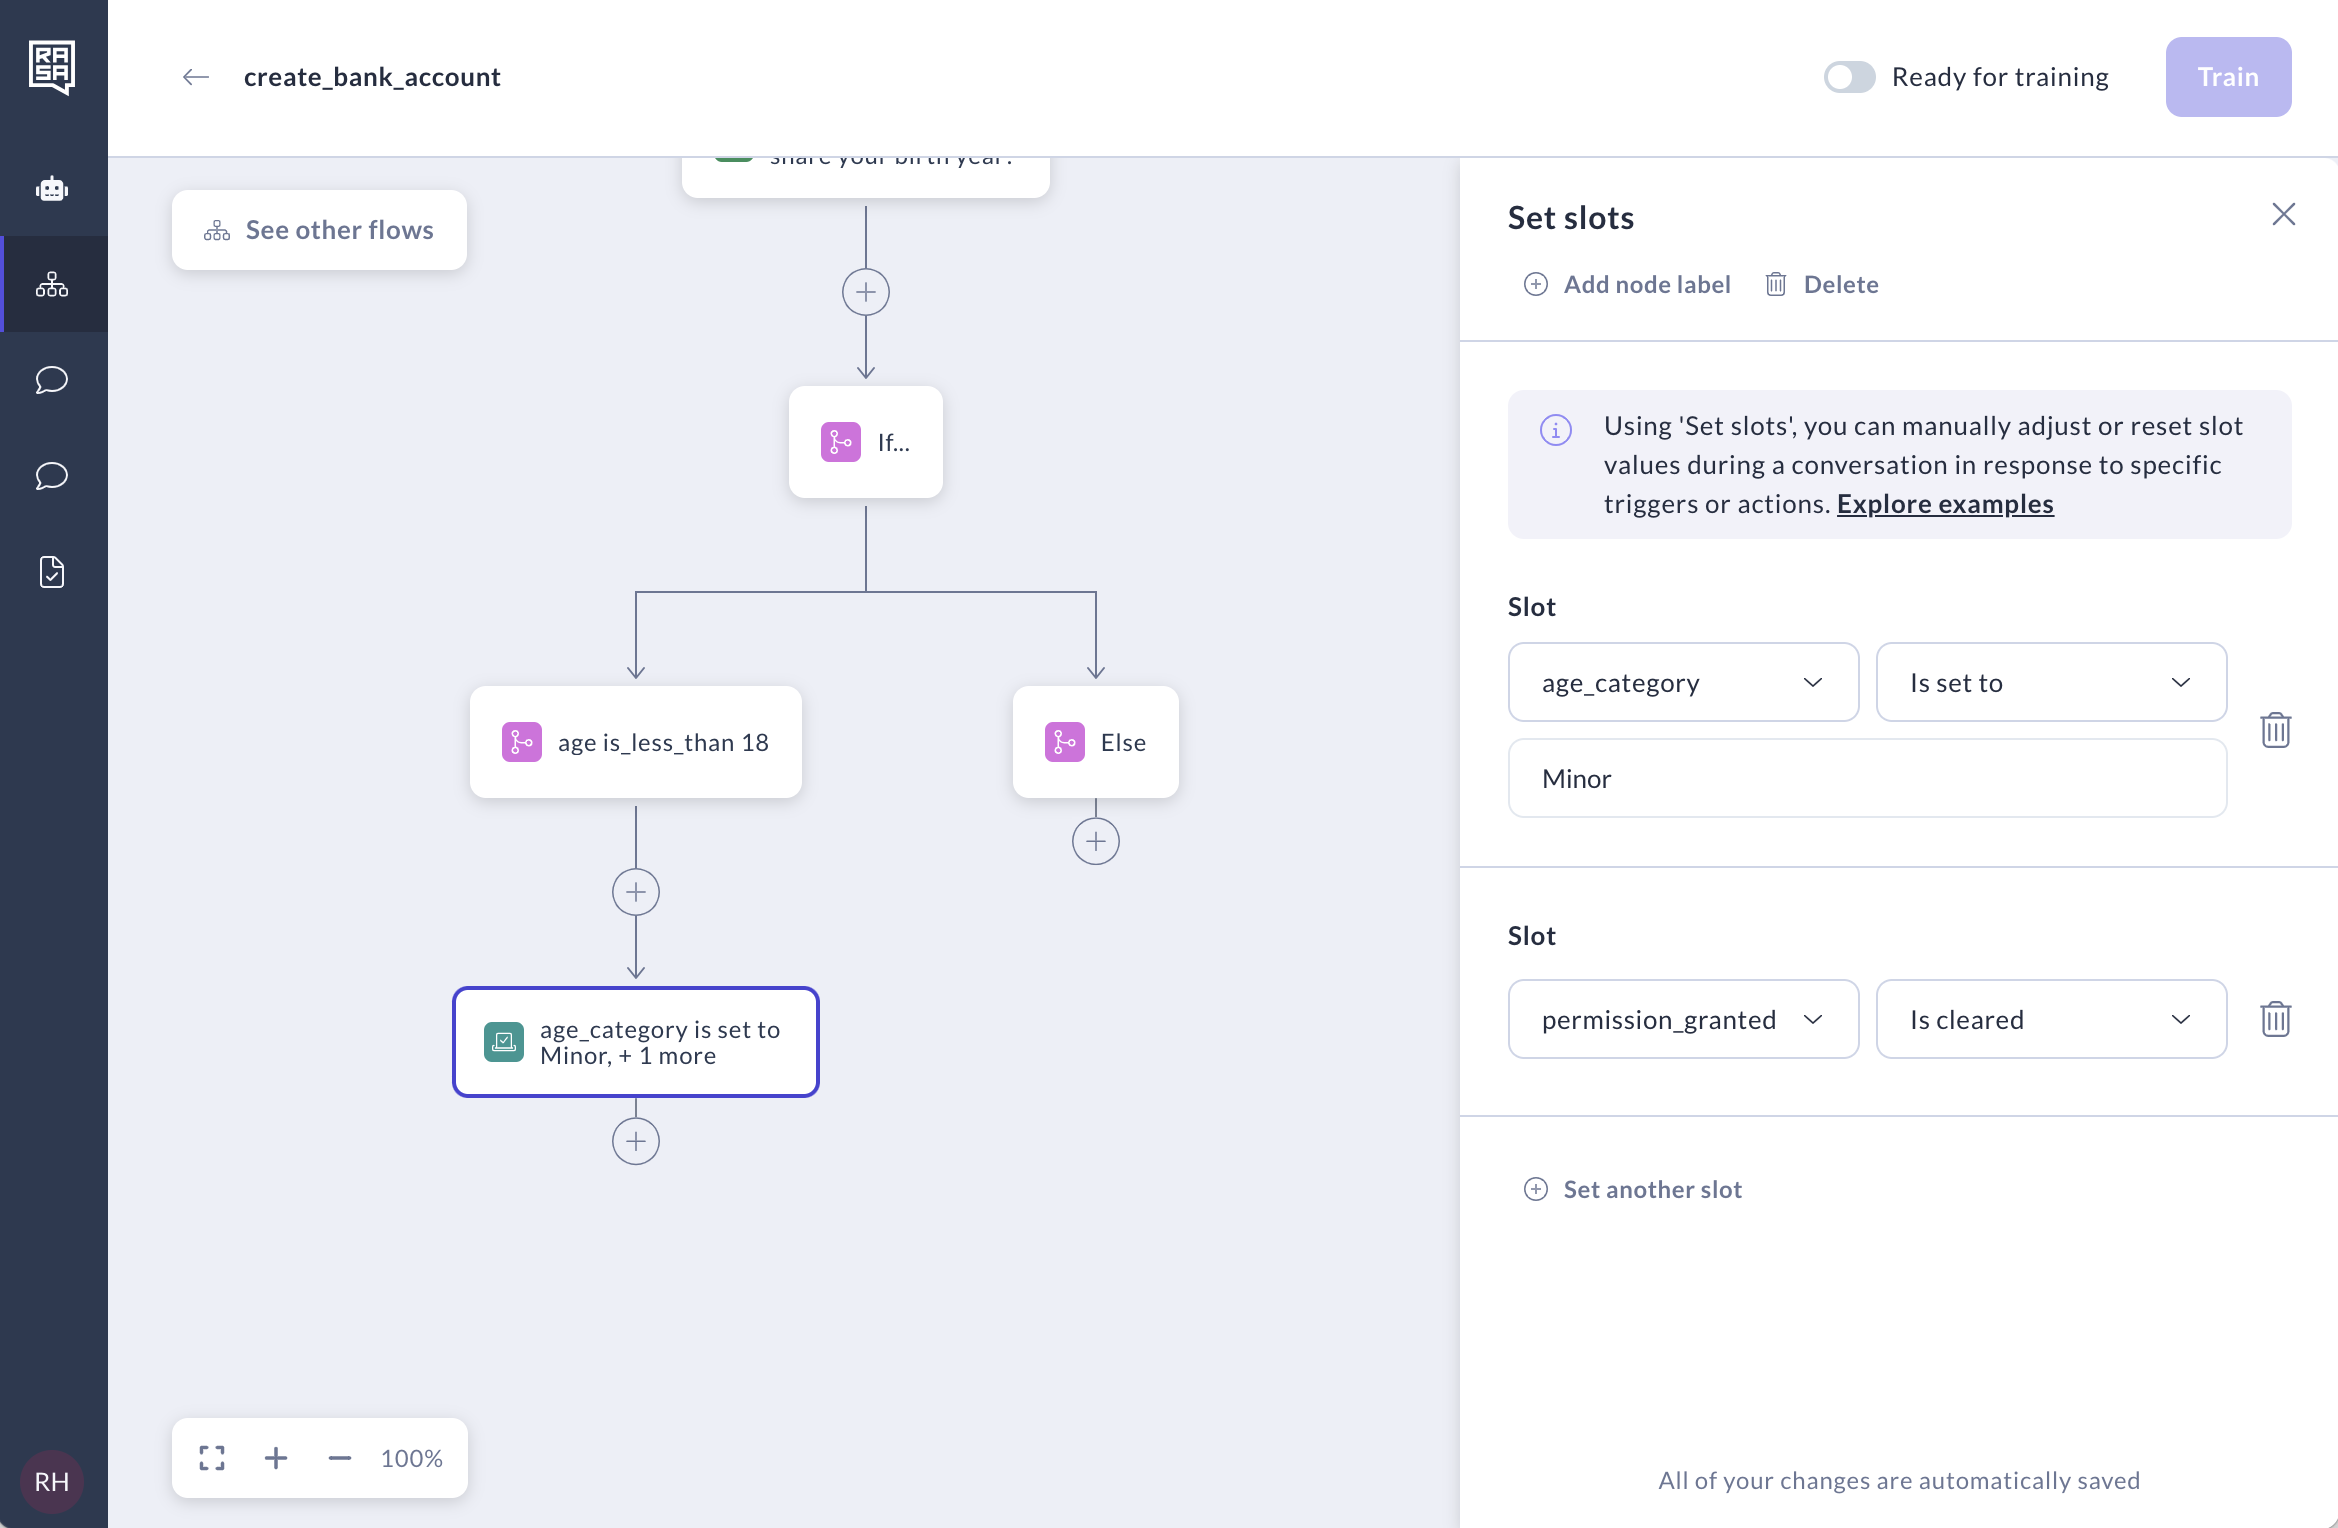
You can set multiple slots in one step. Simply click on "Set another slot" button to add more. You can see how many slots are set in one step by reading the number on the node.
When you select to clear a slot's value, its current value will be reset and we will read it as null. This is mostly used to unset a slot value. For example, if a user asks to transfer more money than they have available in their account, you might want to inform them. Just create a step in the flow to reset the amount slot rather than ending the flow.