Flow Builder — Logic
The "Logic" step enables you to direct the flow based on a condition. For example, you can guide the user to one branch if they have a sufficient amount of money in their account, or to another if the amount is insufficient.
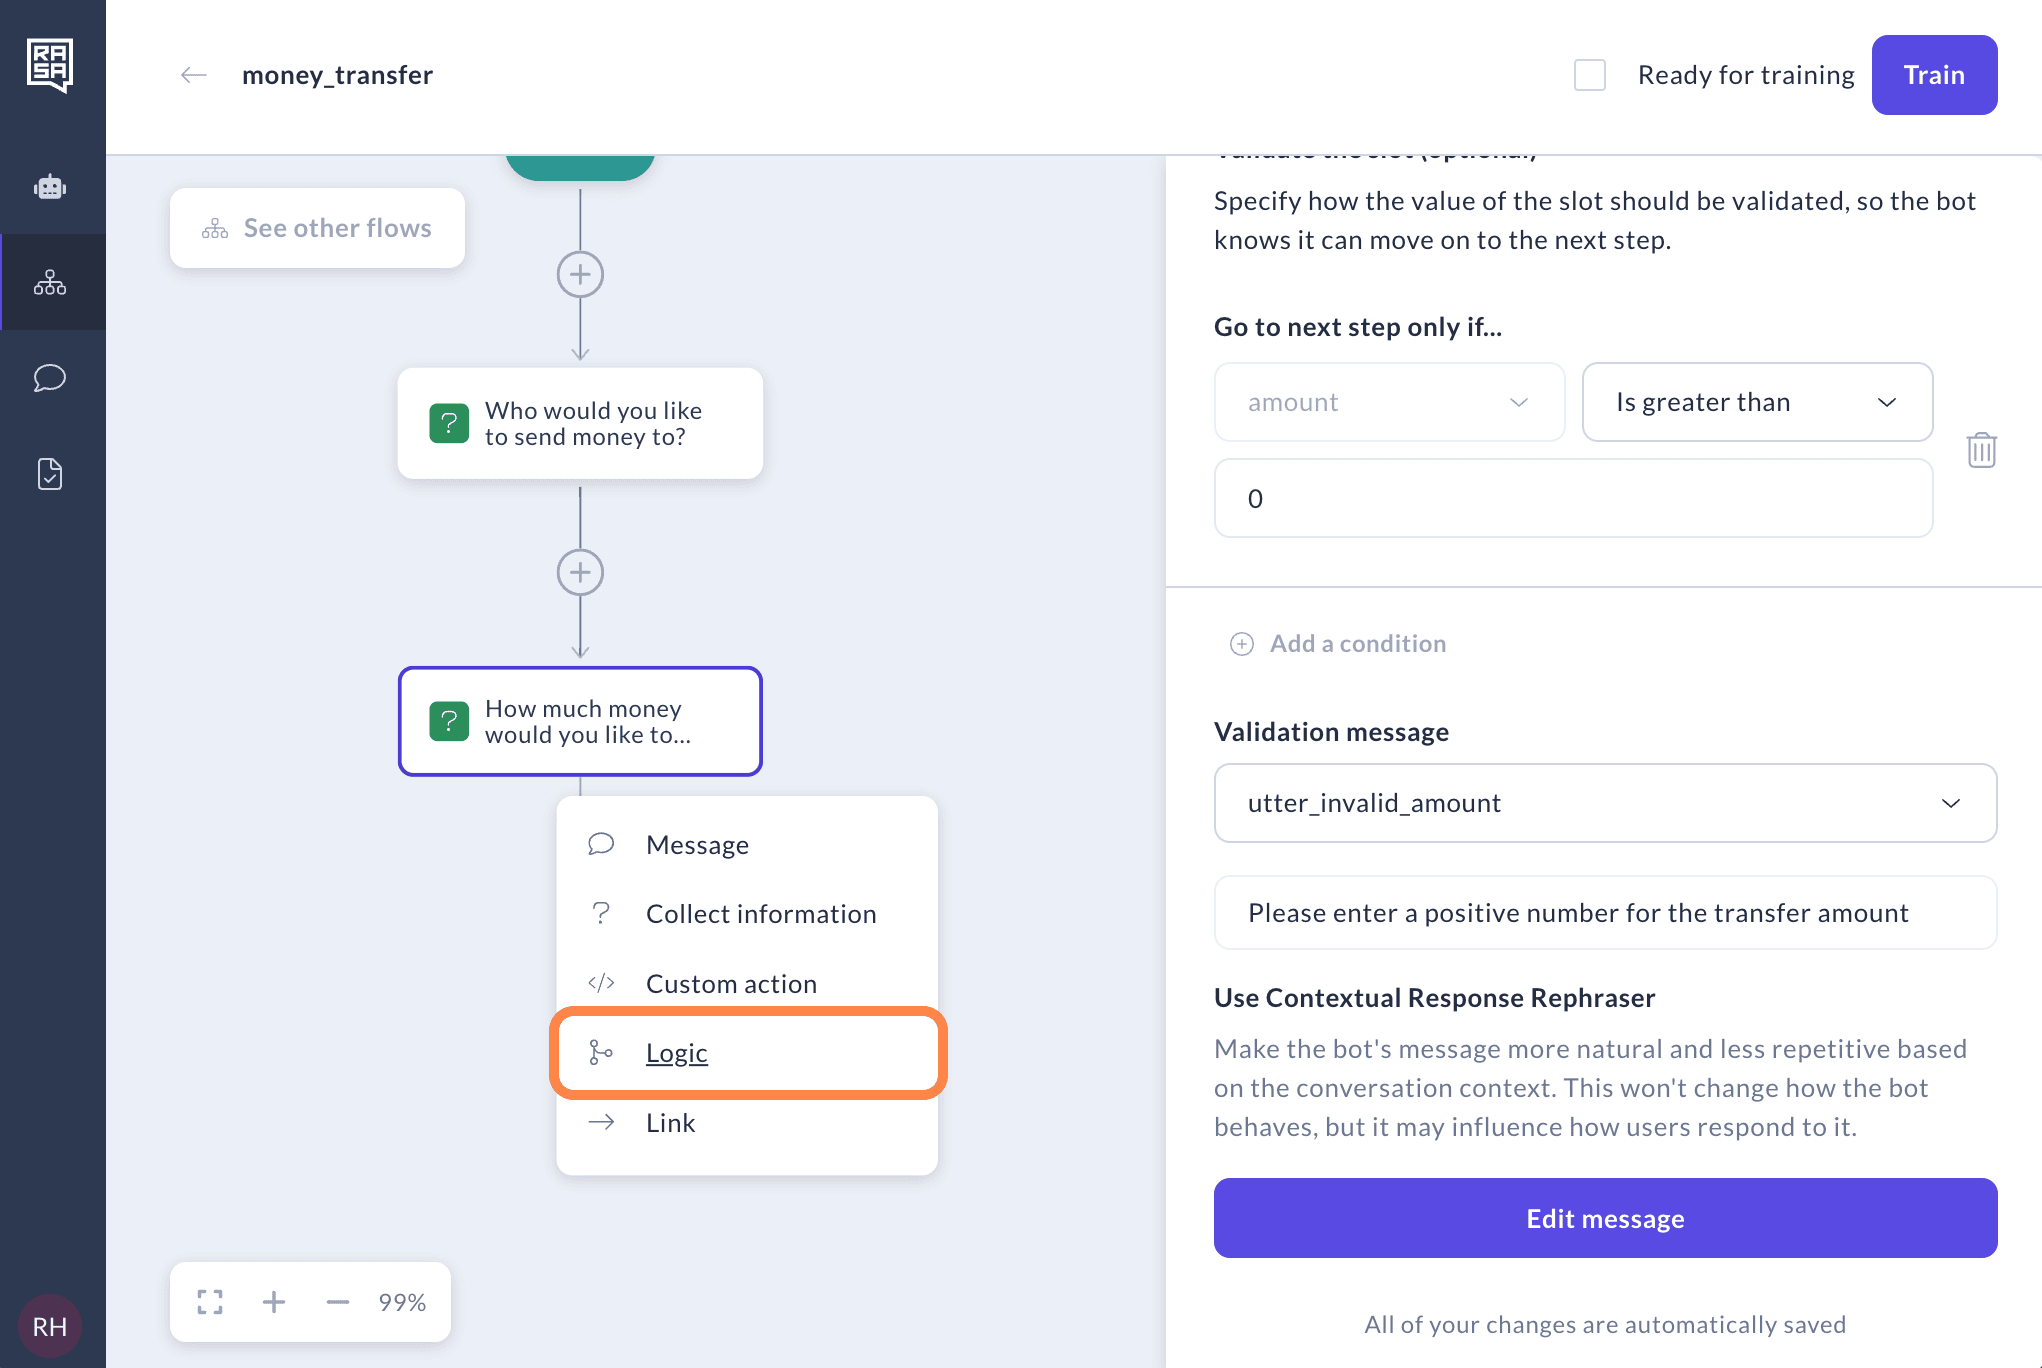
How to create Logic branching
Select "Logic" from the list to branch your flow.
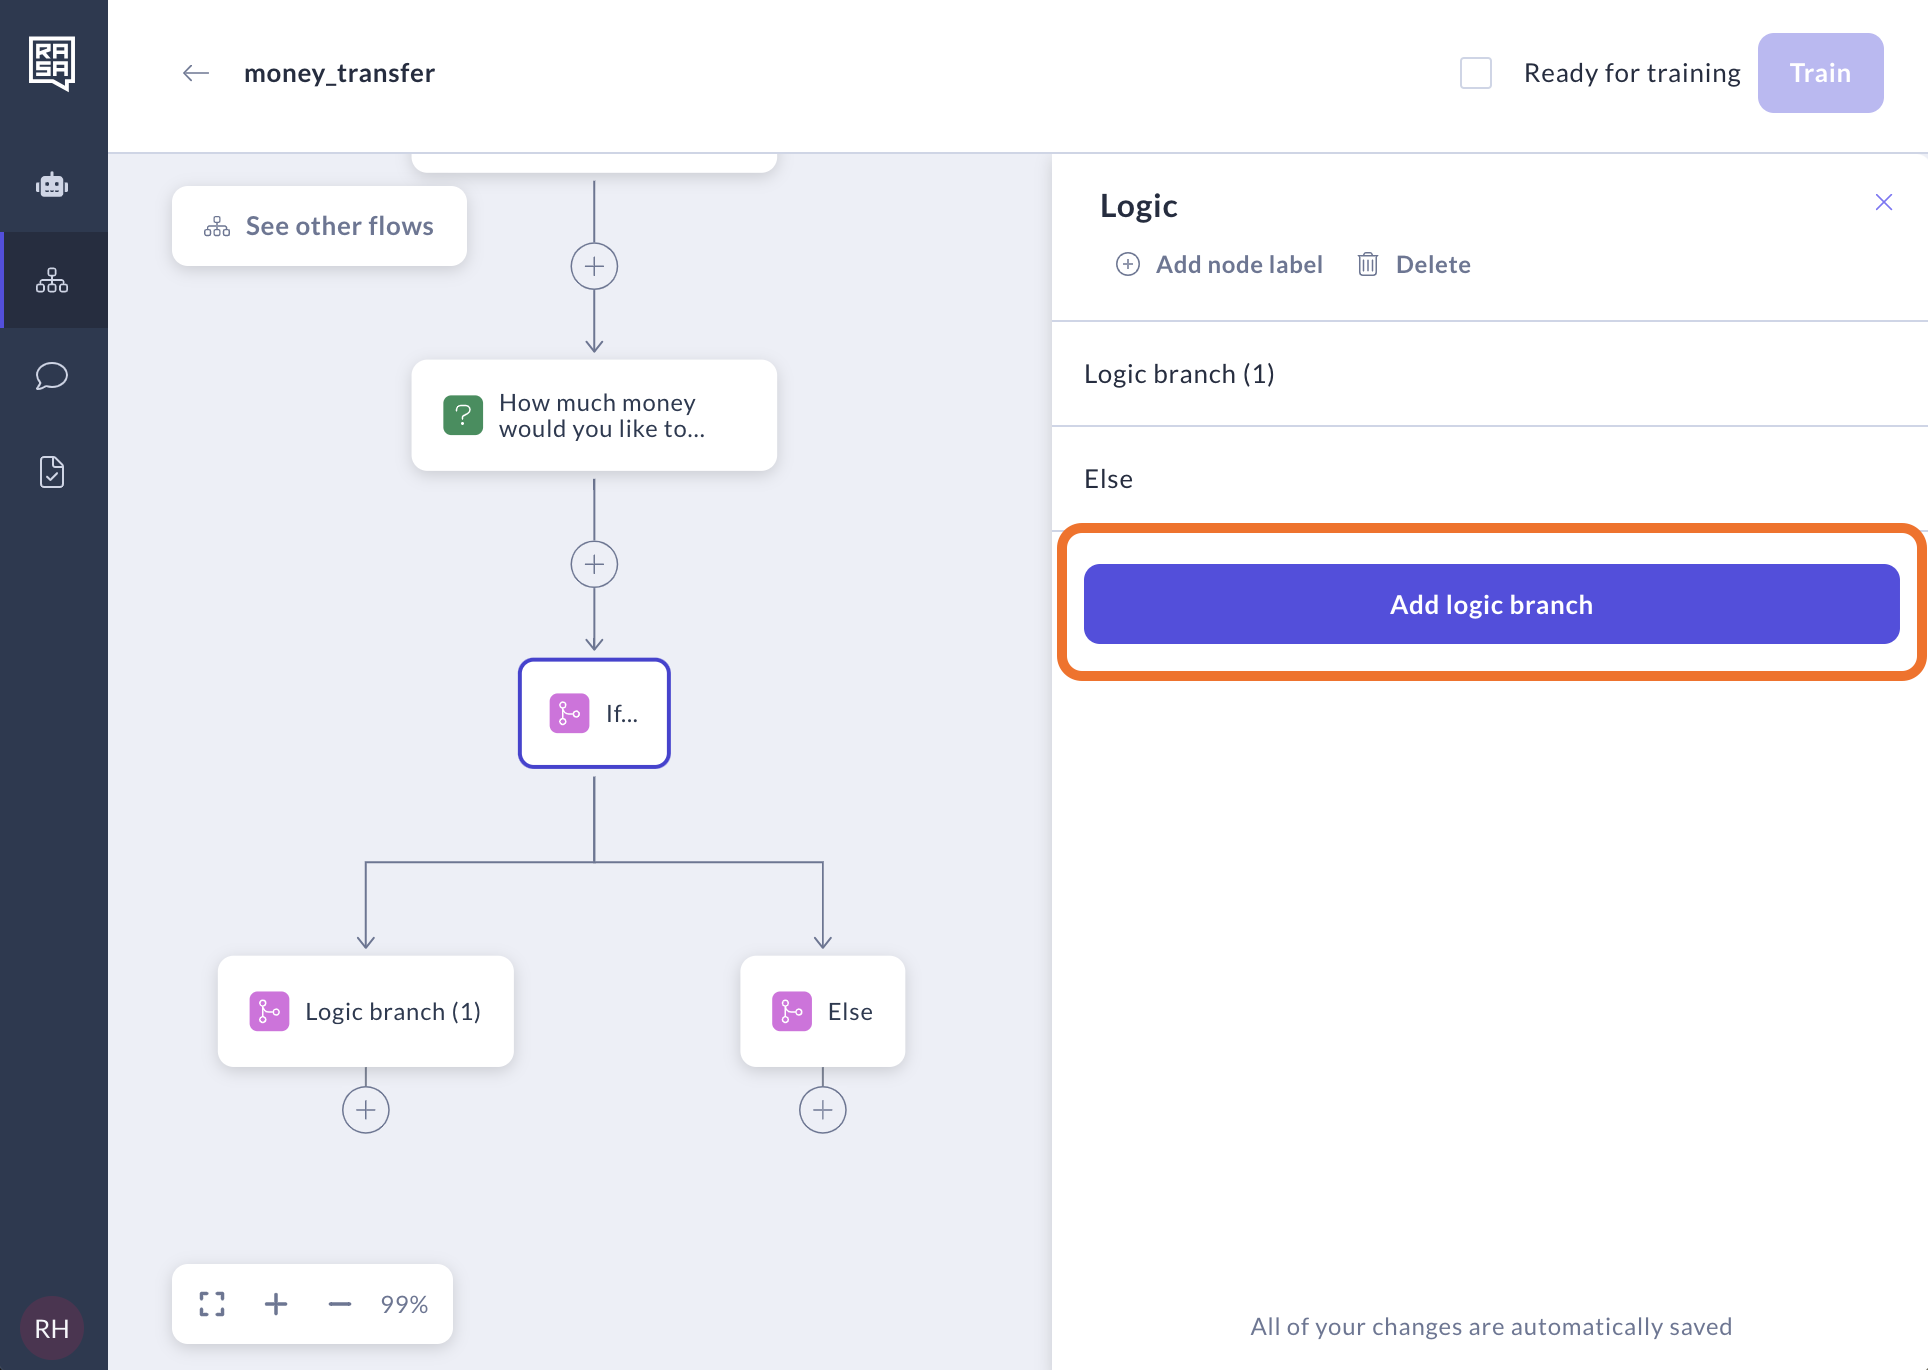
The branching structure will be immediately created. By clicking "Add logic branch" button you can add as many logic branches as you need.
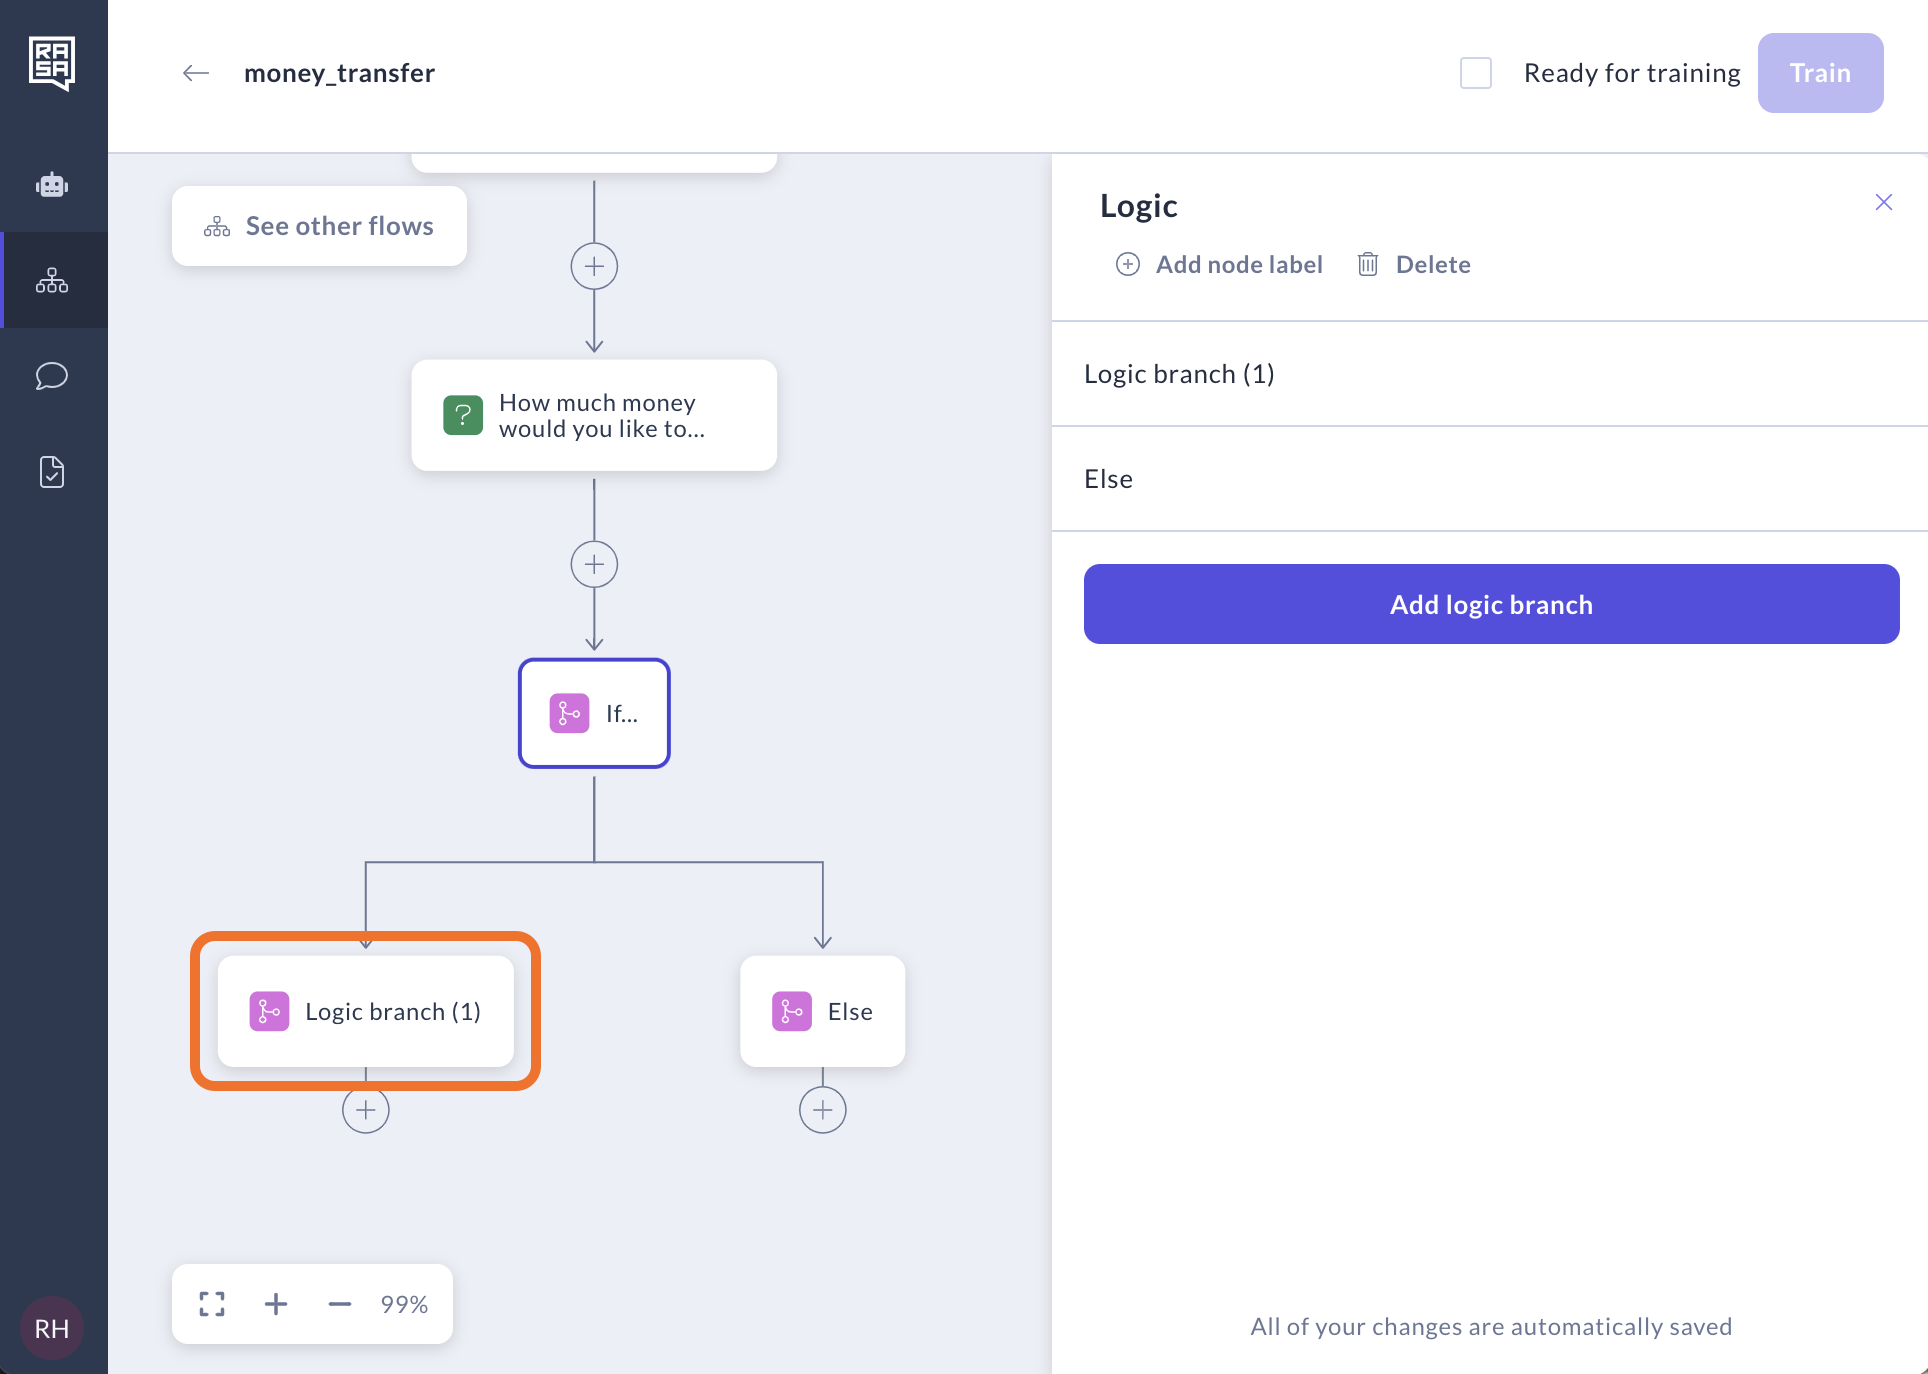
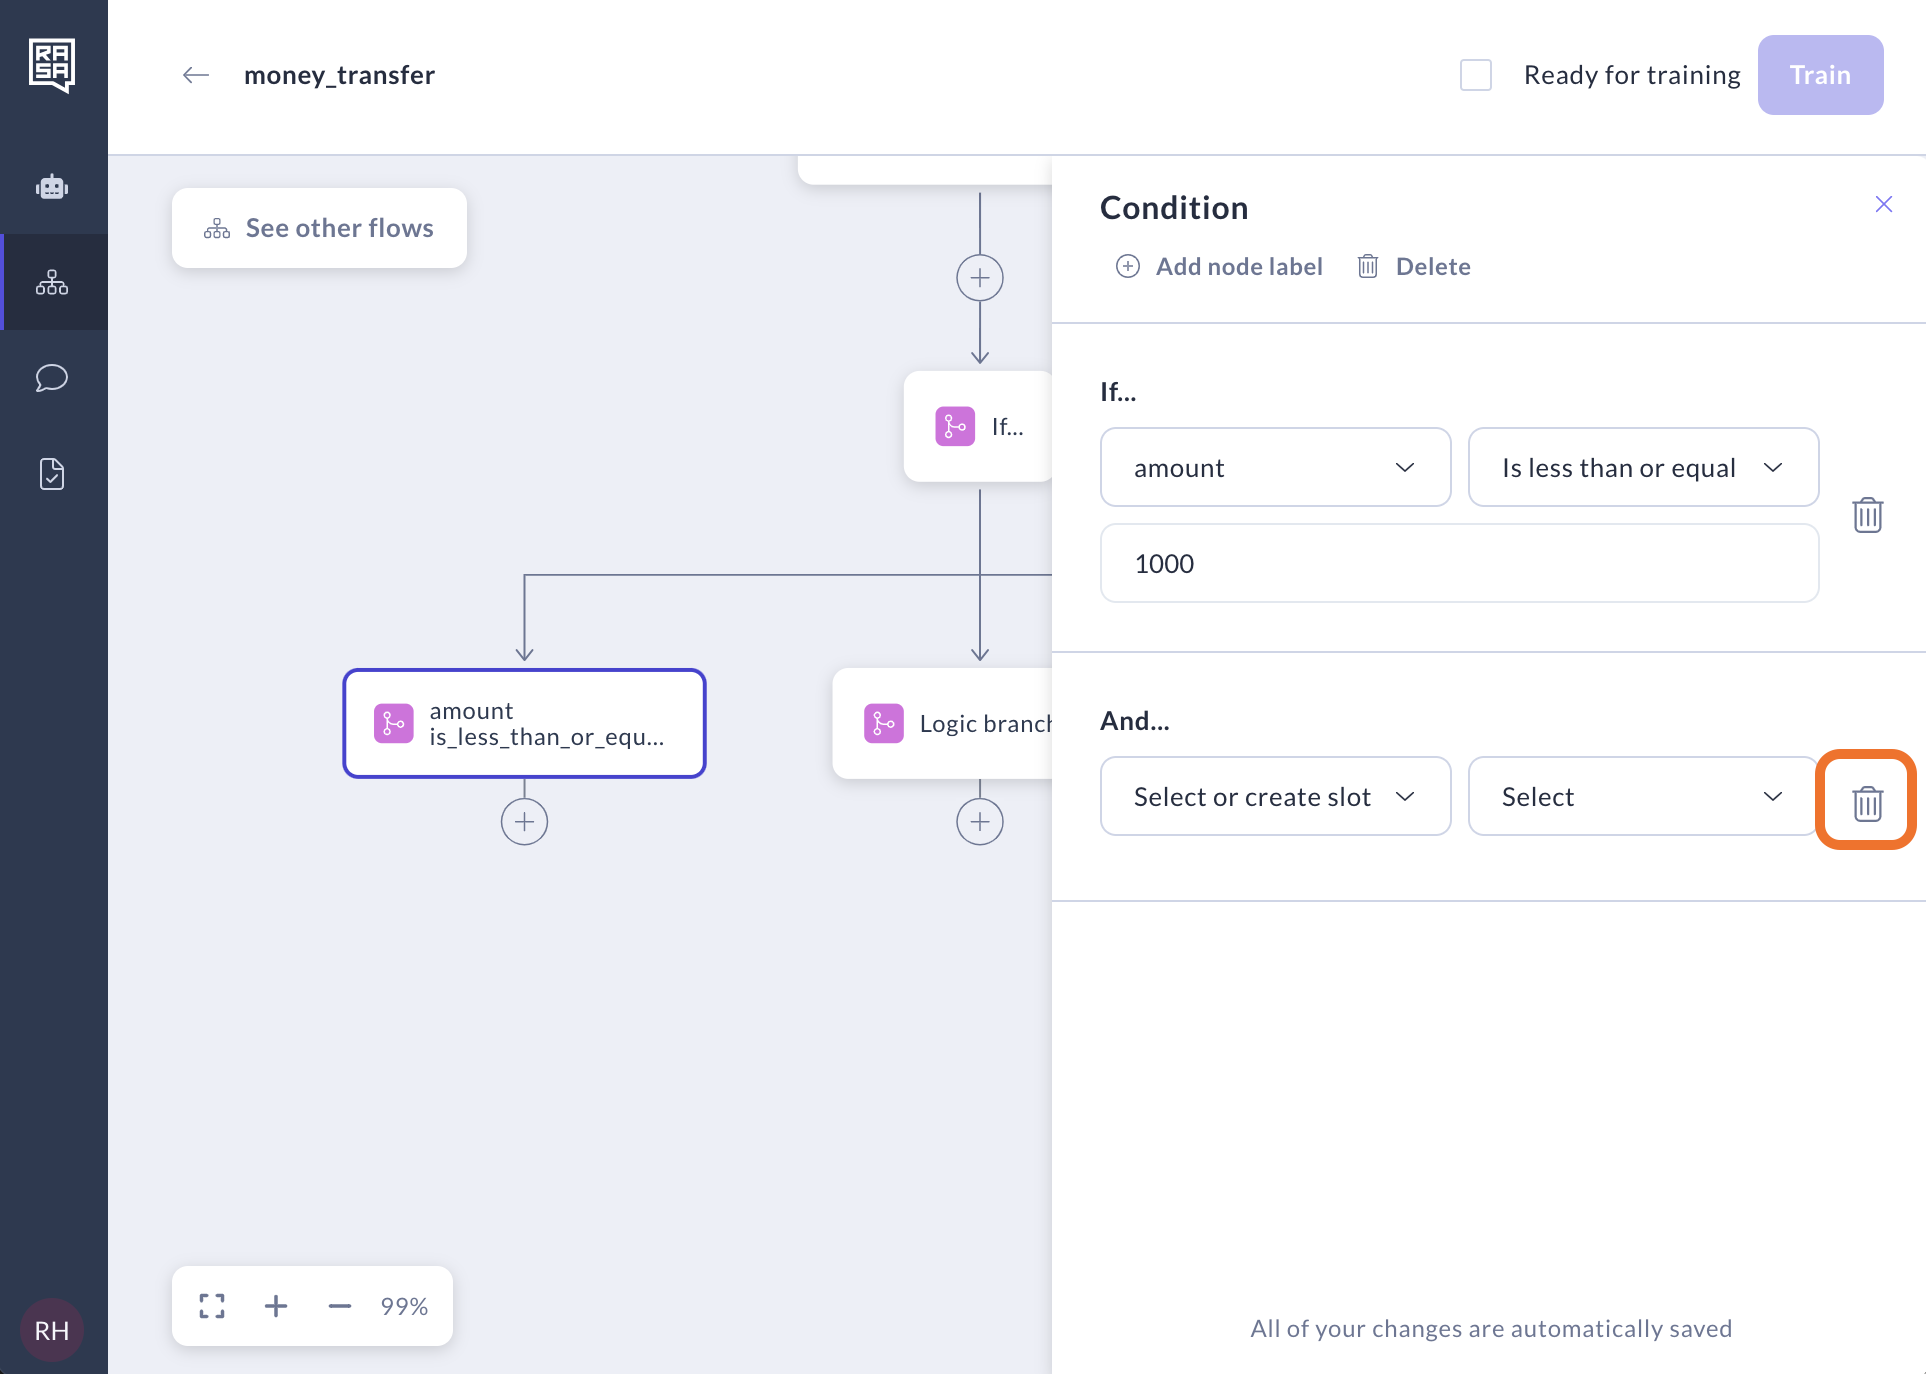
Click on one of the branches to begin describing the condition(s).
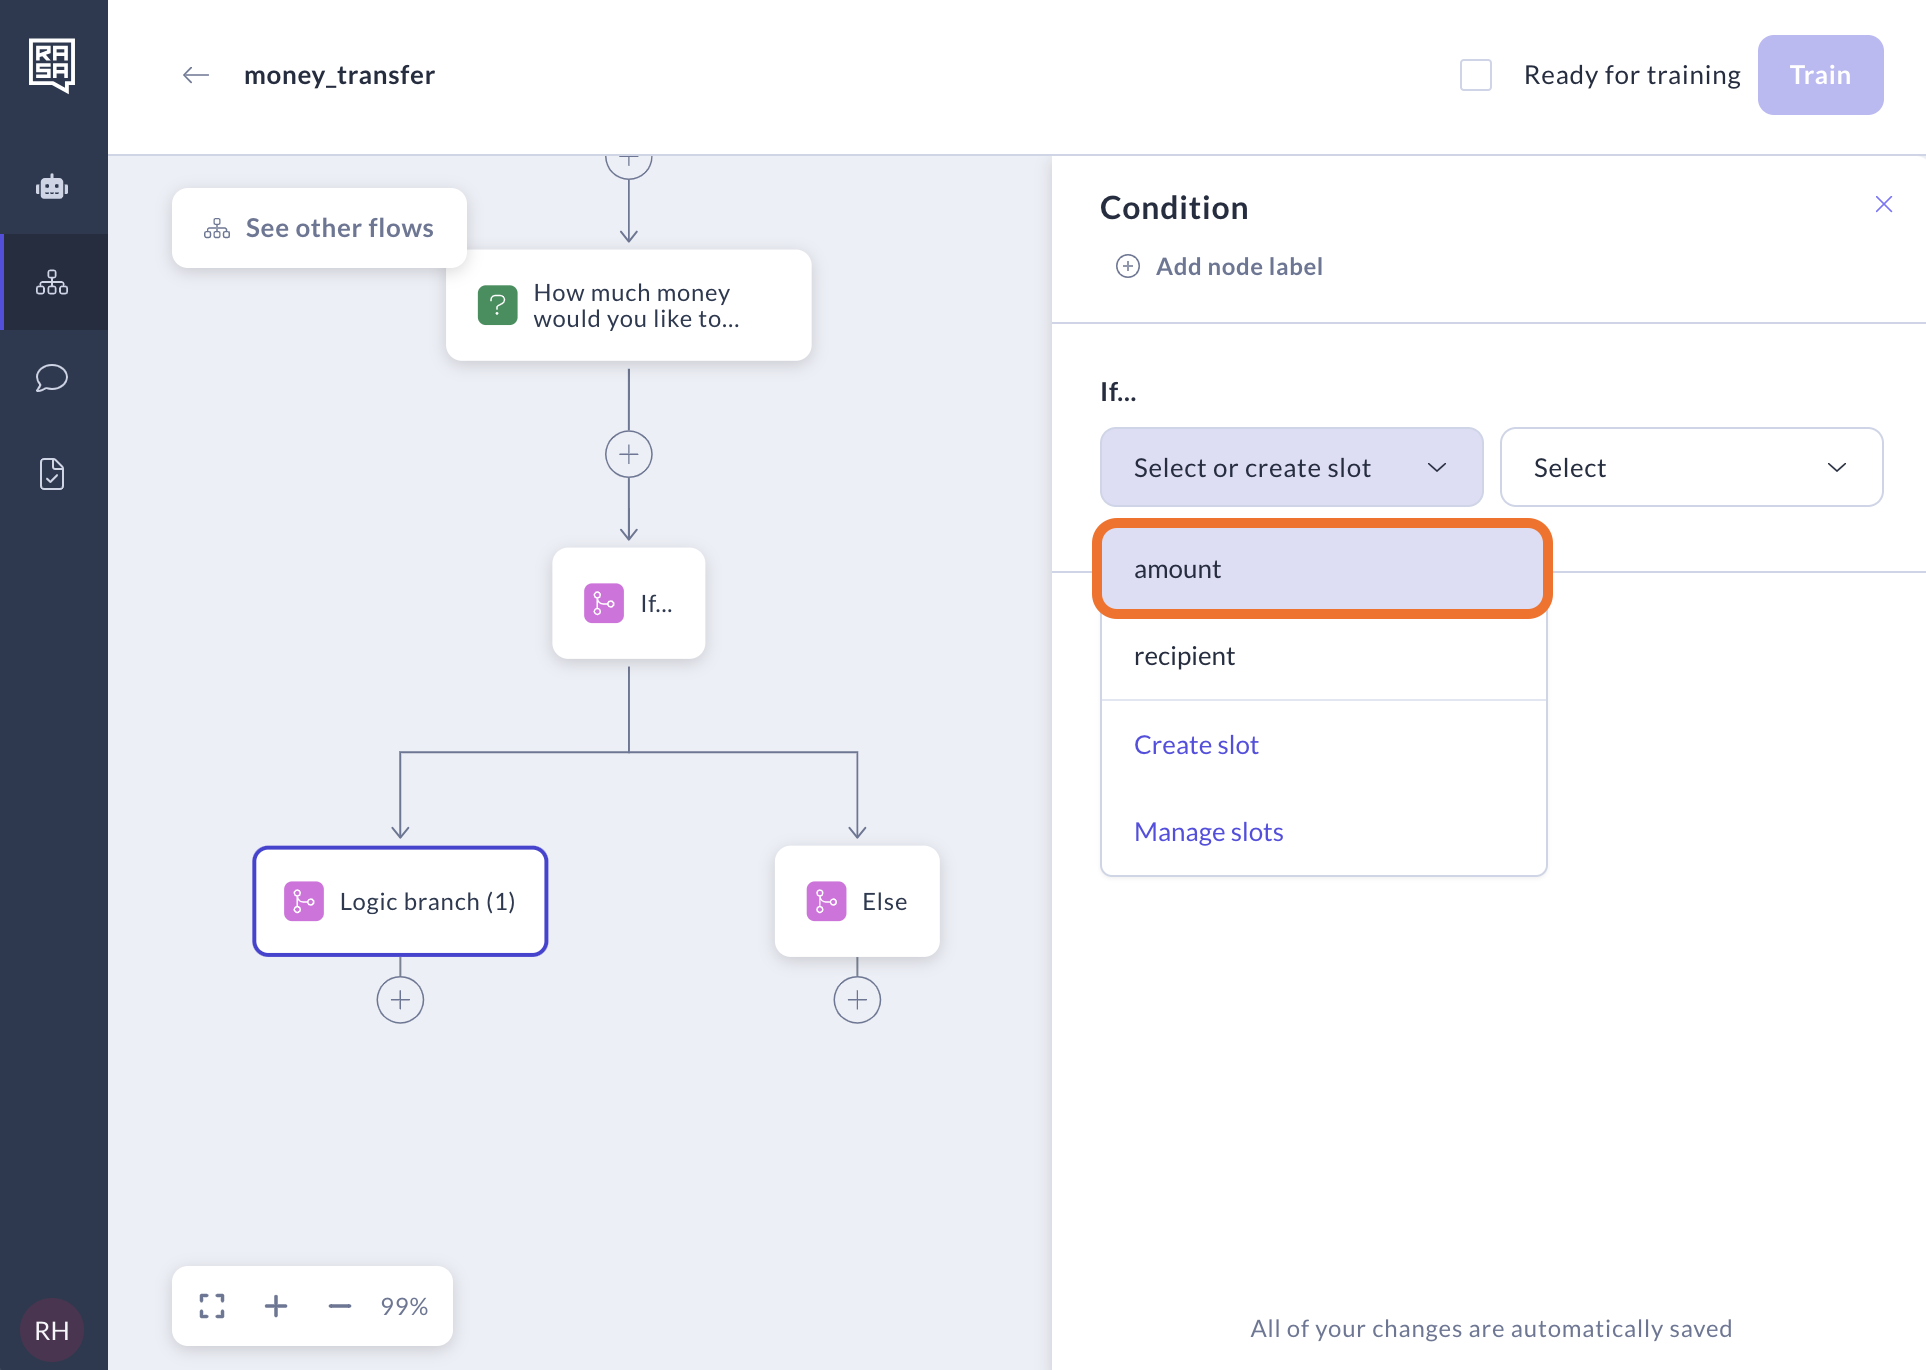
Select the slot from the dropdown menu. You can also create new slots here if they have been used in previously created custom actions. In that case, ensure that the custom action uses the exact slot names created here.
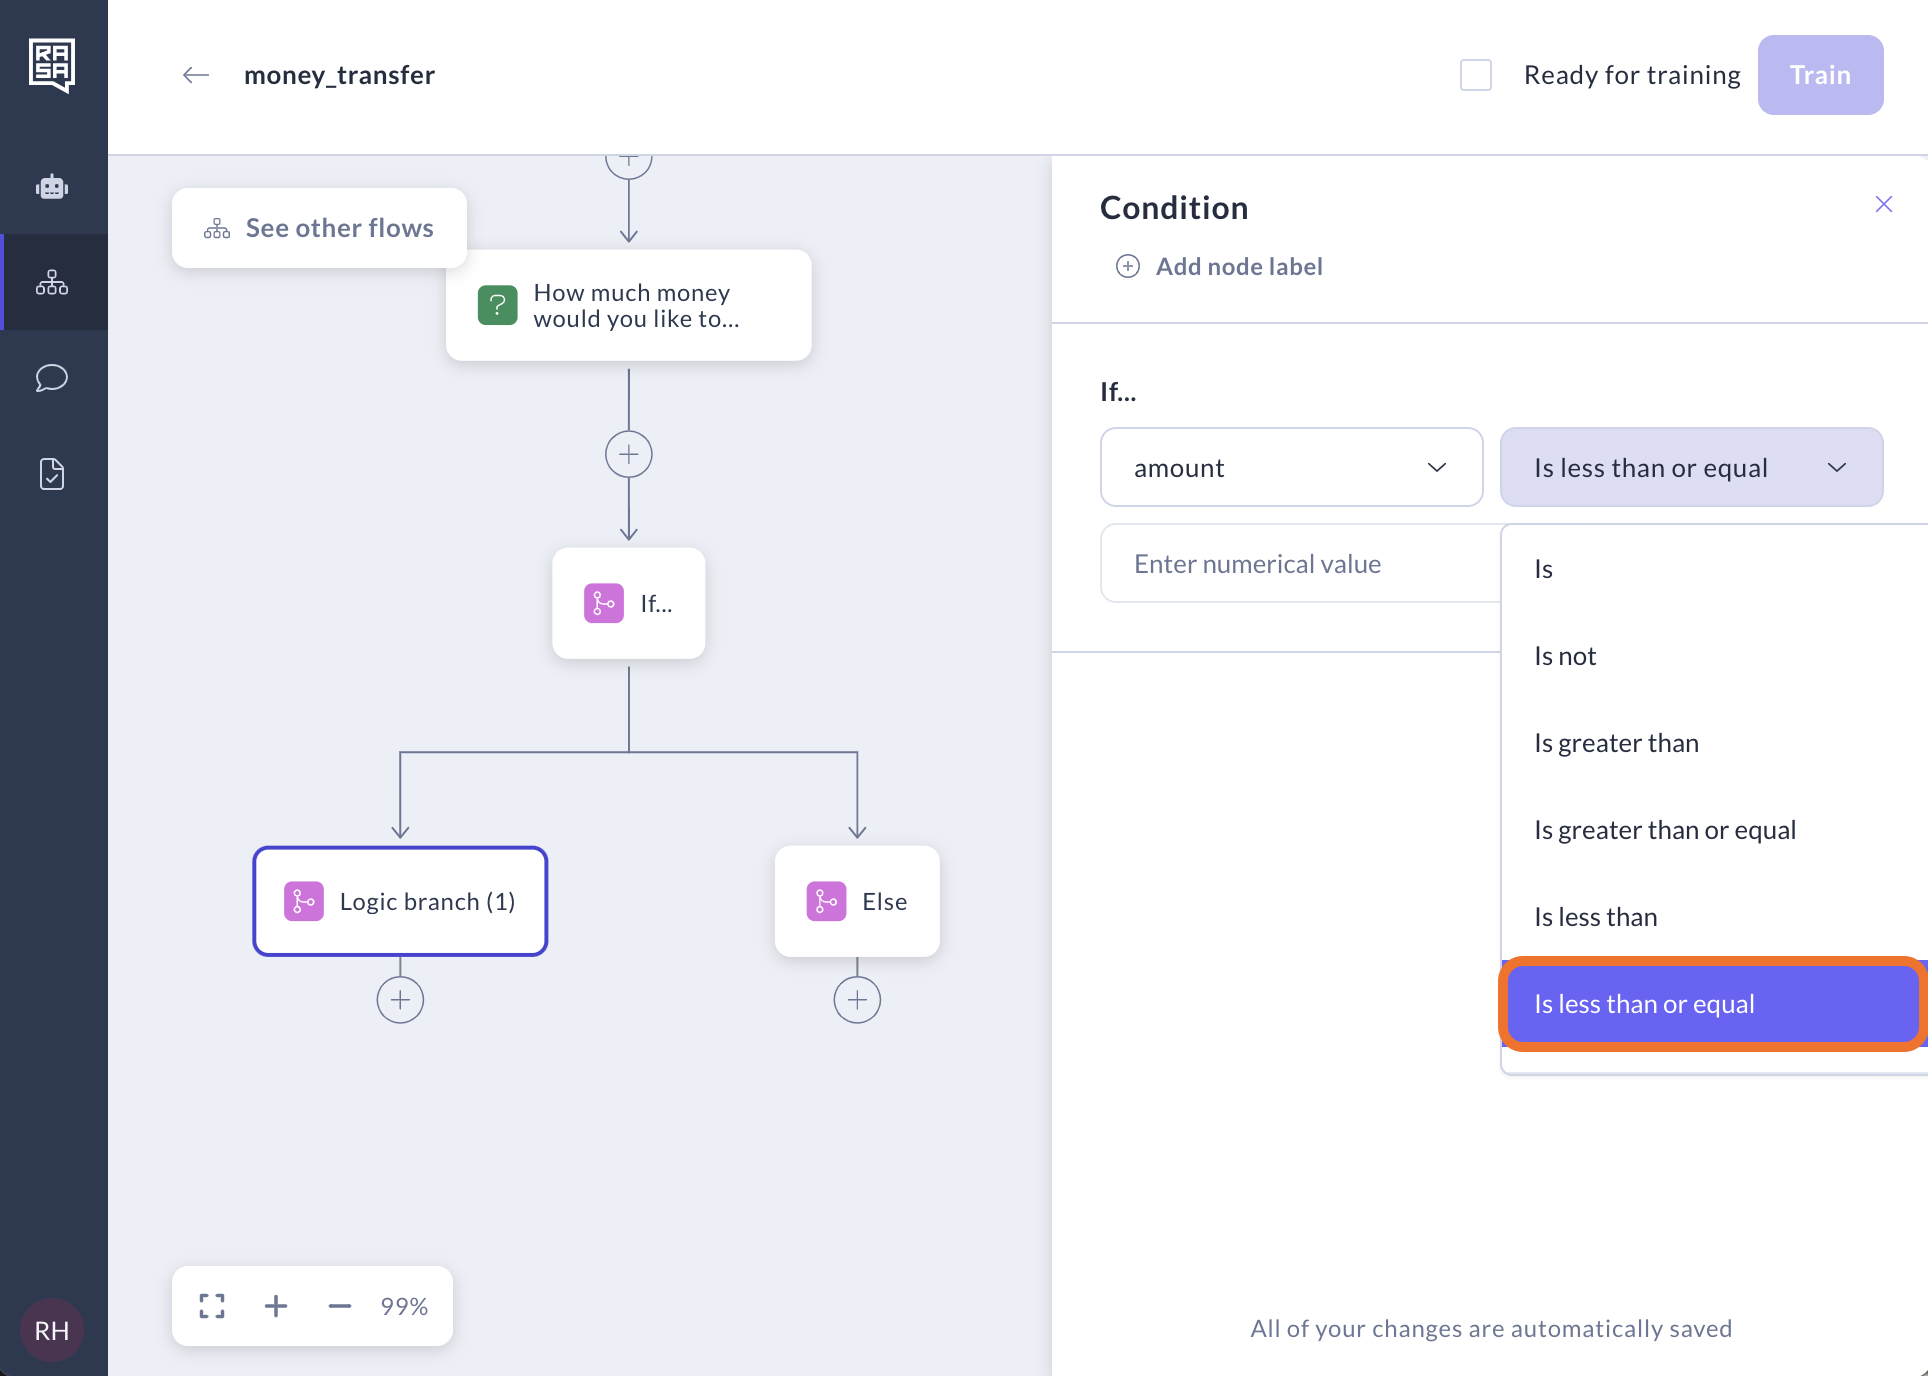
Select an operator. Studio supports the following operators:
and: Combines two conditions with logical ANDor: Combines two conditions with logical OR>: Greater than>=: Greater than or equal to<: Less than<=: Less than or equal to=: Equal to!=: Not equal tois: Checks for identityis not: Checks for non-identitycontains: Checks if a value is contained within another valuematches: Uses regular expressions to match stringsnotmaches: Uses regular expressions to negate stringsis set: Checks if the slot has been assigned a valueis empty: Checks if the slot hasn't been assigned a value
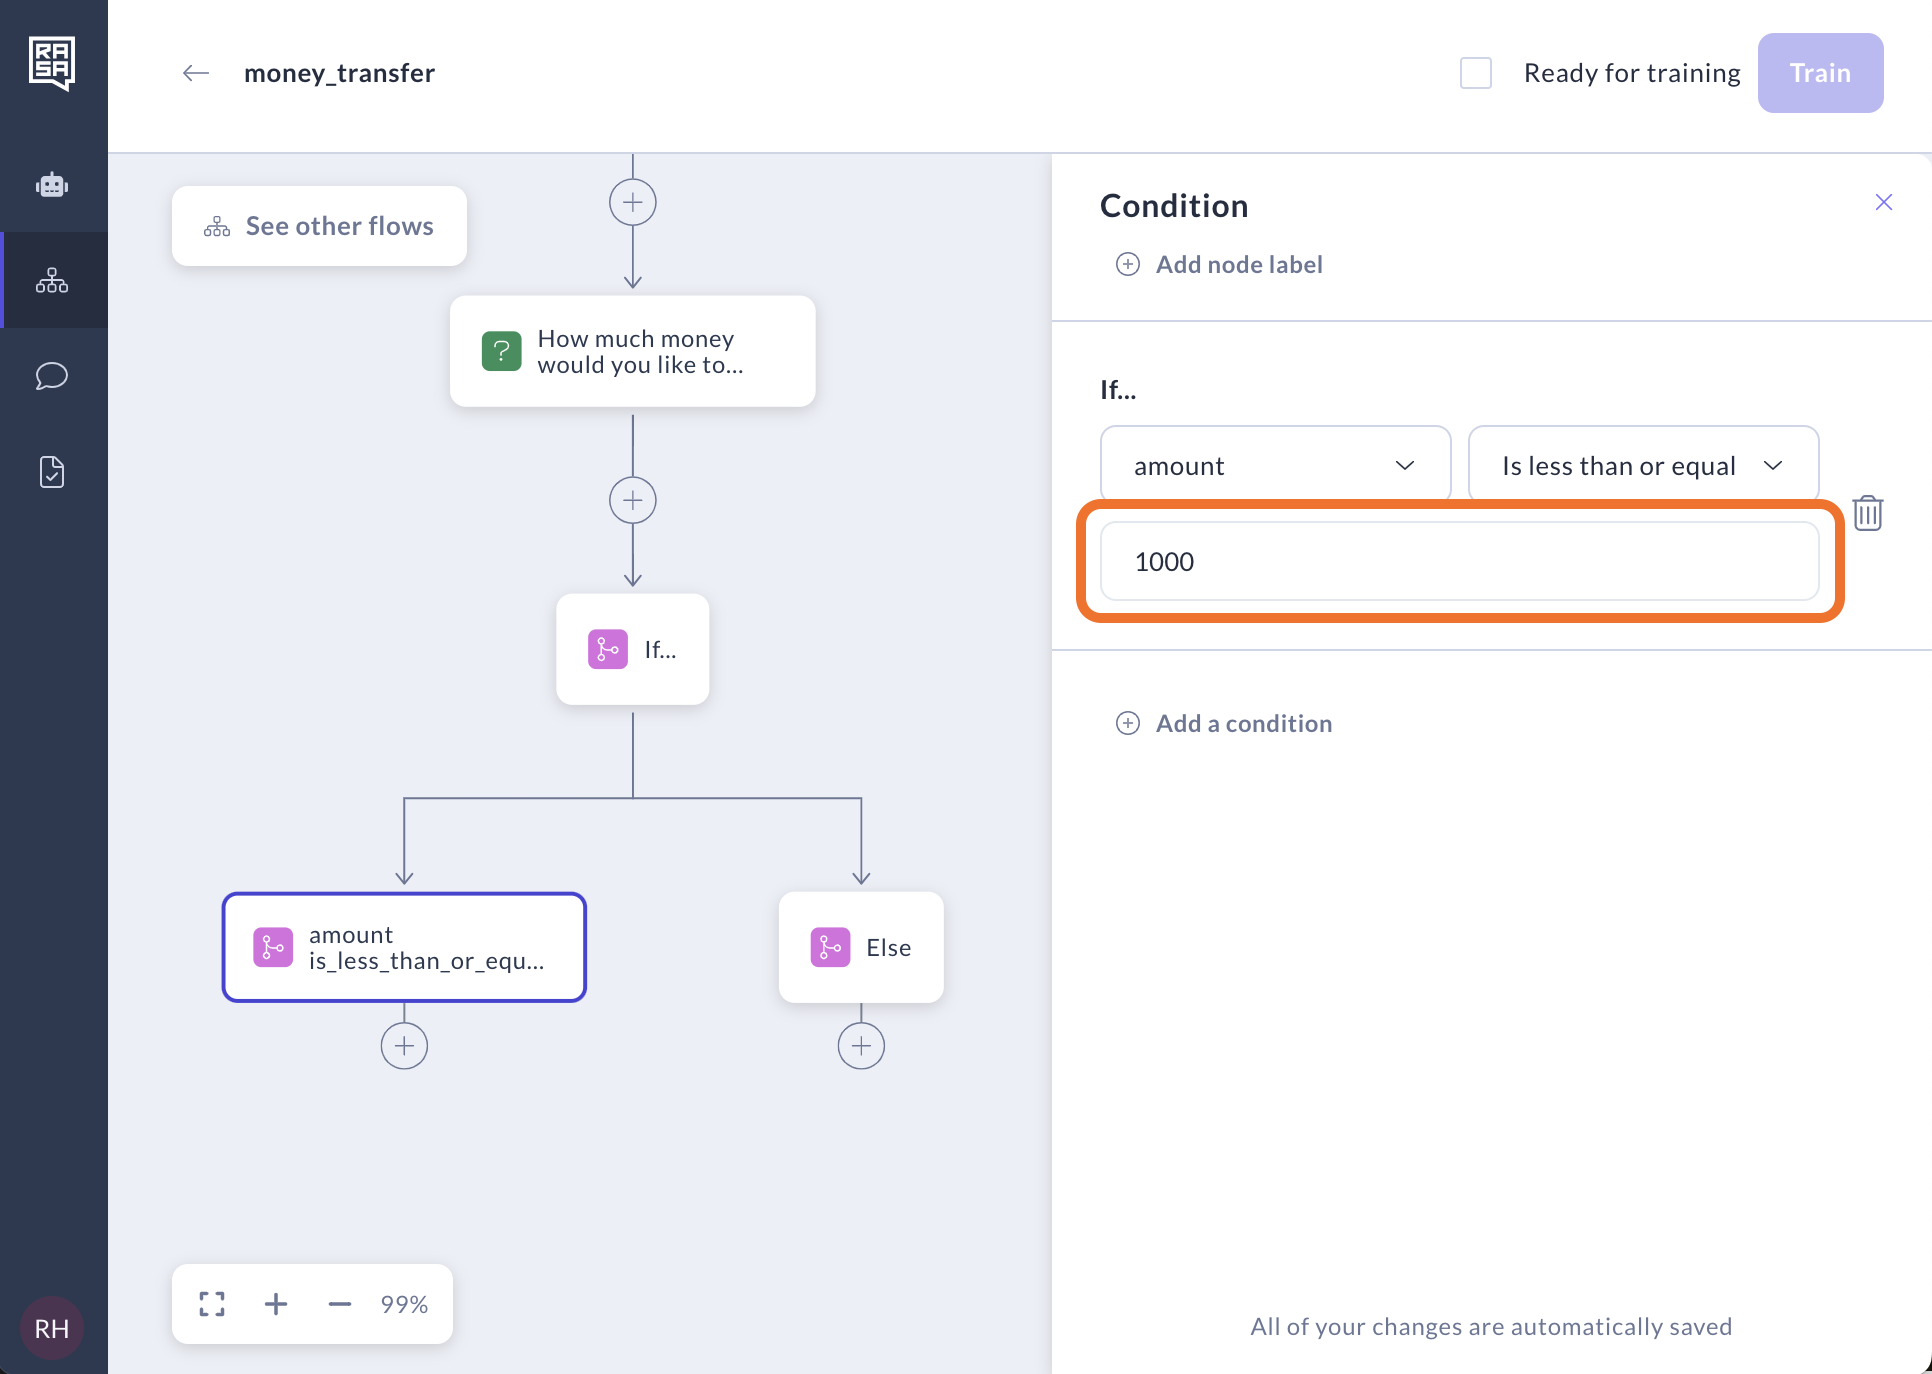
Enter the value
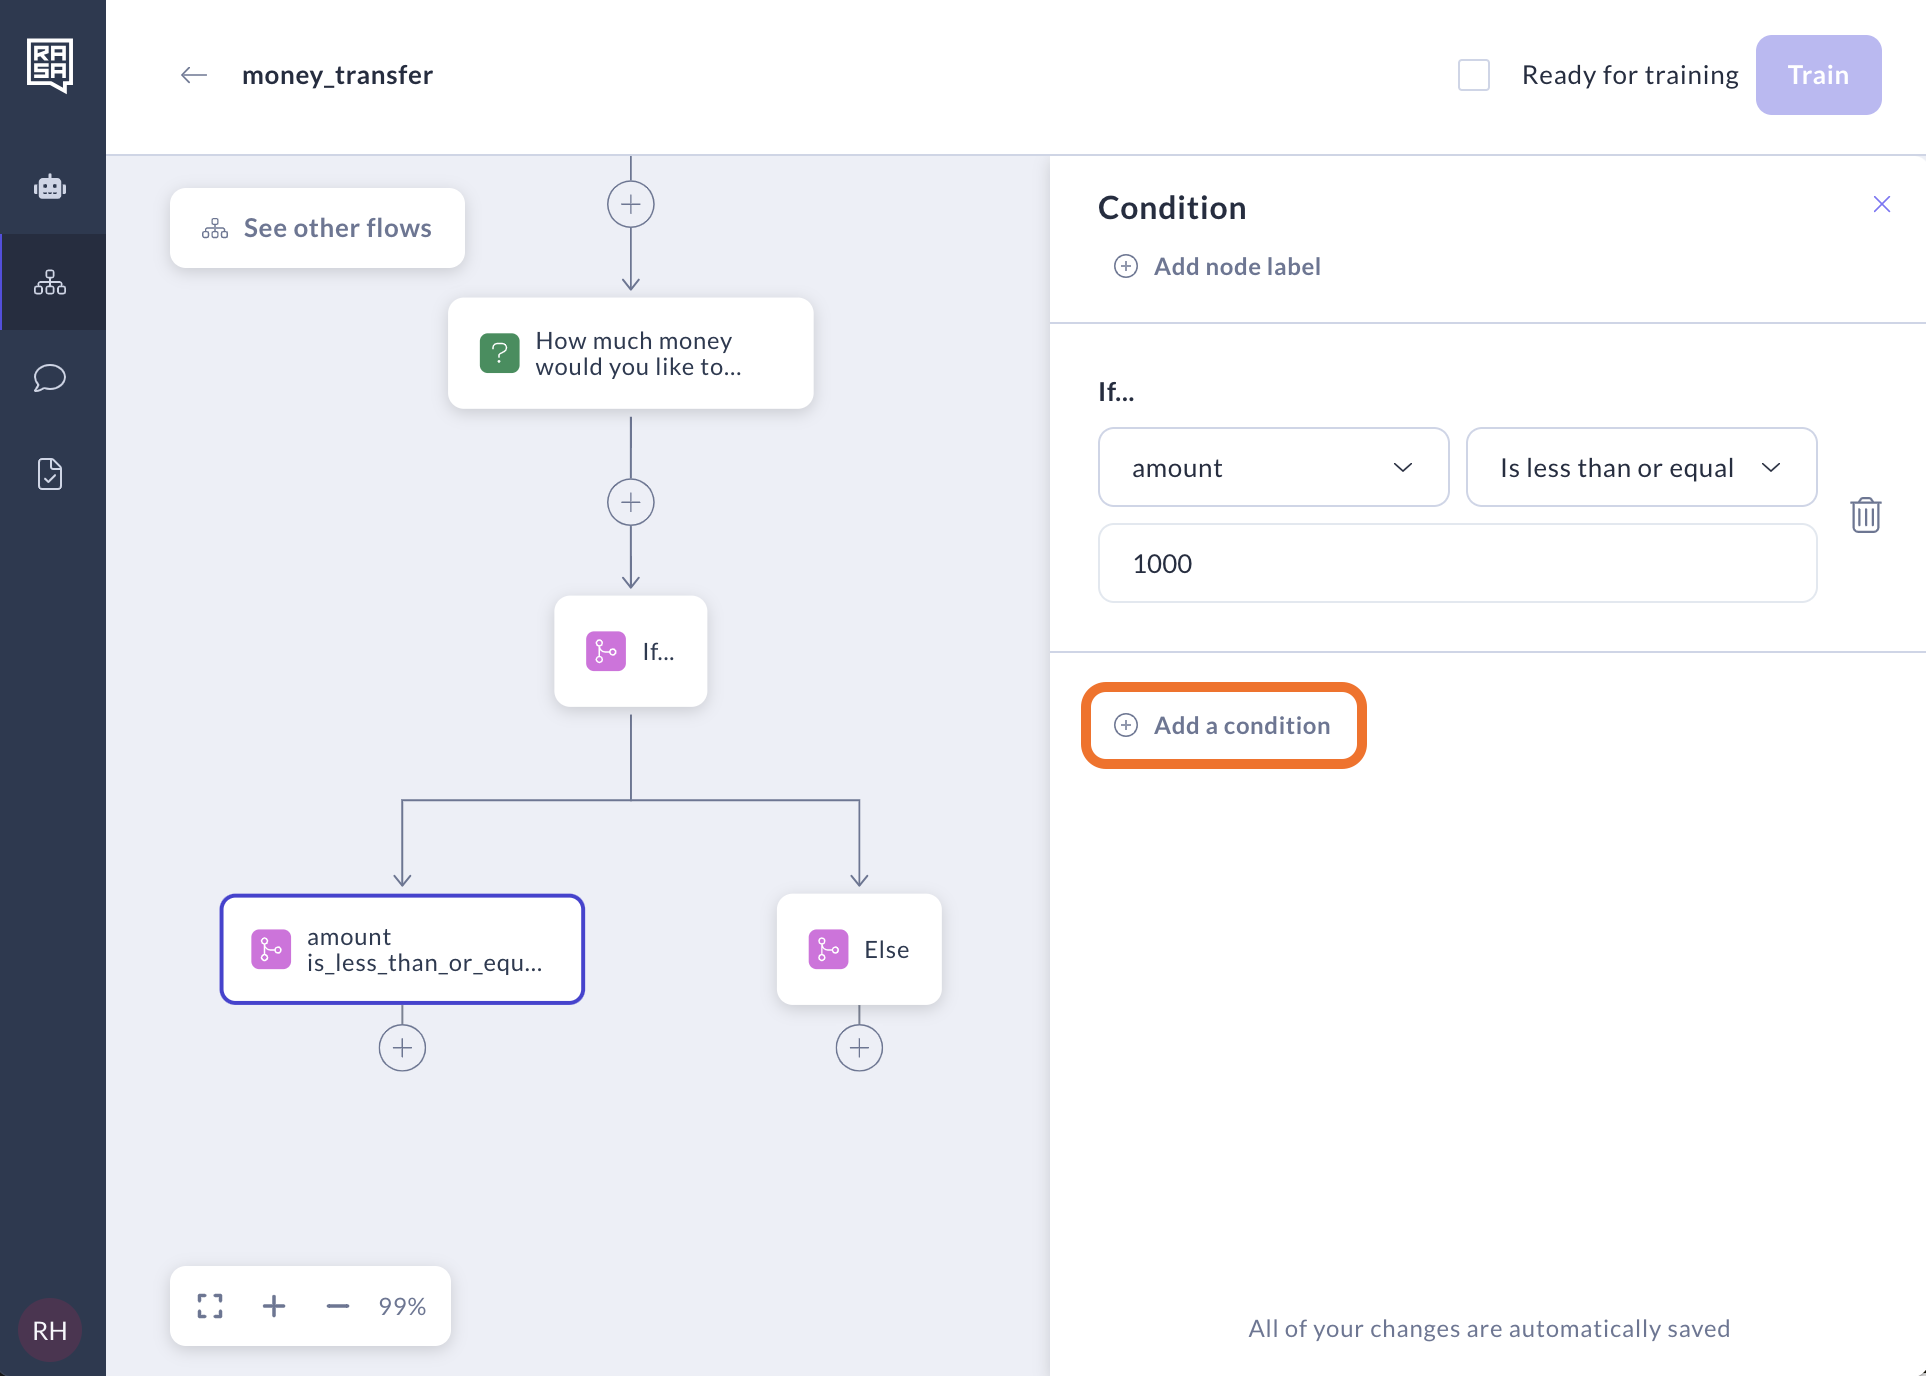
If you want to add more conditions into this branch, click "Add condition". The relationships between the condition is "And" meaning all the conditions need to be met for this branch to move forward.
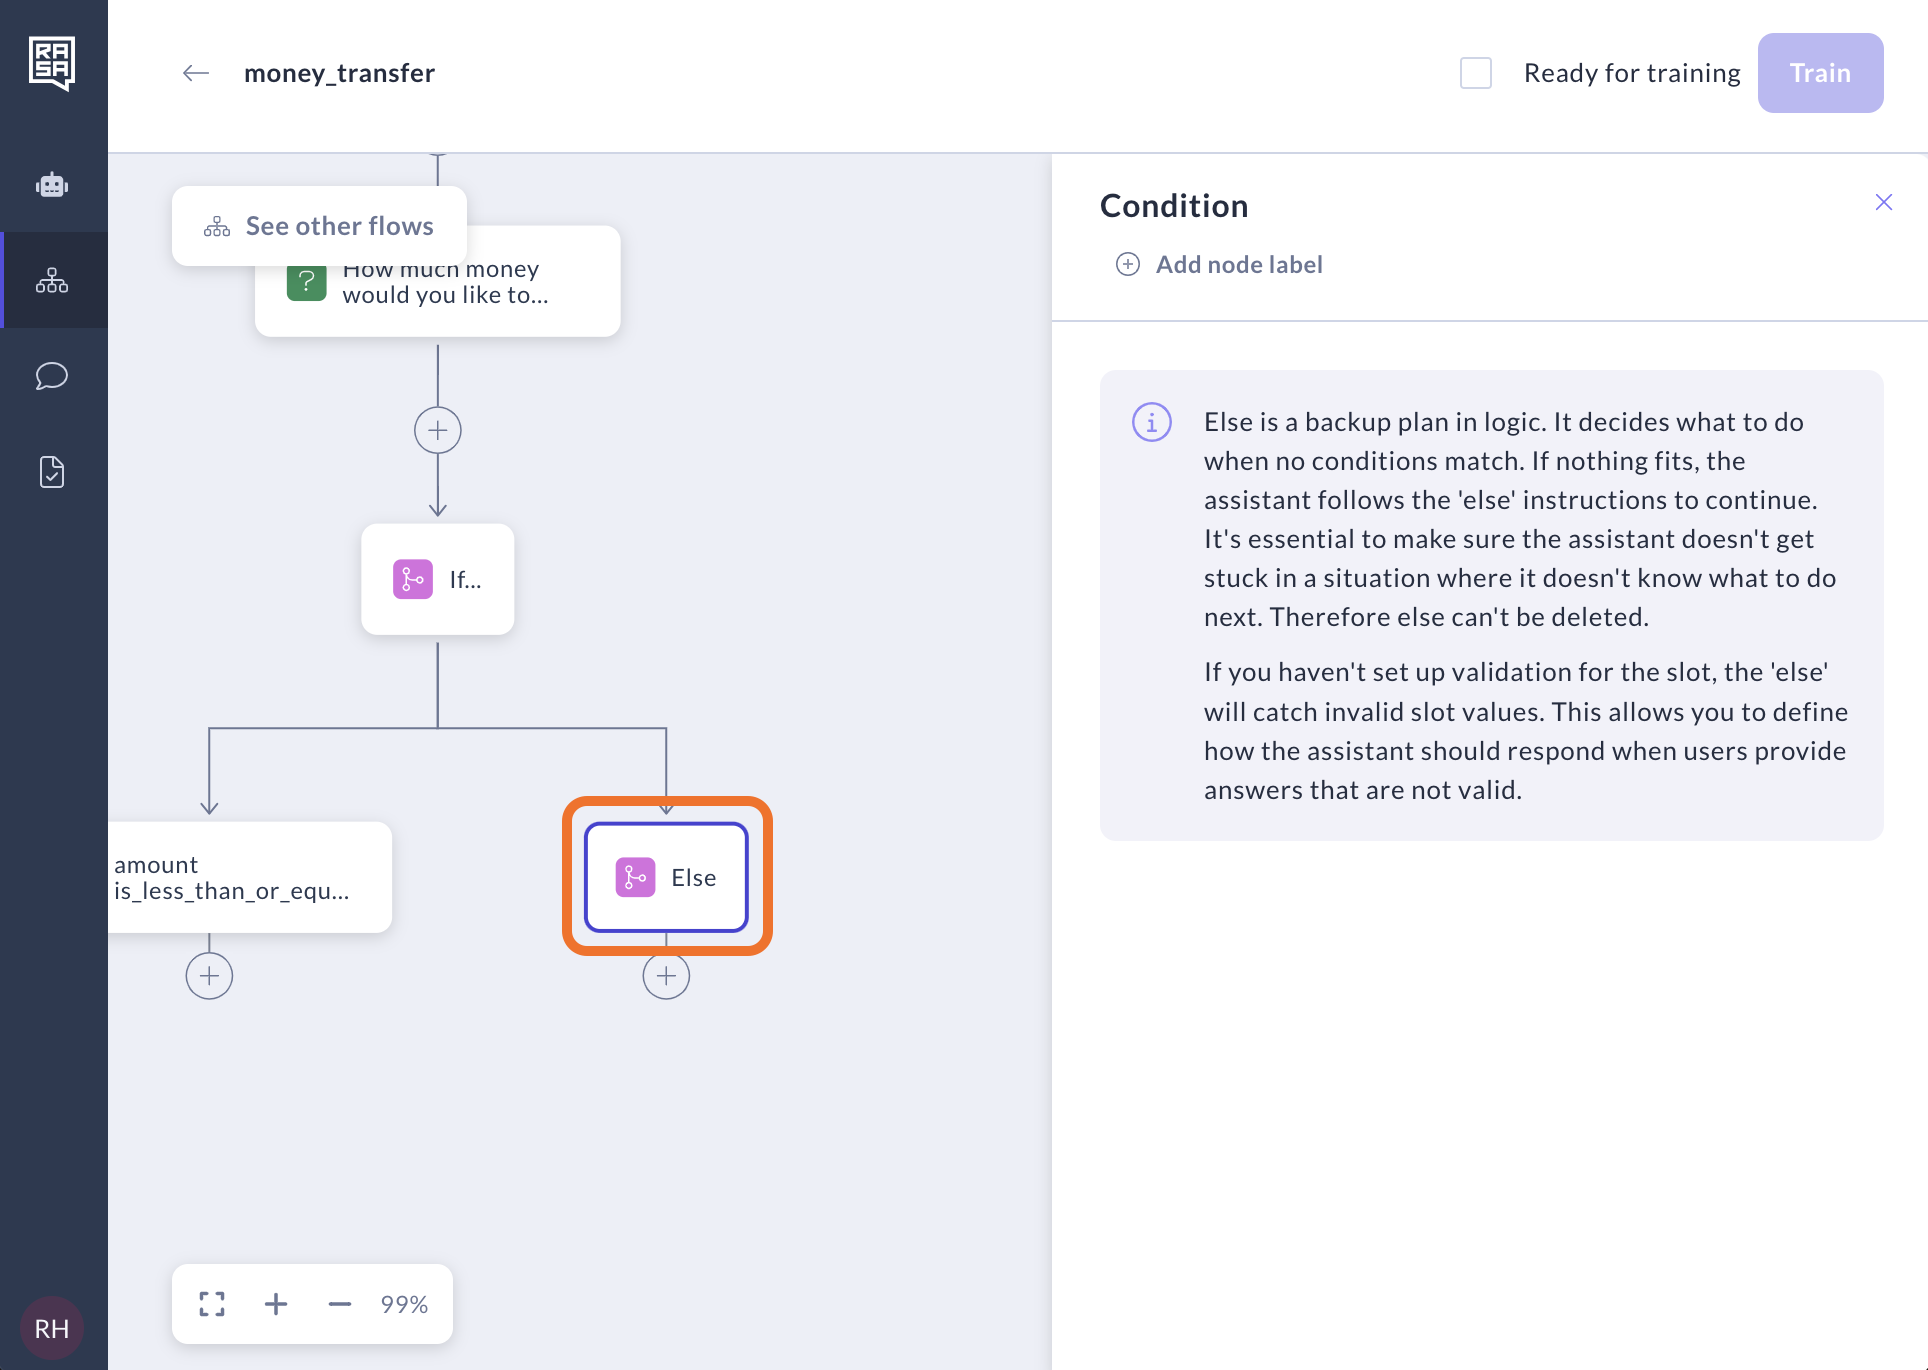
Else
"Else" is the last logic branch and serves as a backup plan in logic. You don’t need to create any conditions for it but you also can’t delete it. It’s there to make sure the assistant always knows what to do even when no condition that you created for this scenarios matches with what happens in the current dialog.
A next step for "Else" is highly dependent on your use case but it could be a human handoff flow or a generic answer to reply to a user’s answer.
Delete conditions
To delete conditions inside Logic step:
Click the delete icon next to the condition you want to delete. You can delete all but one.
Confirm the deletion.
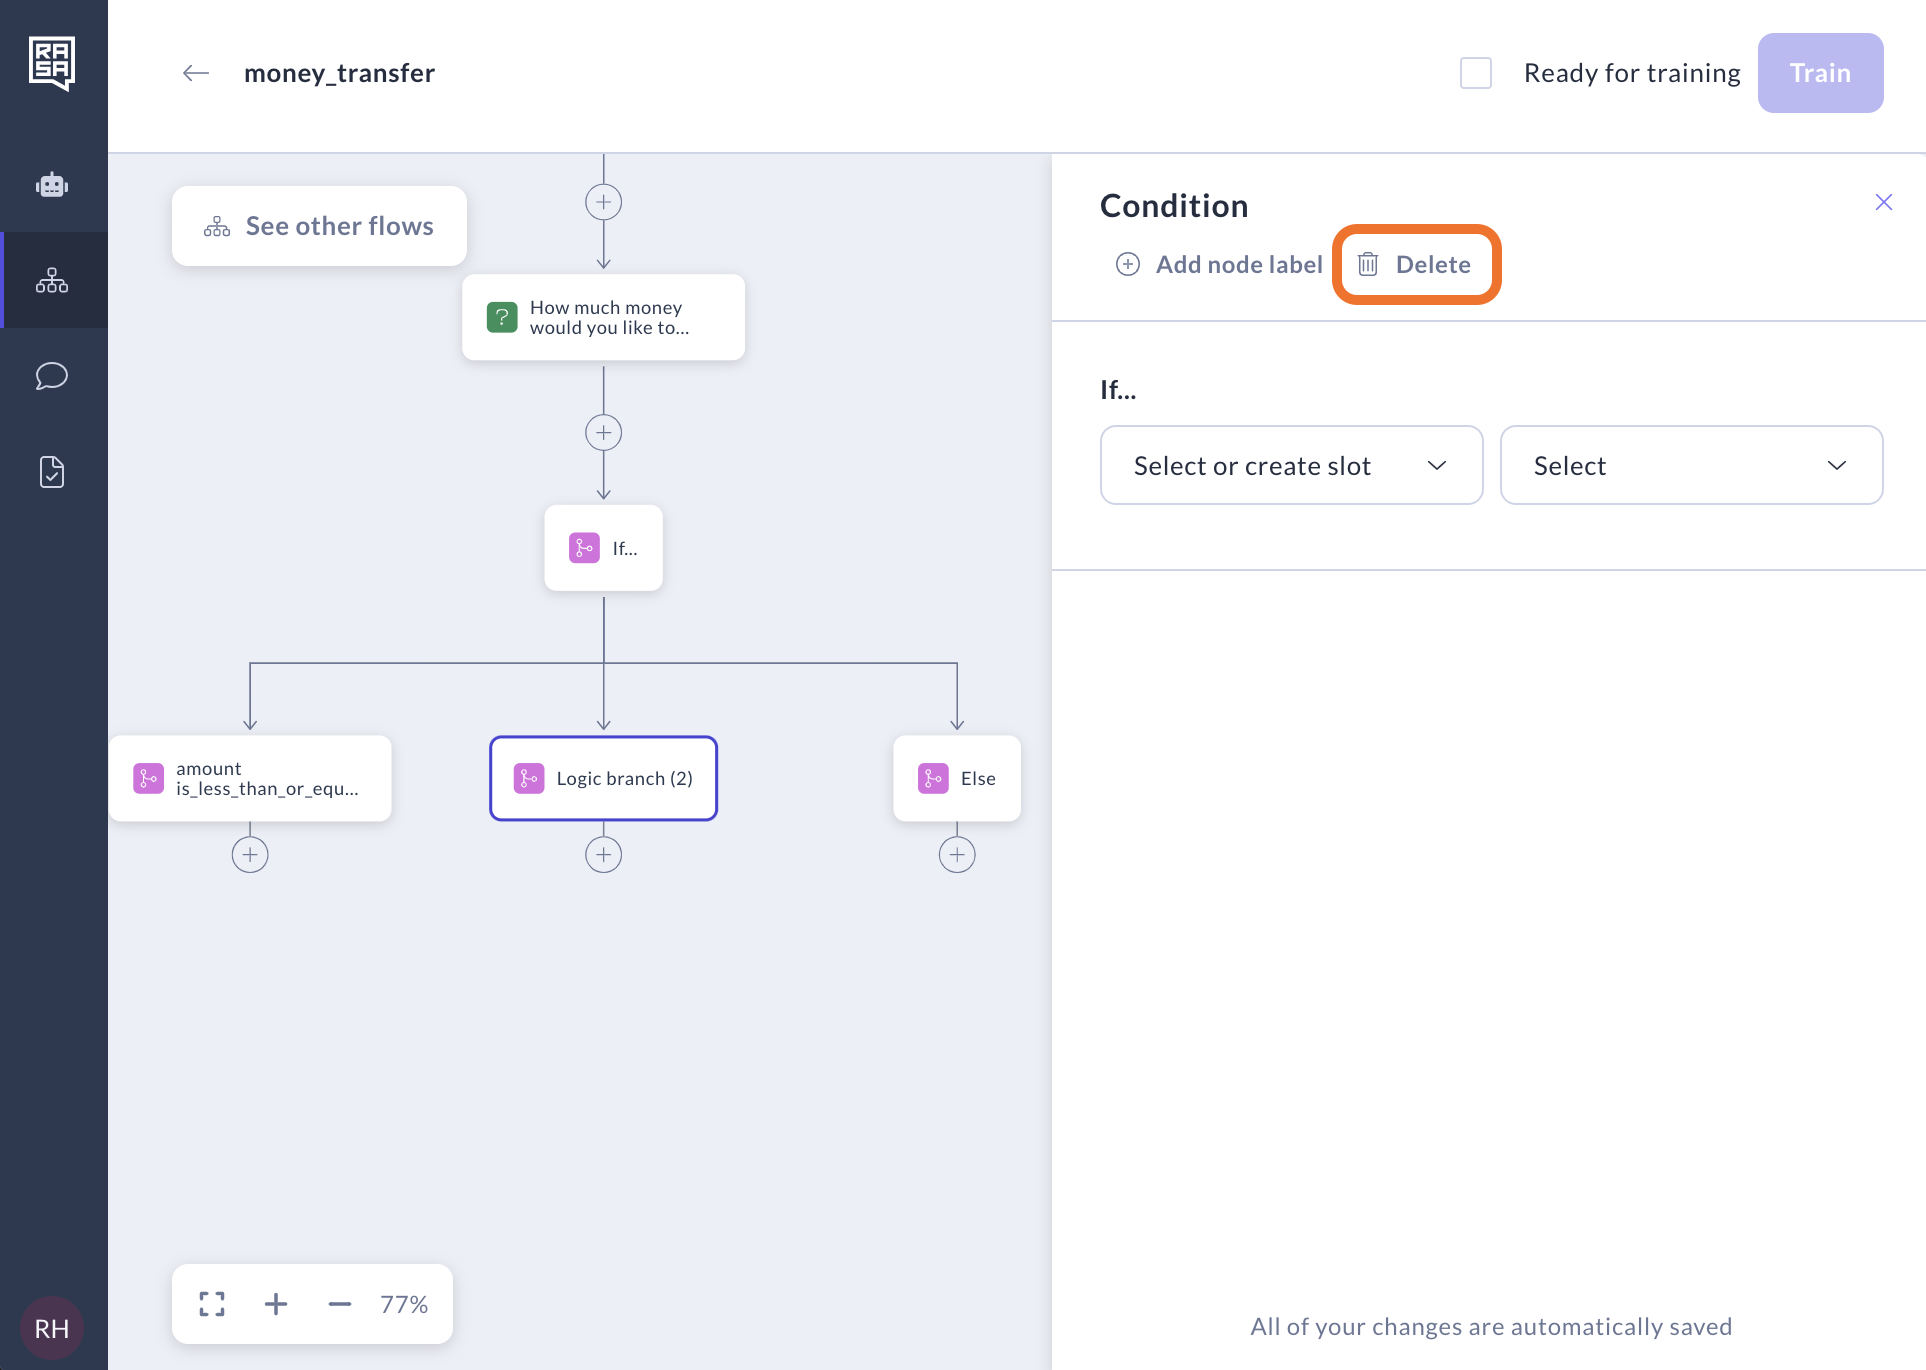
Delete logic branches
To delete a logic branch, select it and click the Delete button. You can delete all branches but one.
Warning: All steps subsequent to this condition will also be deleted. Therefore, we advise you to edit the condition or add new steps before the logic step. Only consider deleting a condition as a last resort.
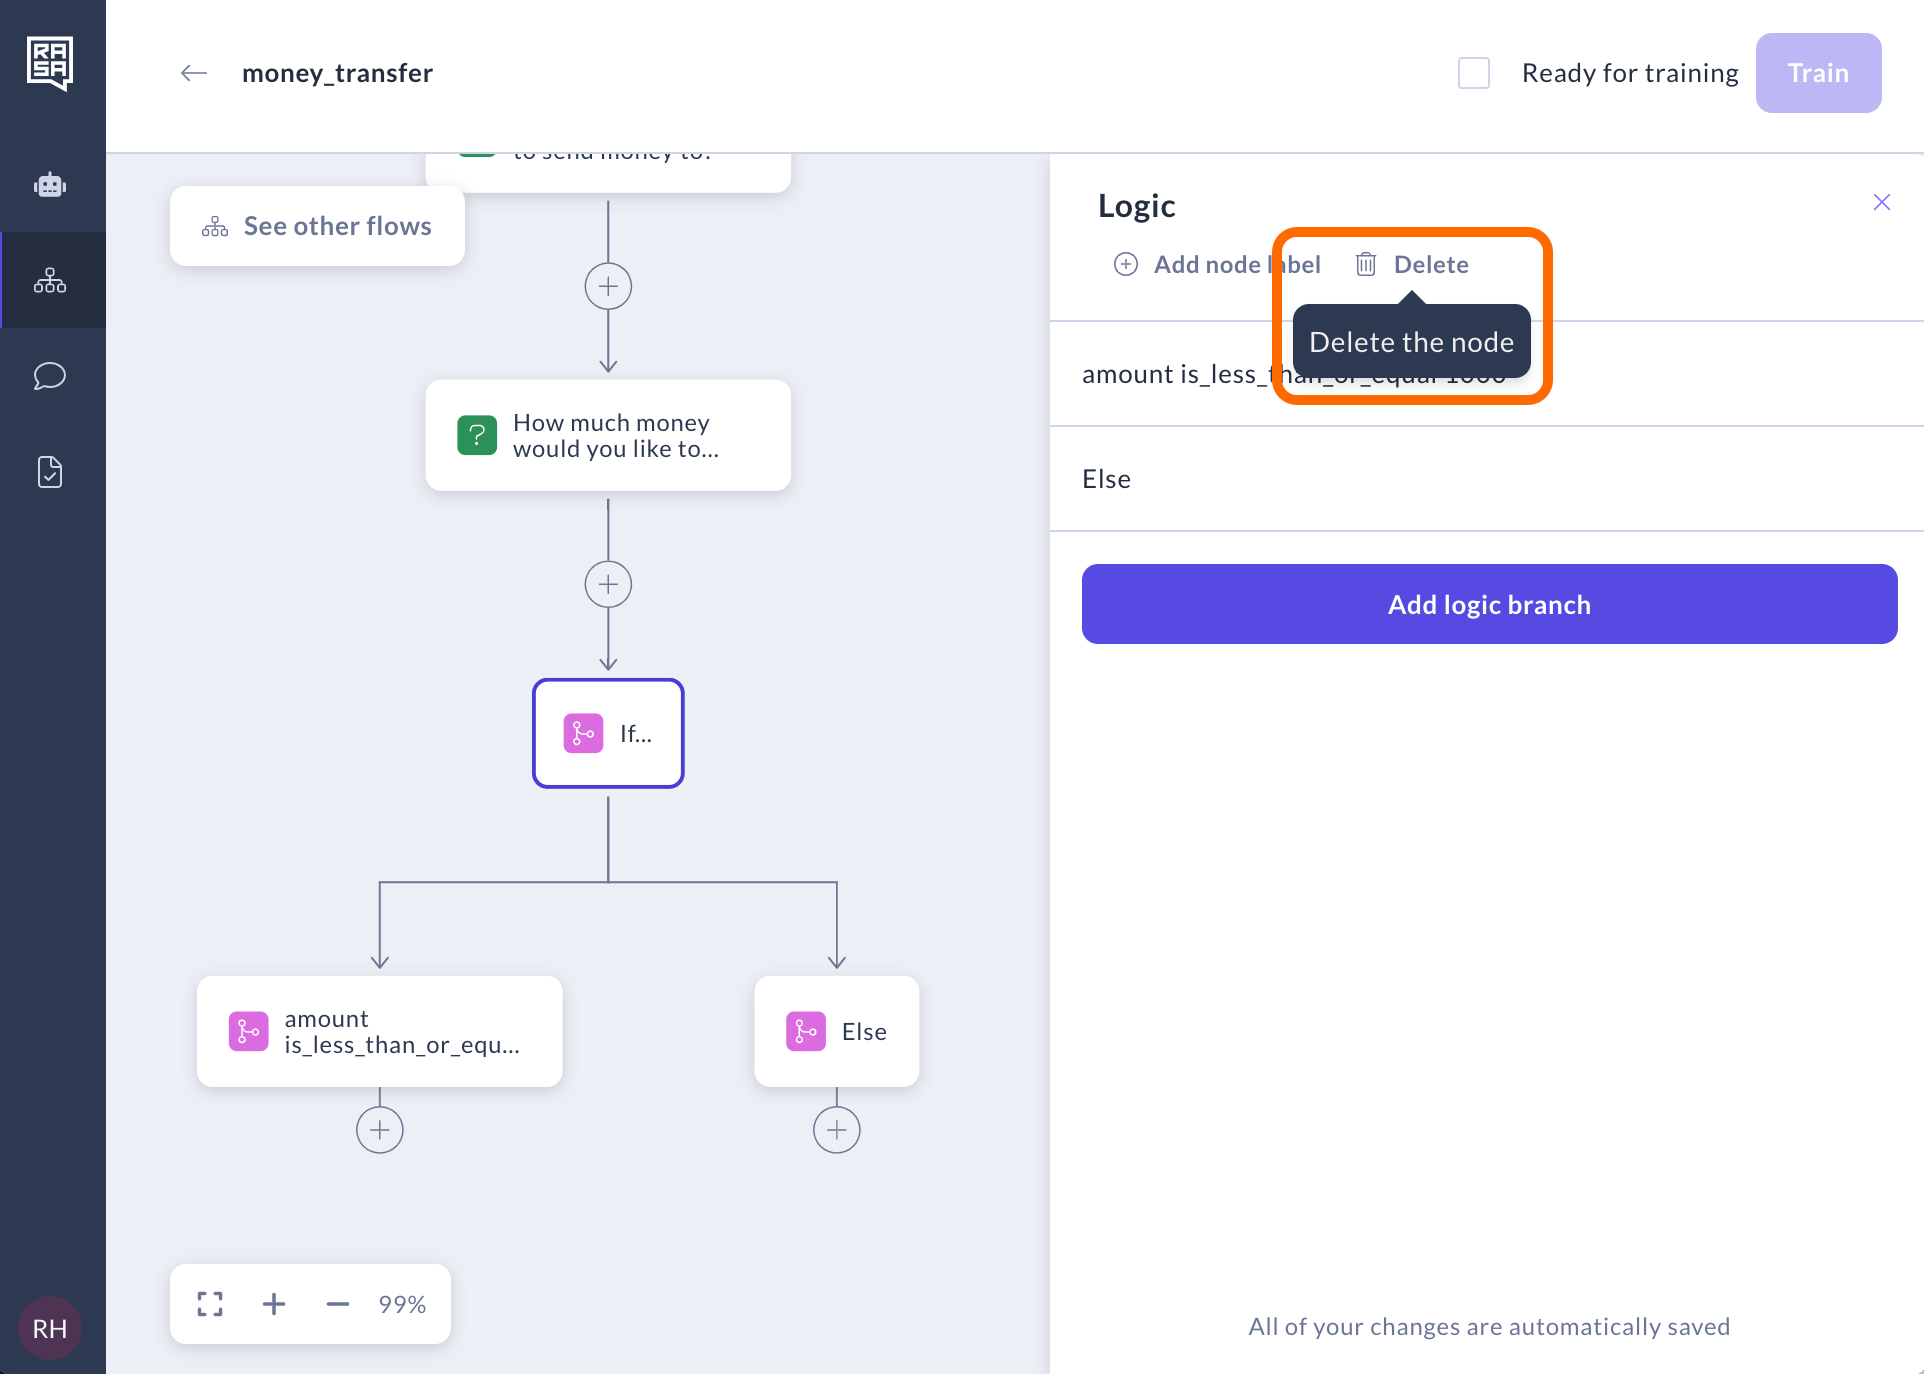
Delete Logic step
You can delete the entire Logic step the same way you delete any other step—by clicking on the Delete icon. However, a warning will appear notifying you that all conditions and subsequent steps will also be deleted, and you will need to confirm your decision to delete everything.
Note: Deleting the entire Logic step can have significant repercussions. We advise you to consider updating the existing logic and conditions or adding new steps before the logic step instead of deleting it.